How to install WSL and Microsoft Visual Studio Code

Step 1
The First step is to go and visit the official Microsoft Visual Studio wesbite and install the latest Visual Studio code. Since this is for Windows, the standard Windows version x64 was selected. Click on the link and let it download. Once it has downloaded, click on the .exe file to begin Installation.

Step 2
This is what the start of the installation will look like. Accept all terms and conditions.

Step 3
Select a place to install in your PC.

Step 4
Make sure the bottom two checkboxes are selected.

Step 5
Microsoft Visual Studio Code will begin to Install.

Step 6
Once Installed Click Finish.

Step 7
When VSC (Visual Studio Code) opens, this is what the home interface will be.
NOTE: the theme might differ.

Step 8
Now Navigate to the Microsoft Store

Step 9
In the search bar, type in UBUNTU and hit enter. You will see a list of different UBUNTU softwares to download

Step 10
Choose the Latest one. In this case Ubuntu 22.04.2 LTS

Step 11
Hit Get and let it install

Step 12
Once Installed Click Open.

Step 13
When you first open it, you may encounter this error, where it says that "The Windows Subsystem for Linux has not been enabled" This is normal. The following steps show how to resolve it.

Step 14
Press the Windows key and search "Turn Windows Features on or off." Click on the first result and it should take you to this window.

Step 15
In this window, check the following Boxes: "Virtual Machine Platform", "Windows HyperVisor Platform" and "Windows Subsystem for Linux". Please note this was done on a PC running an Intel Processor. This may look different for those running an AMD processor. Never the less, make sure that the virtual machine and windows subsystem for linux is checked. Once all selected, hit ok.

Step 16
It will start to install.

Step 17
Once Installed it will ask to restart. Make sure if any work is being done that it is saved. Then click "Restart Now".

Step 18
Once Rebooted, go back into Ubuntu. This time the message should be different and it will say that it is installing. This will take several minutes so DO NOT close the window or shut off your PC

Step 19
Once it is Installed it will ask you to create a UNIX Username. It is case sensitve as well so make it all lowercase

Step 20
Like this. Now it will ask you for a password. Now it is very important that you make it something you remember or else resetting it is a pain. It is a hidden Password, i.e when you type it in, you cant see what you typed. So make sure to make it as simple and easy to remember as possible.

Step 21
Like this. Now retype it.

Step 22
Give it a few minutes and you will be greeted by a Success message and a screen similar to this. This means installation was successful and we can move forward.

Step 23
Now to Install the C Compiler, known as gcc, run the following command:
sudo apt update && sudo apt install build-essential

Step 24
For any command using the sudo keyword, it will ask you for your password. Type it in and hit enter

Step 25
It will start installing and depending on your internet connection, it may take a while.

Step 26
It will ask you if you want to continue, type in "y" and hit enter and it will install the files and dependencies. Again, this may take time as it depends on your internet connection.

Step 27
As shown here.

Step 28
Once done, it will stop and have the prompt to add a command.

Step 29
type "clear" and press enter. This will clear the terminal. Then type "gcc --version and hit enter. It should show the version of gcc installed.

Step 30
Now exit out of Ubuntu and open VSC.

Step 31
To test this works, I created a file called test.c

Step 32
Then, click on the extensions tab on the left handside and search for C/C++ Extension Pack This should also show as a prompt in the bottom left hand corner of the last step.

Step 33
Install it.

Step 34
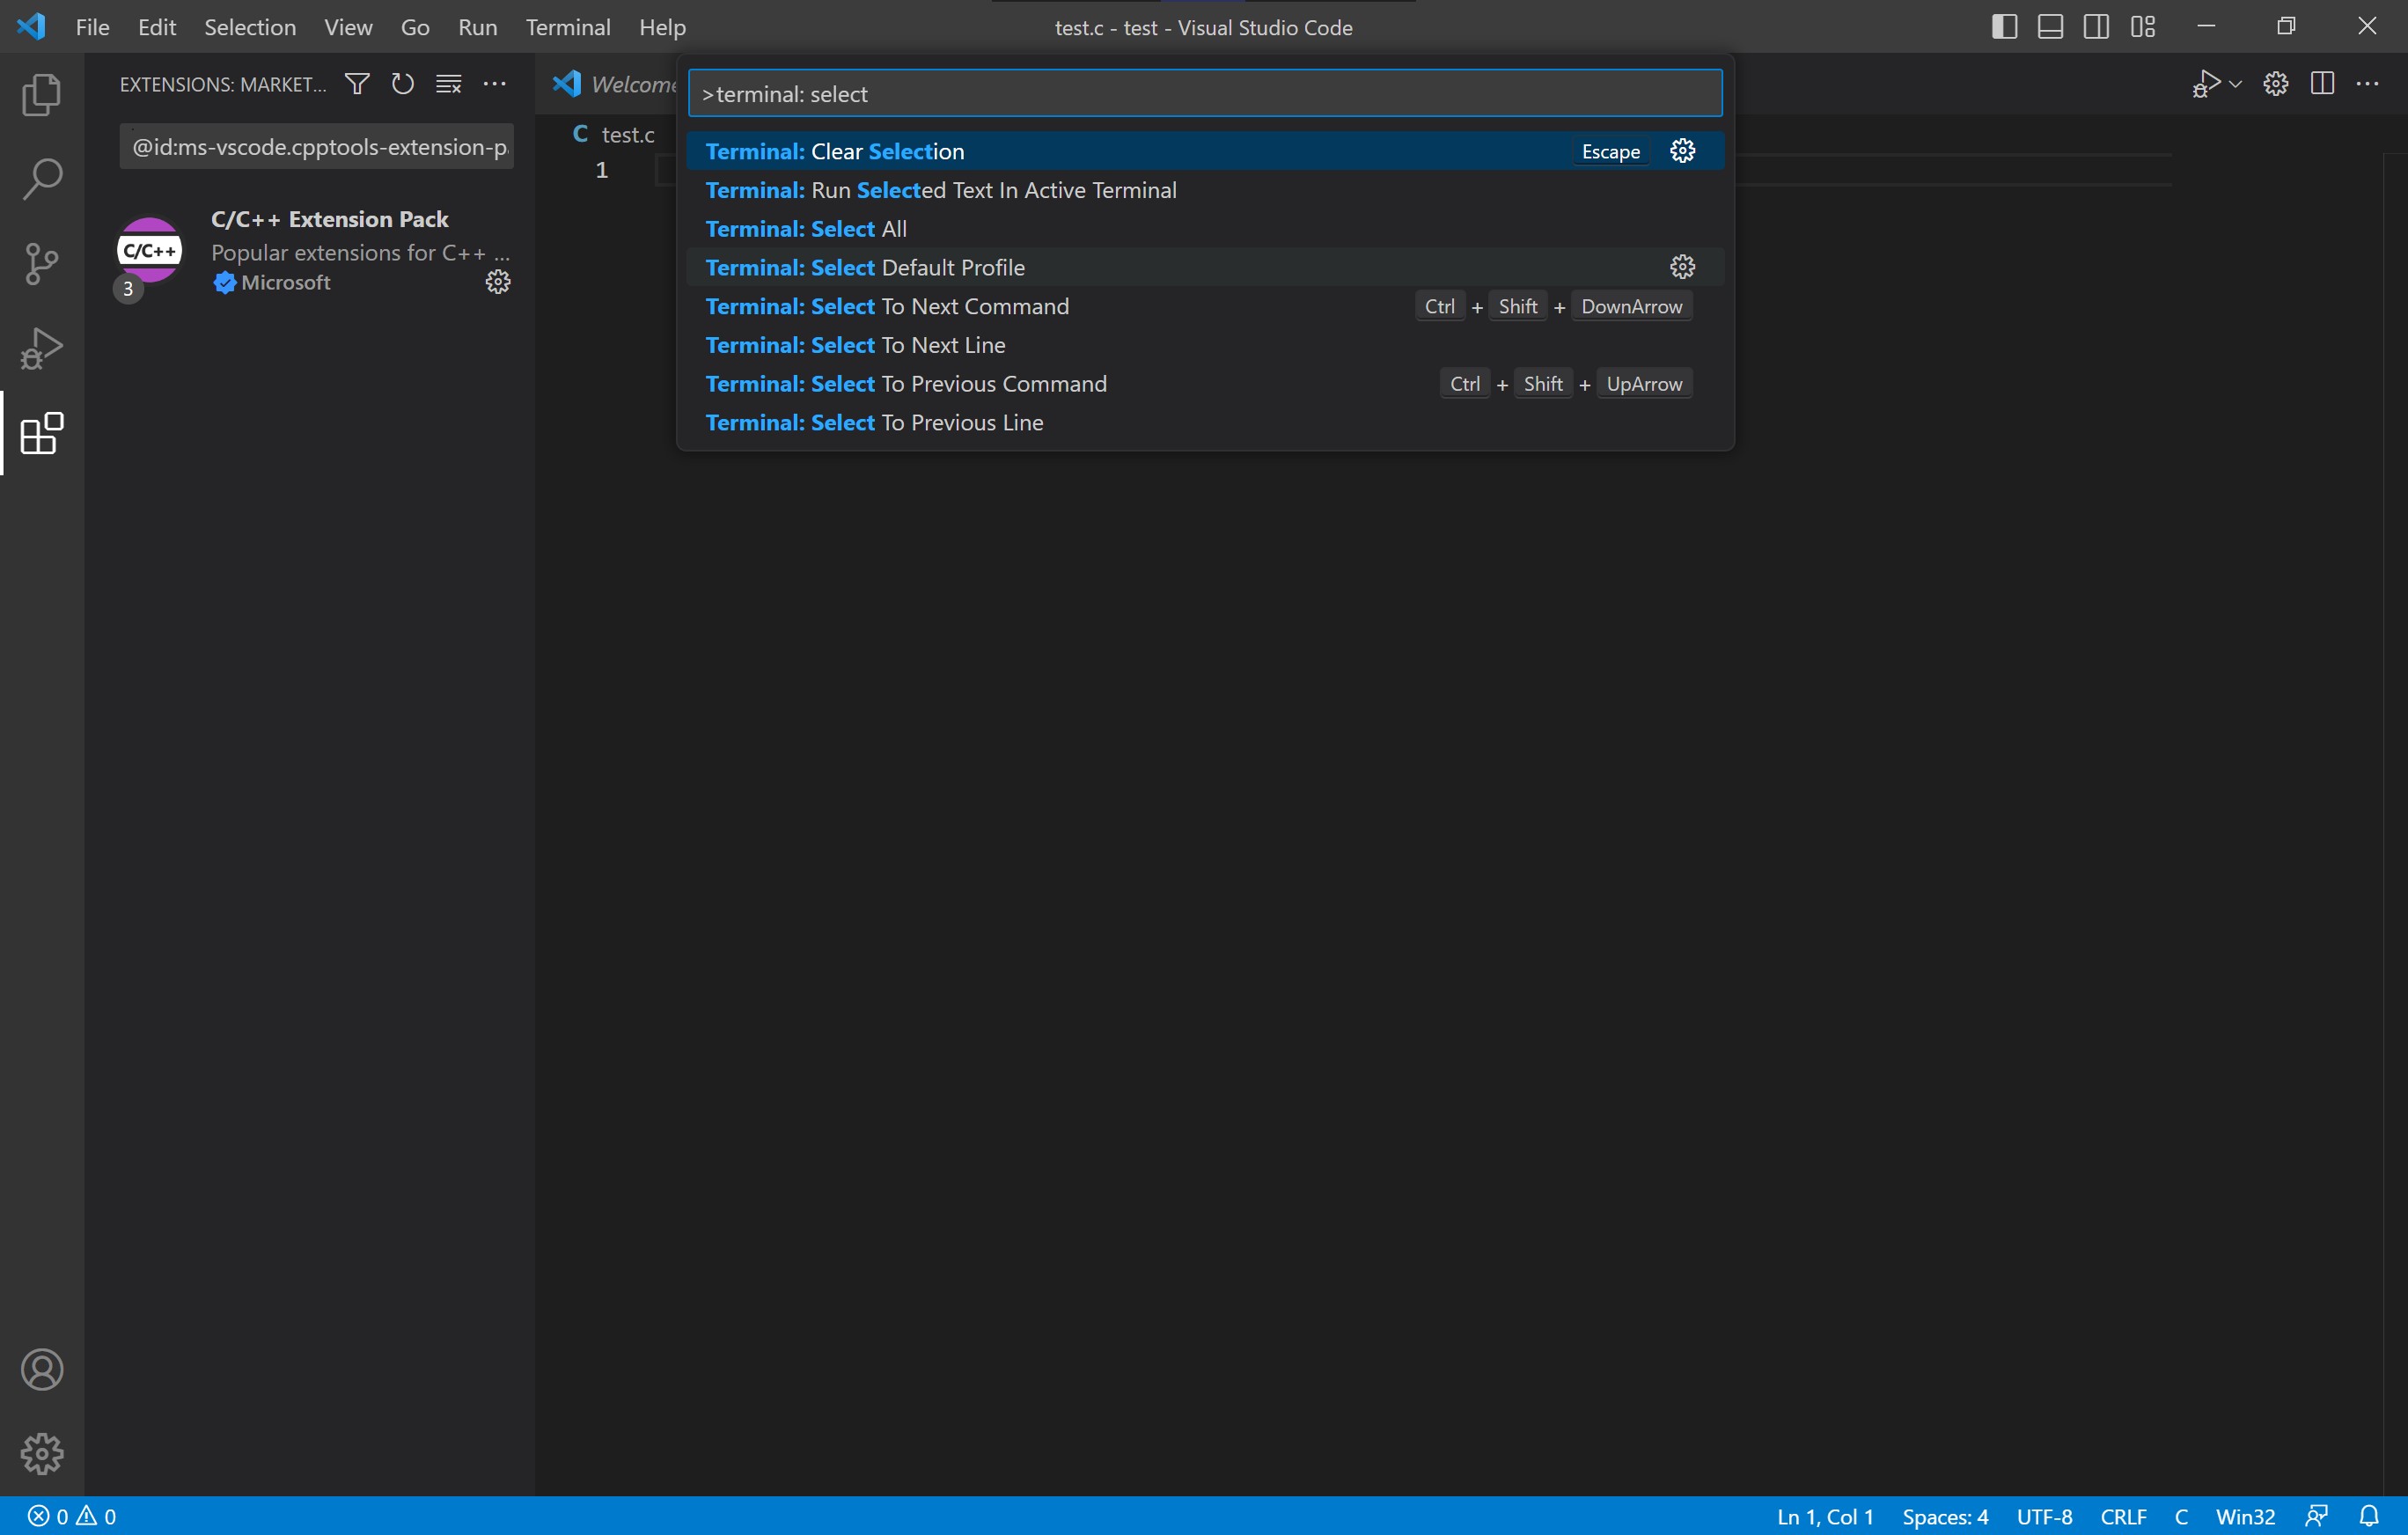
Now we will set WSL as our default terminal. Go to:
View > Command Pallete (Ctrl + Shift + P)
Step 35
In the Search box, type in:
Terminal: Select Default Profile
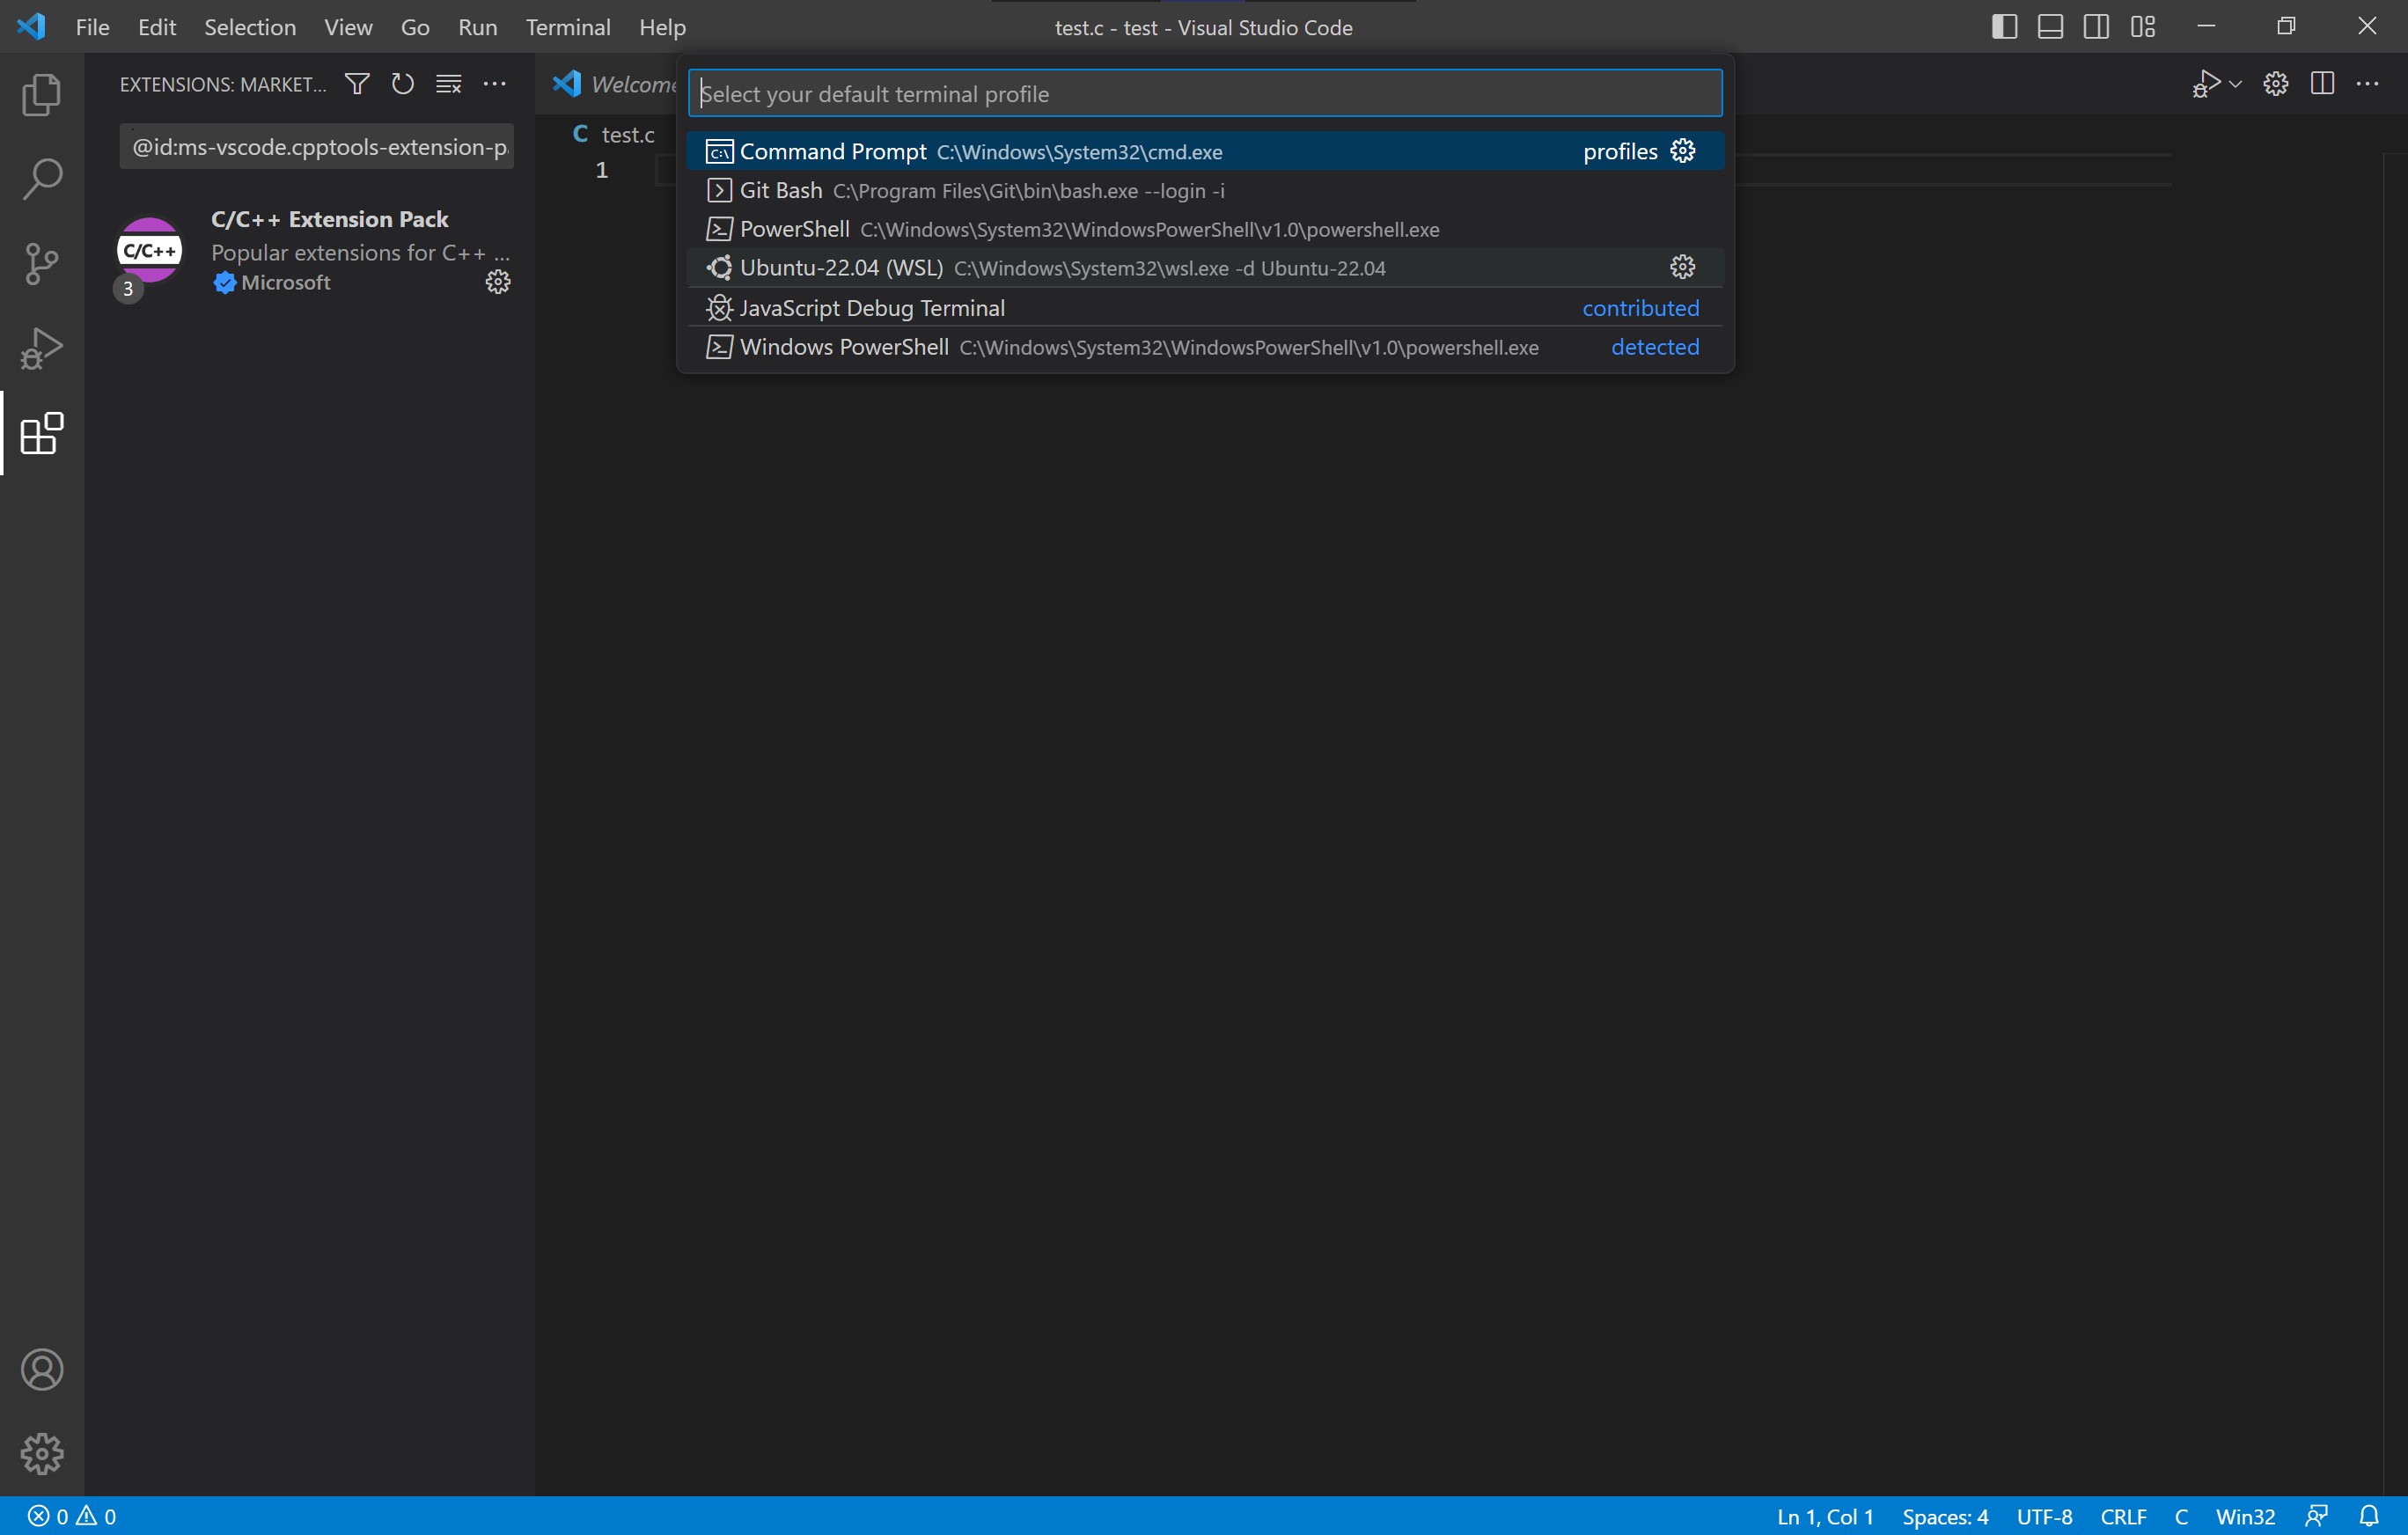
Step 36
VSC should automatically recognise Ubuntu. Click on it
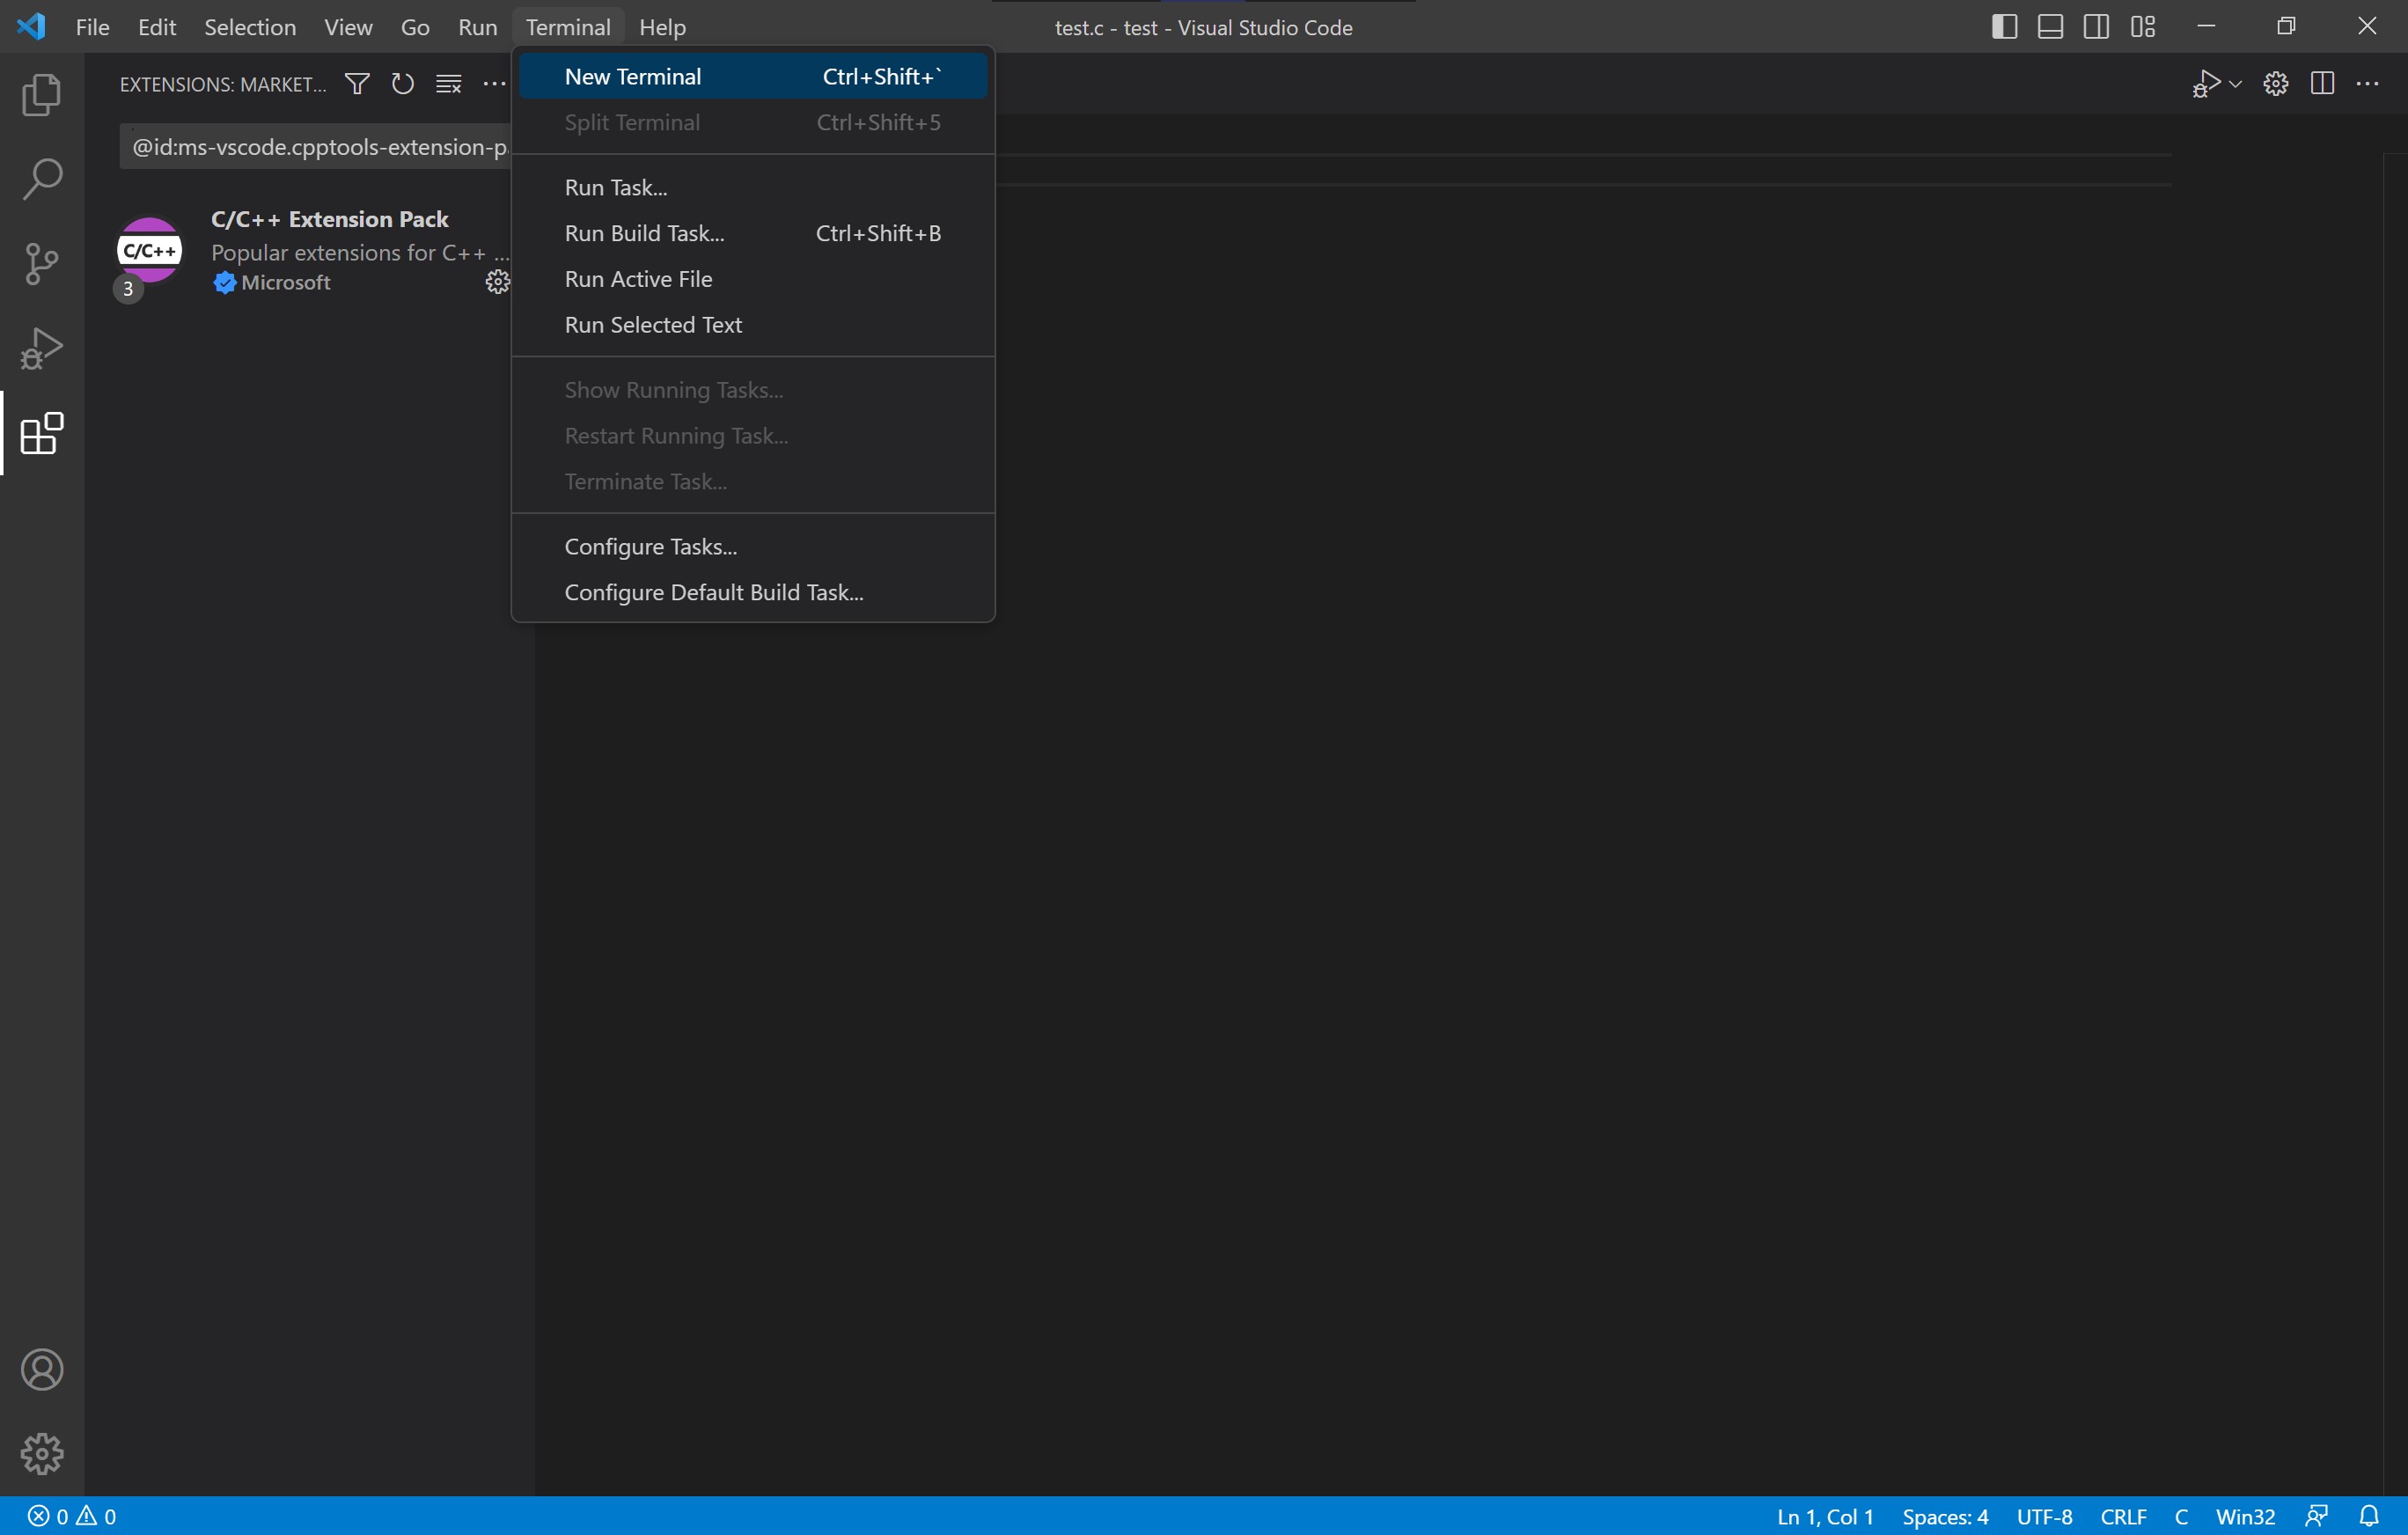
Step 37
To check that Ubuntu is our default terminal click on:
Terminal > New Terminal
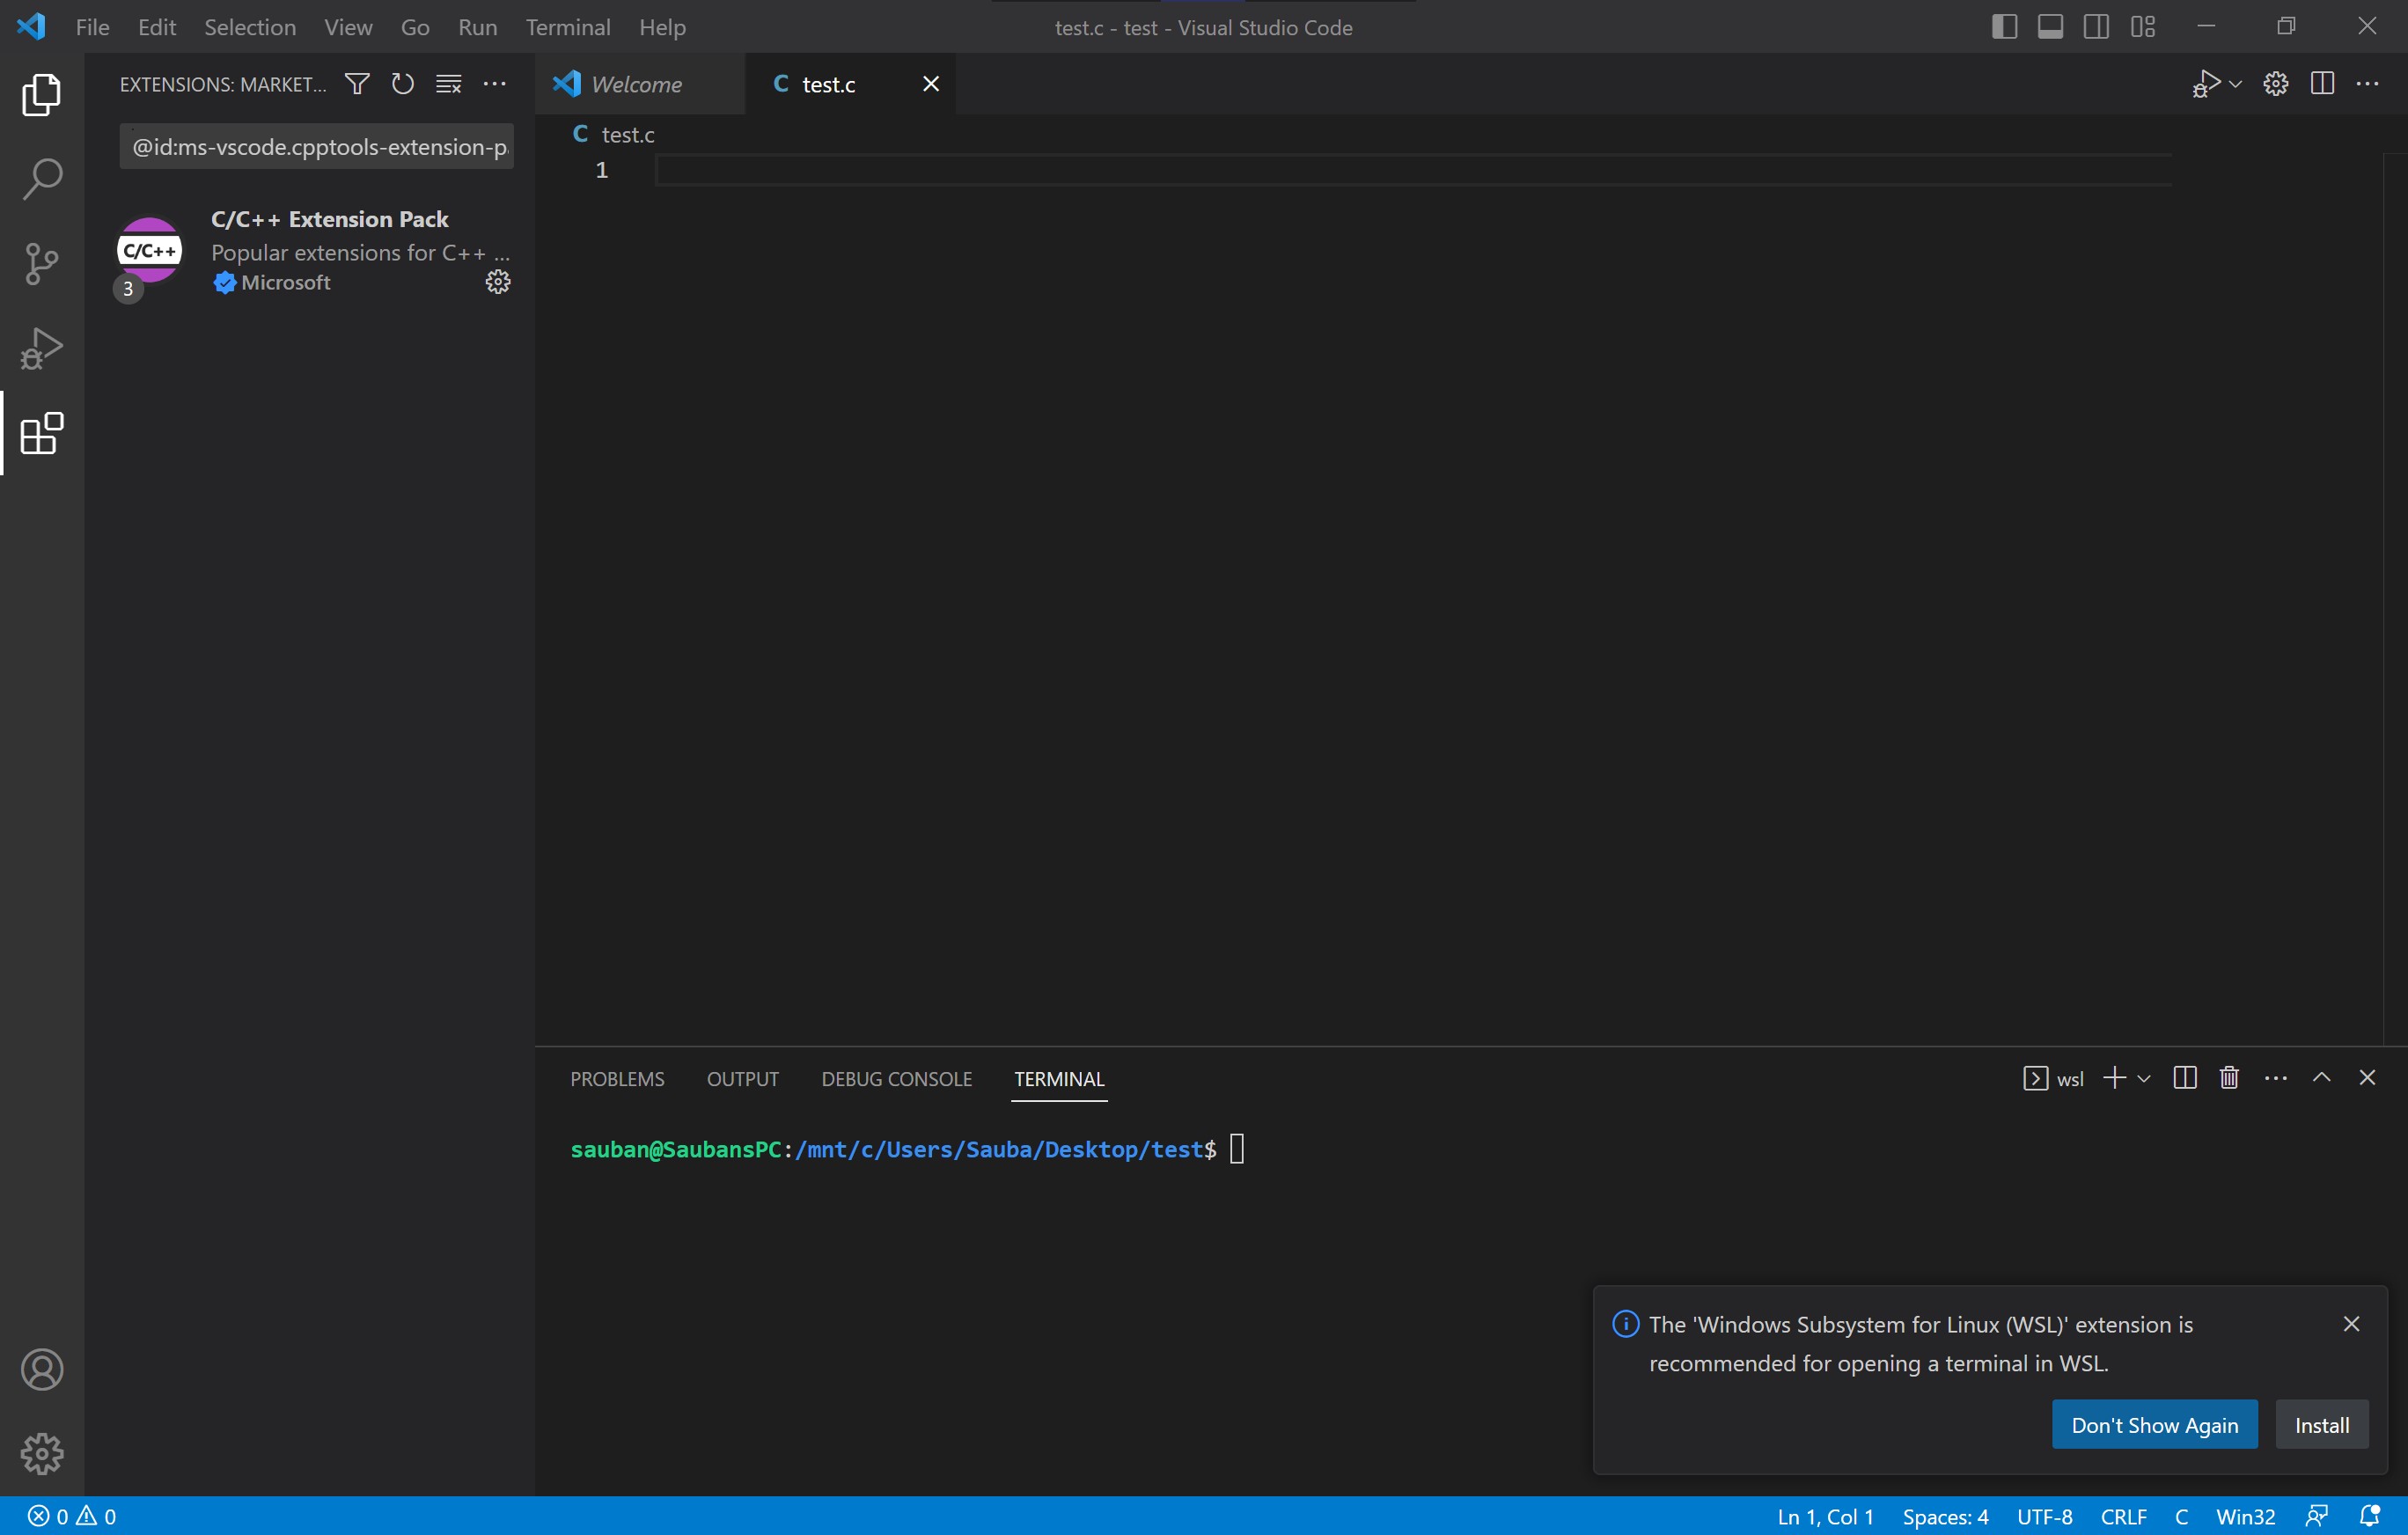
Step 38
You should see the terminal open at the bottom which is now the Ubuntu terminal set as default
Step 39
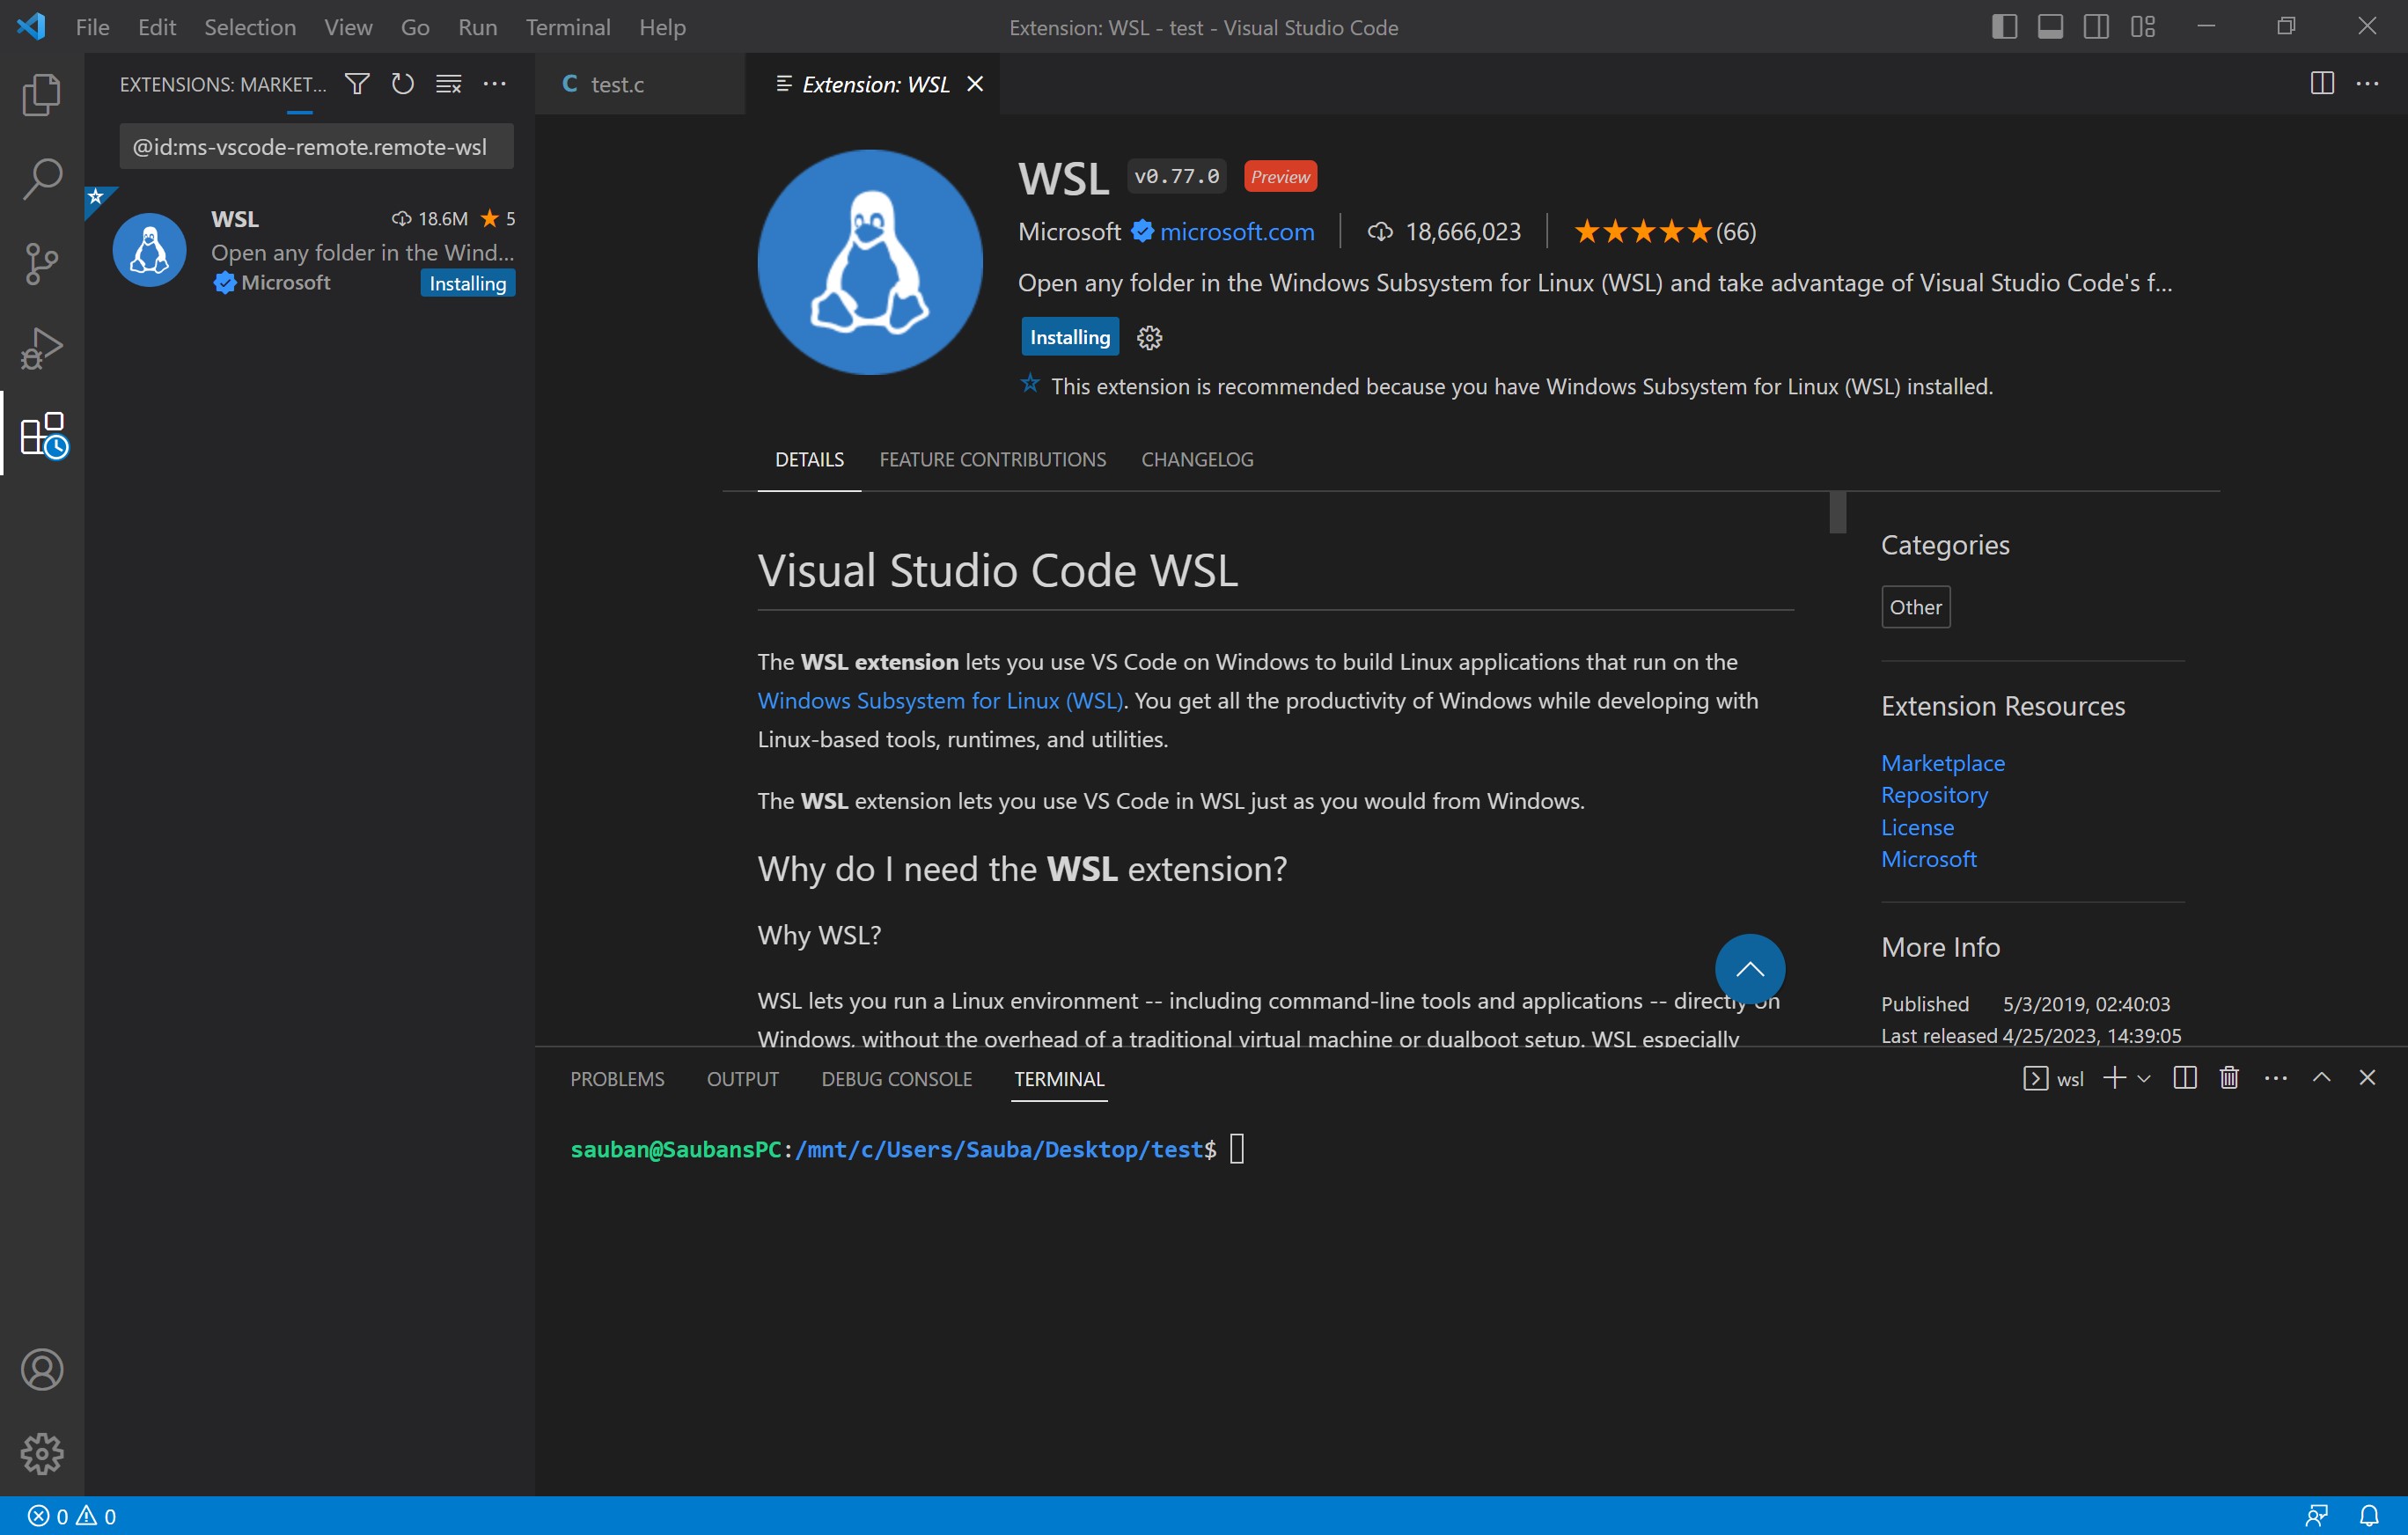
Now back in the extenstions tab, find the WSL extension and install it.
Step 40
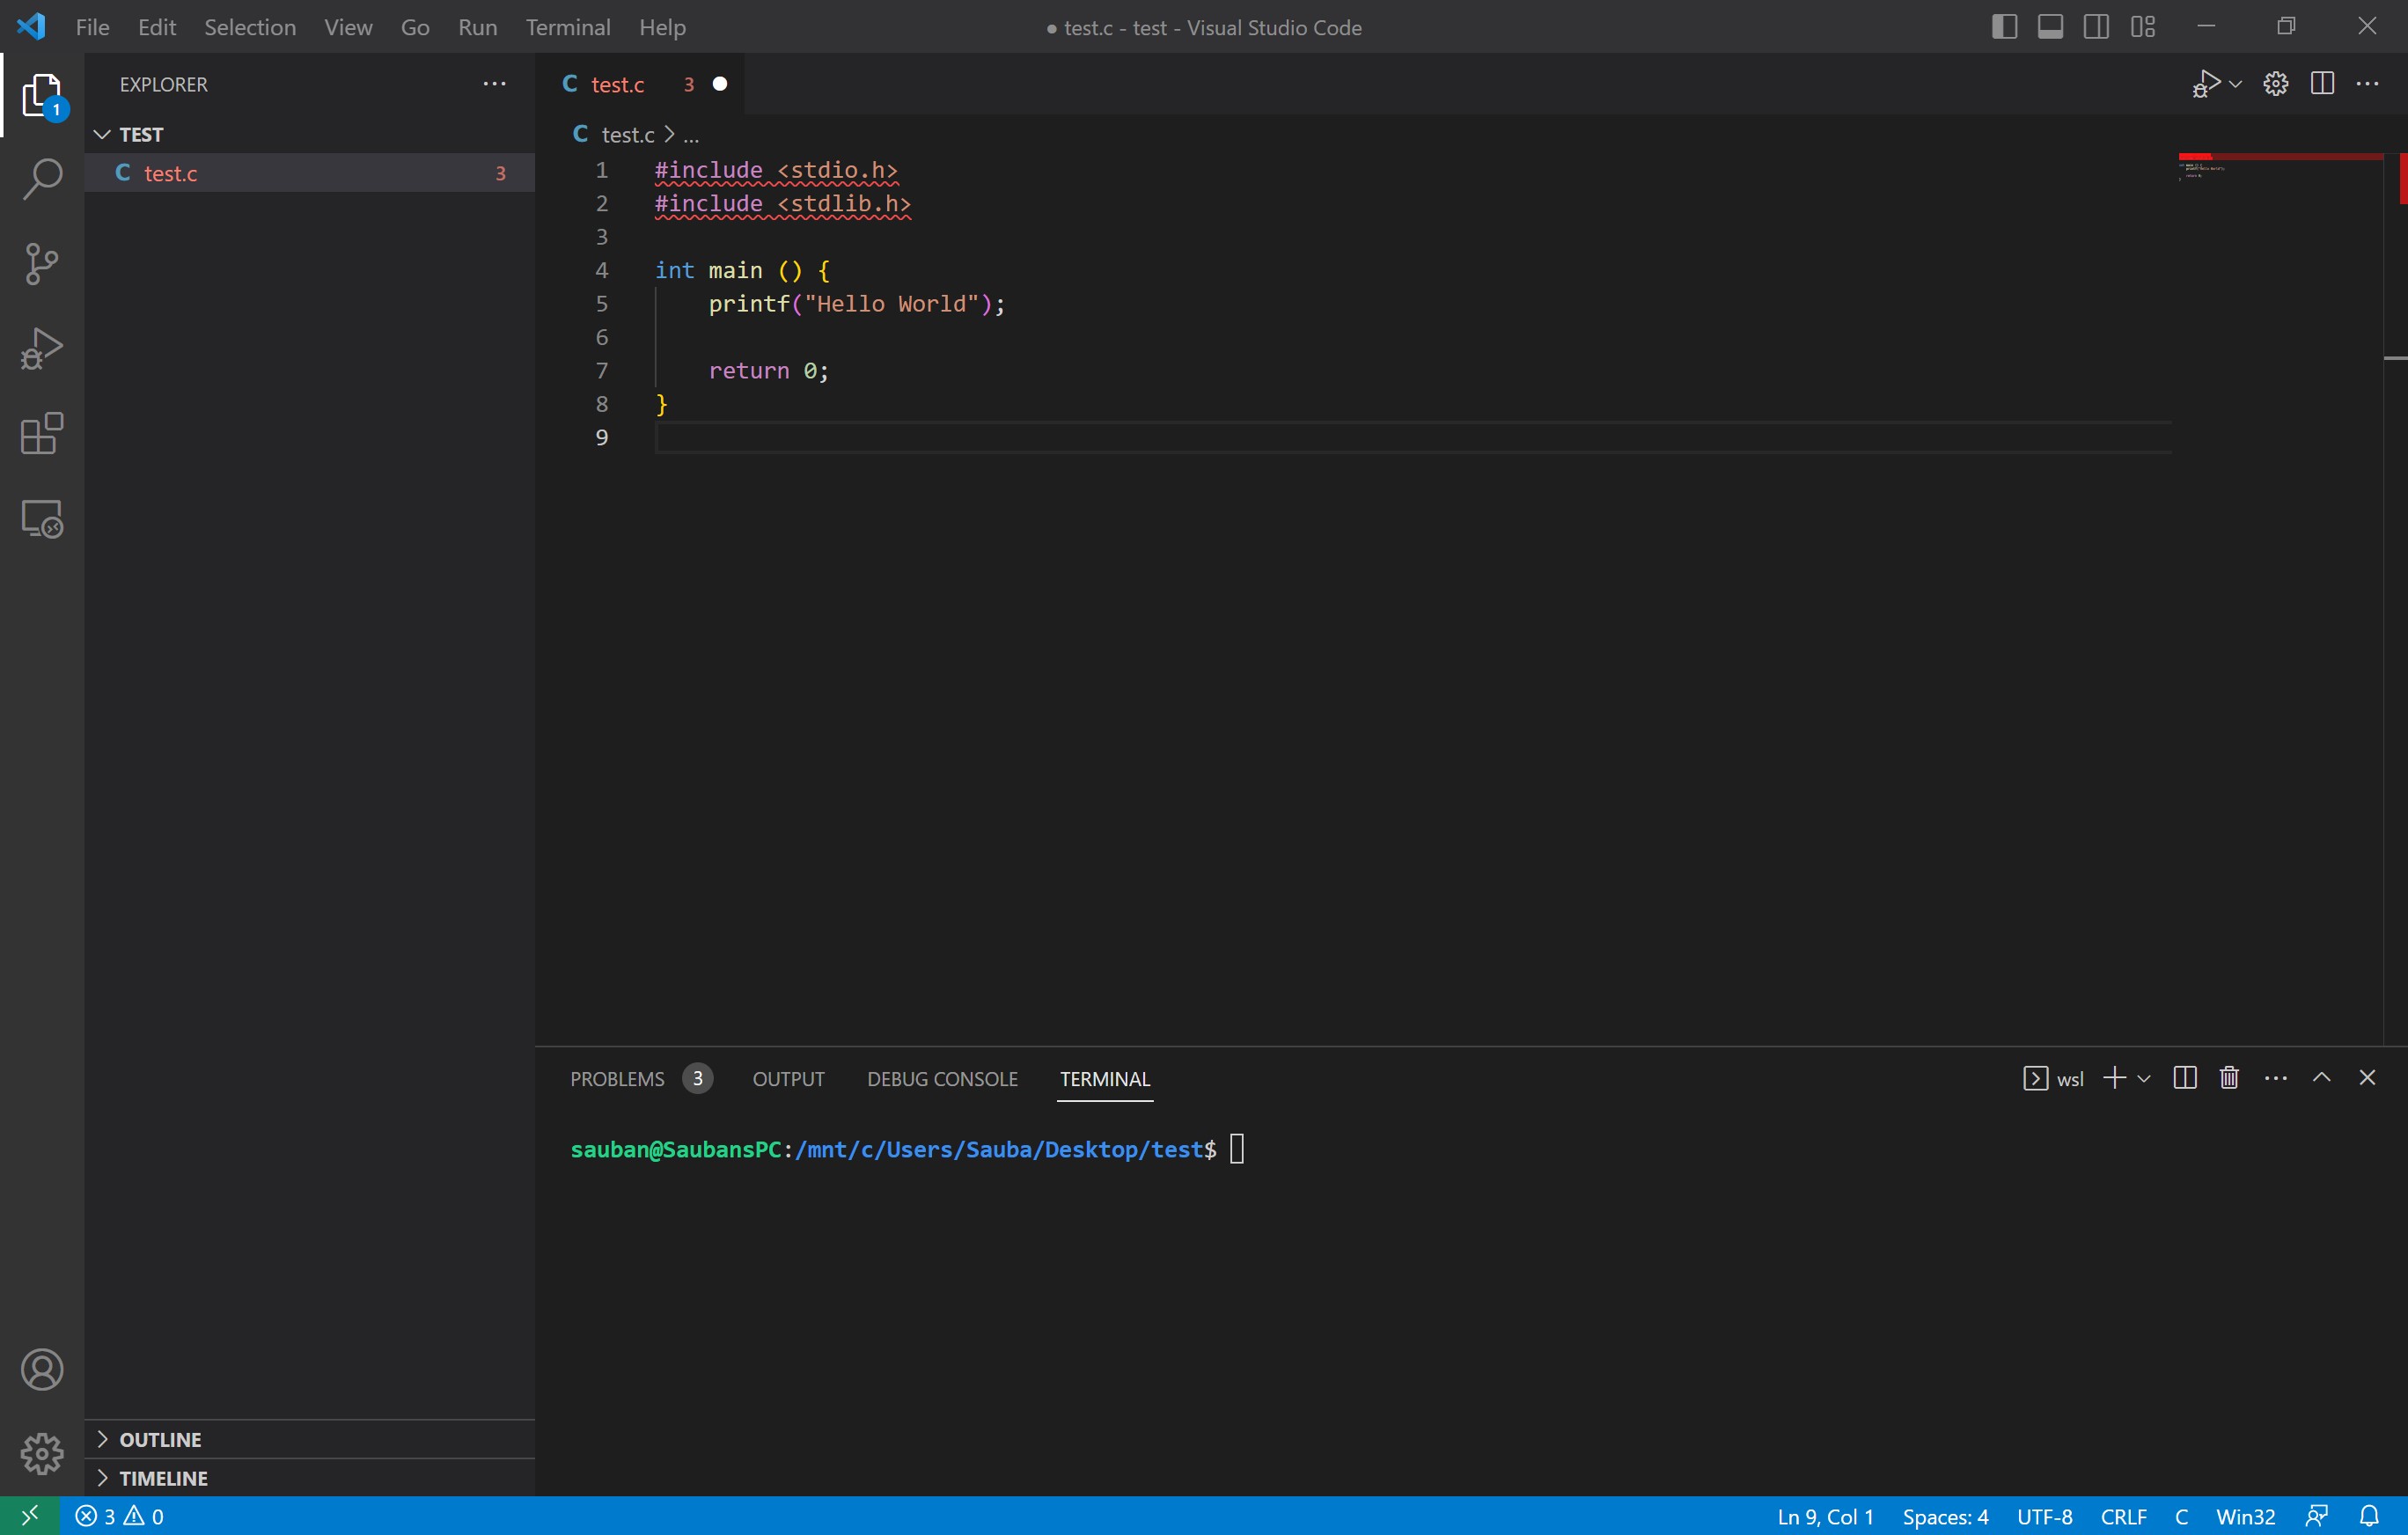
Once installed, create a file here named test.c and i wrote a simple program that outputs Hello World to the terminal. However we have errors.
Step 41
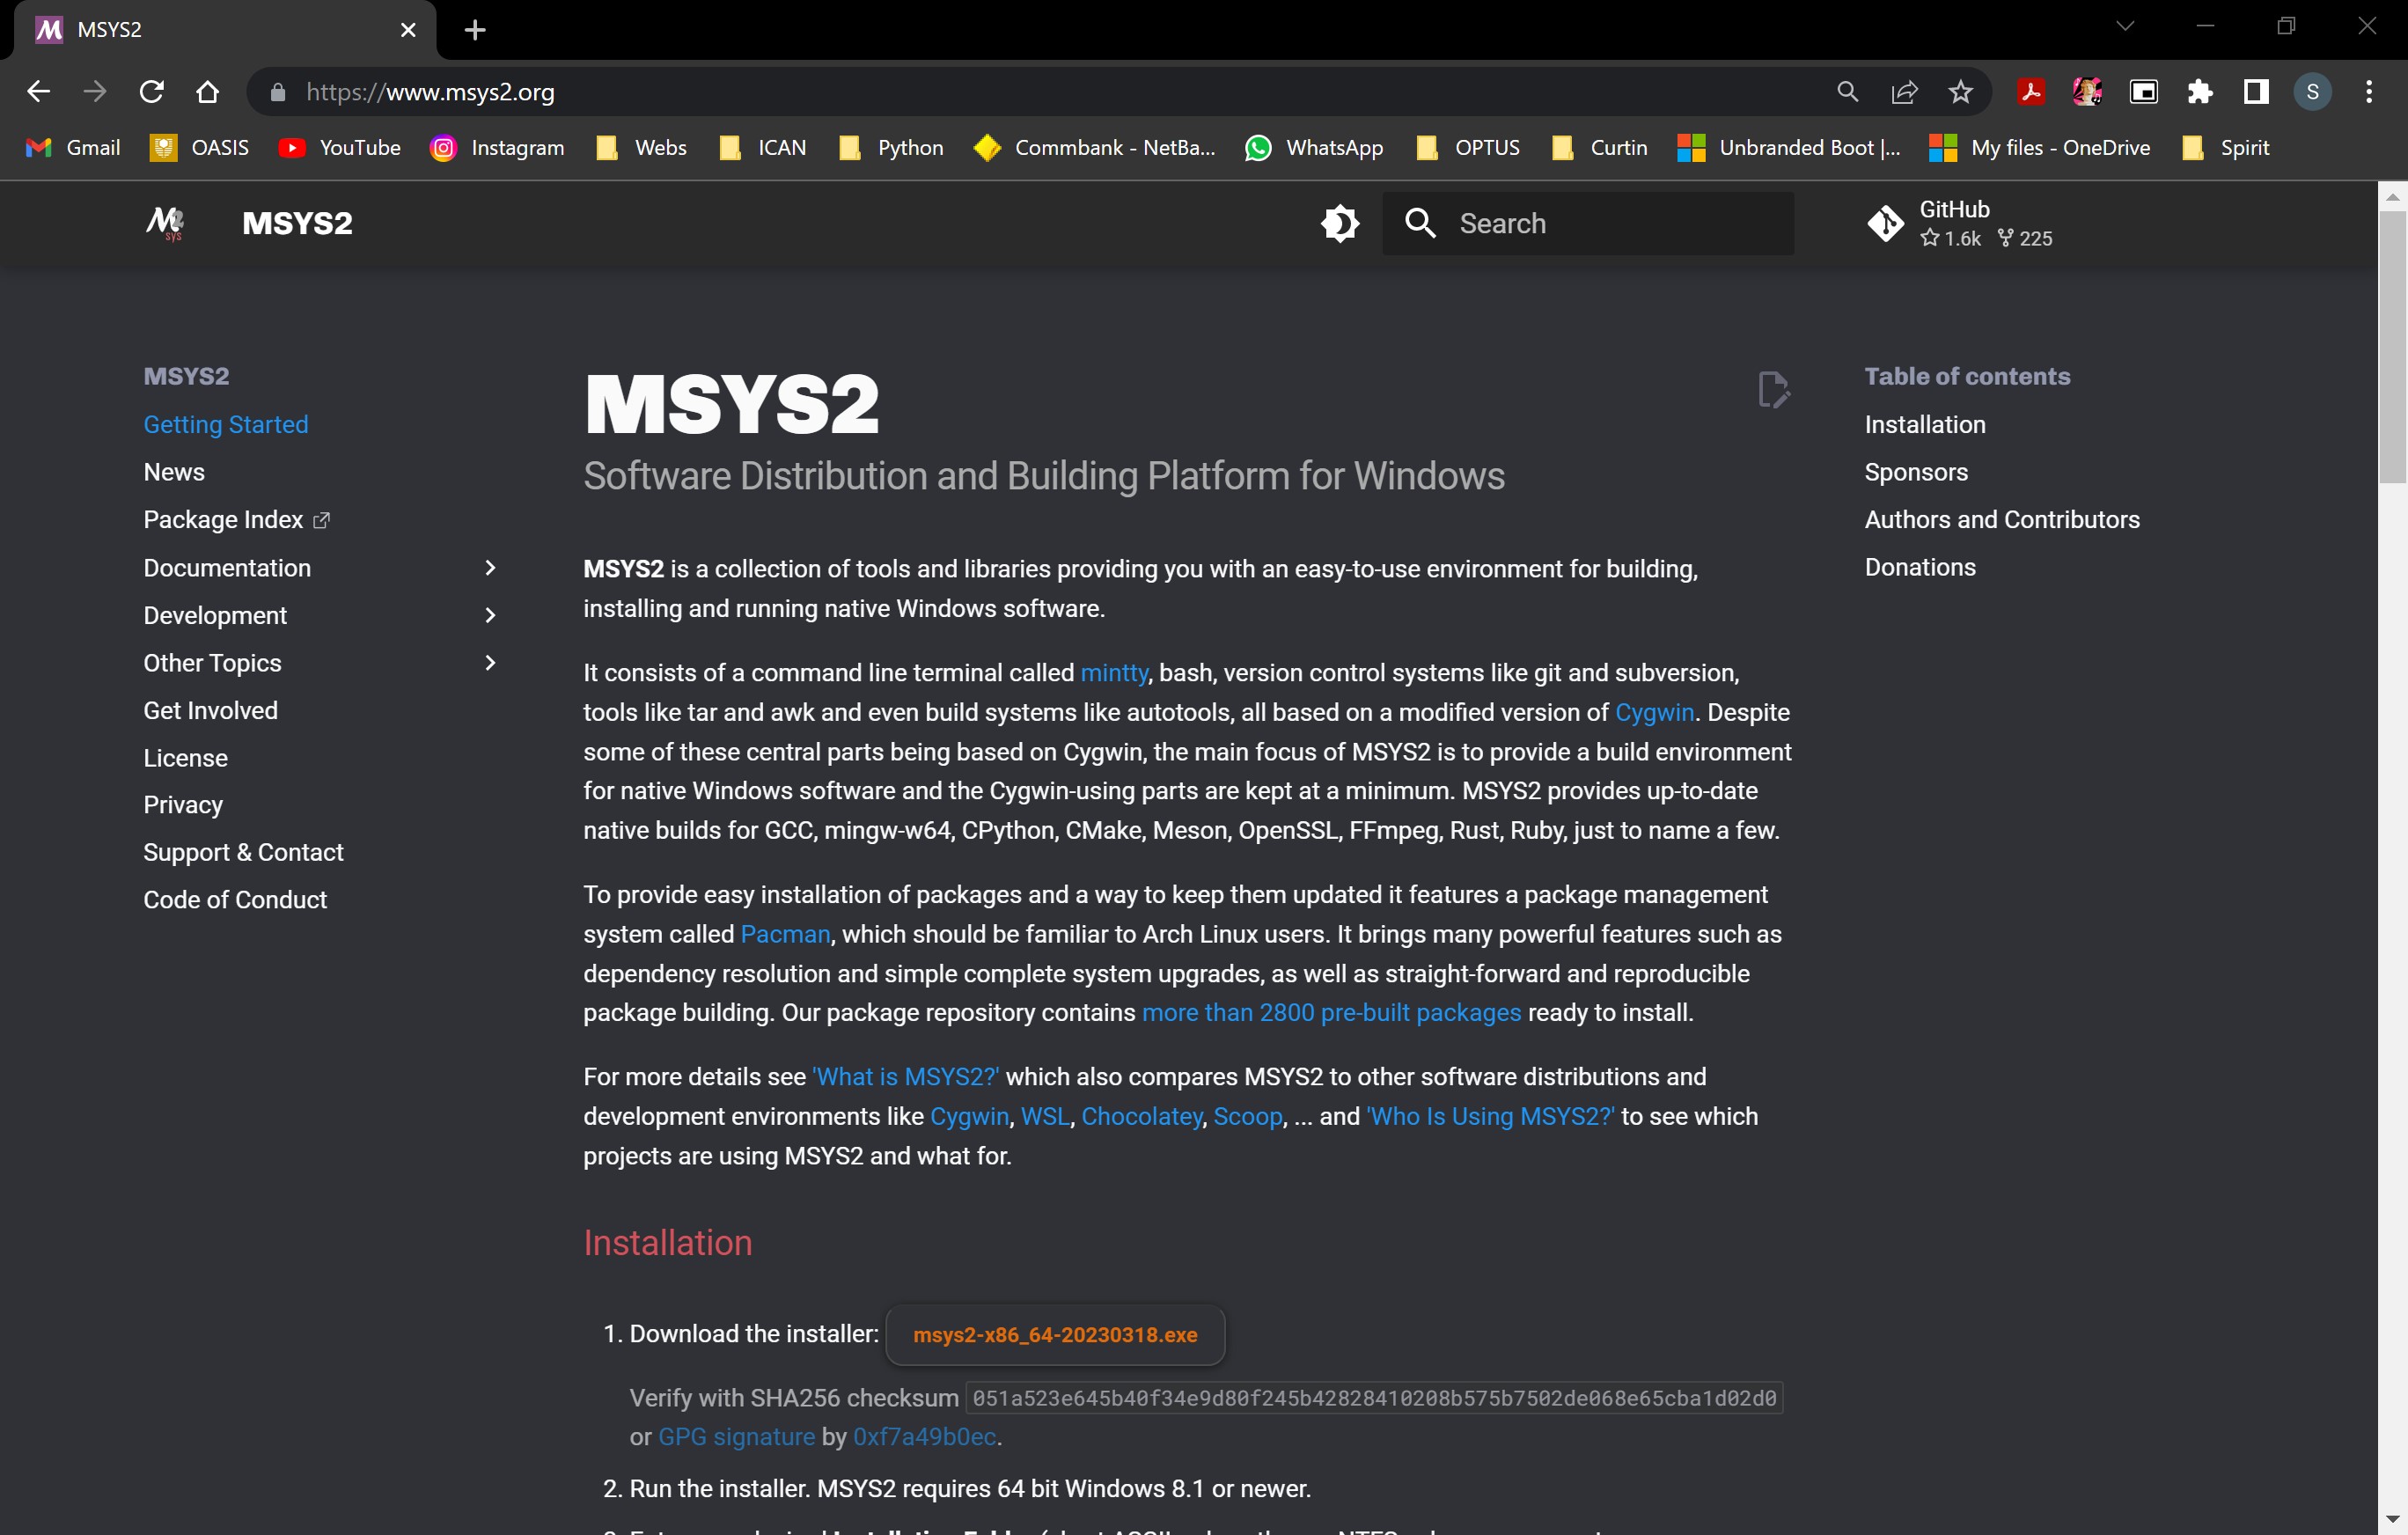
To fix those erros, we need to download the compiler for it. Although installing Ubuntu with the sudo command installed gcc, vscode cant find the path. So, go to this website to download MSYS2. Click on the link to download the installer.
Step 42
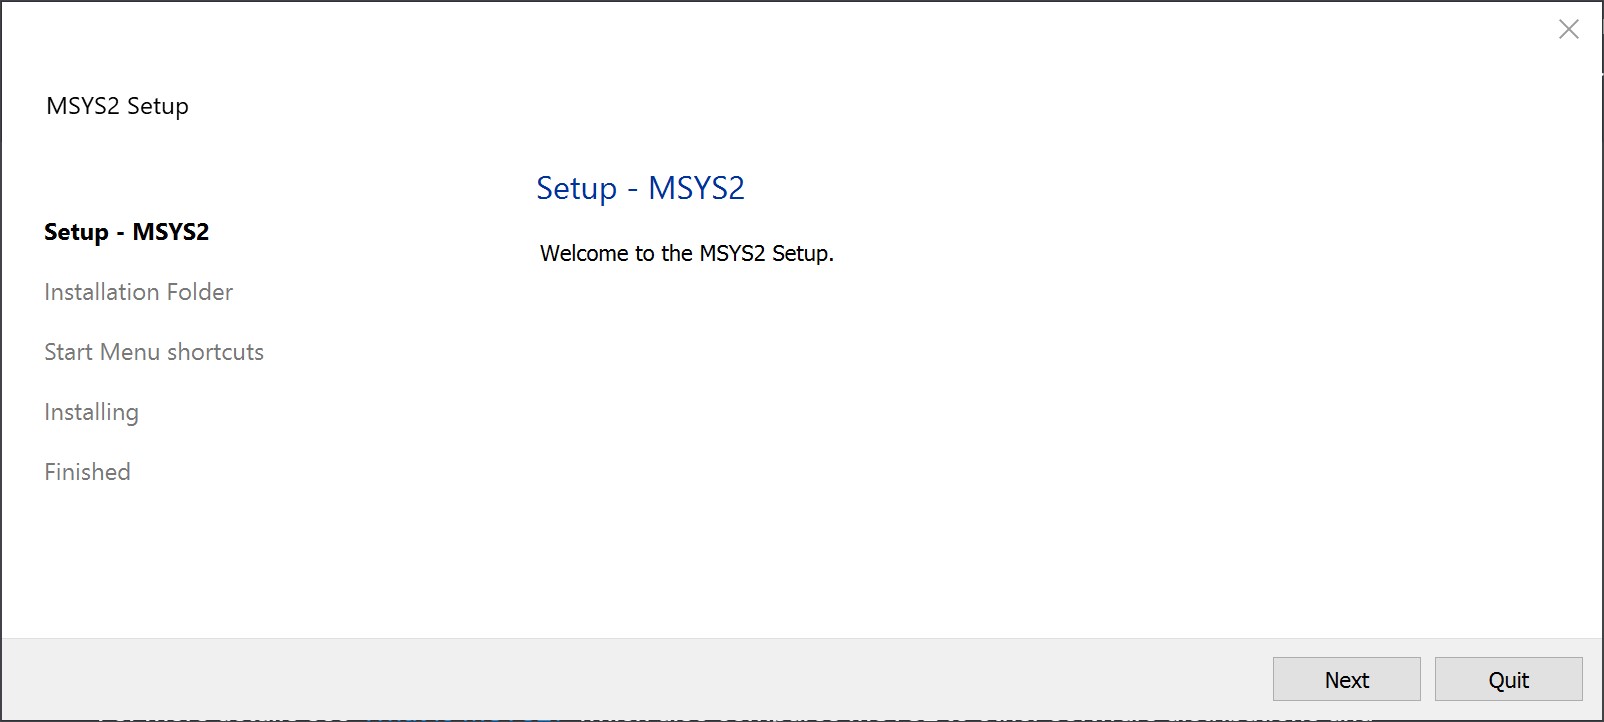
Once downloaded, run the installer.
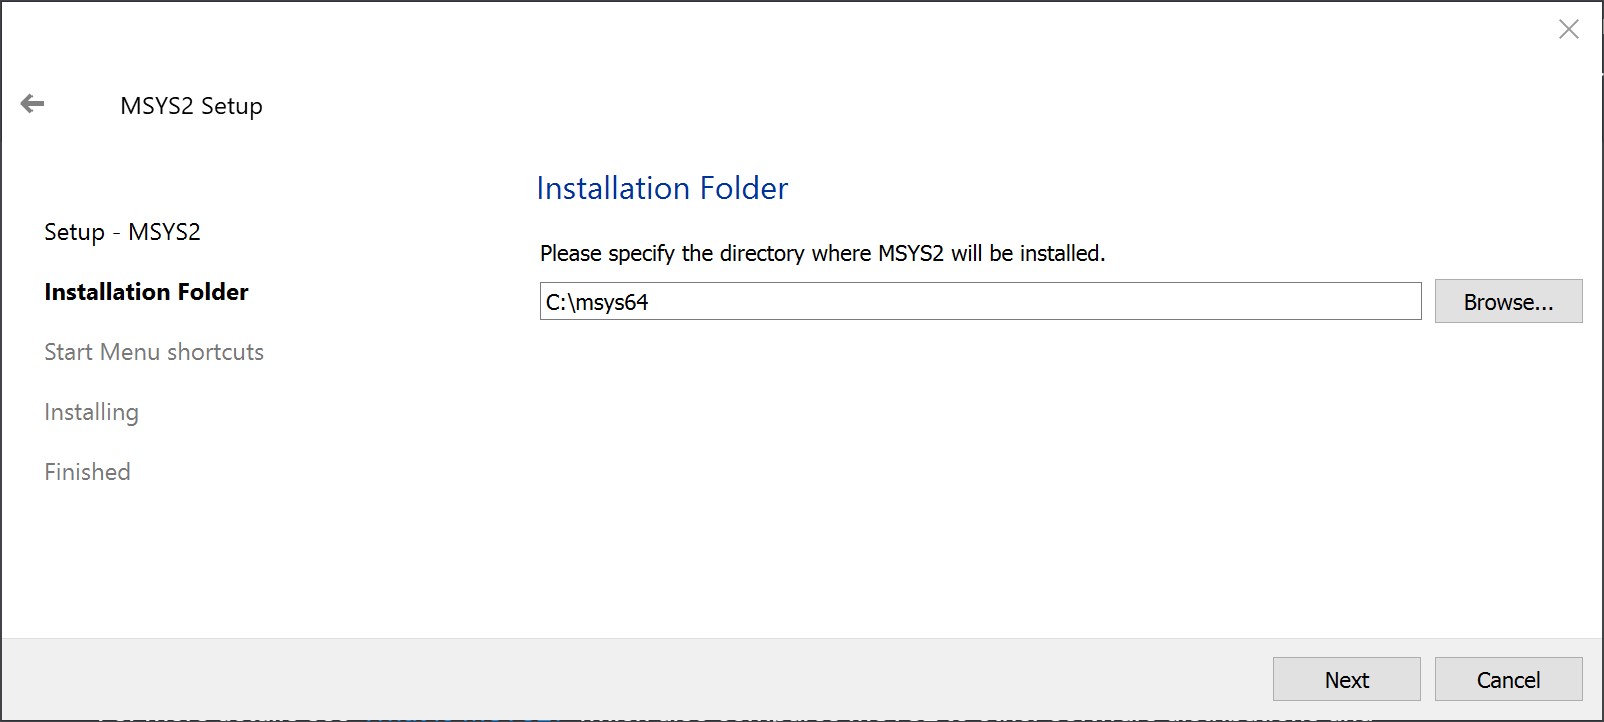
Step 43
Select your installation folder.
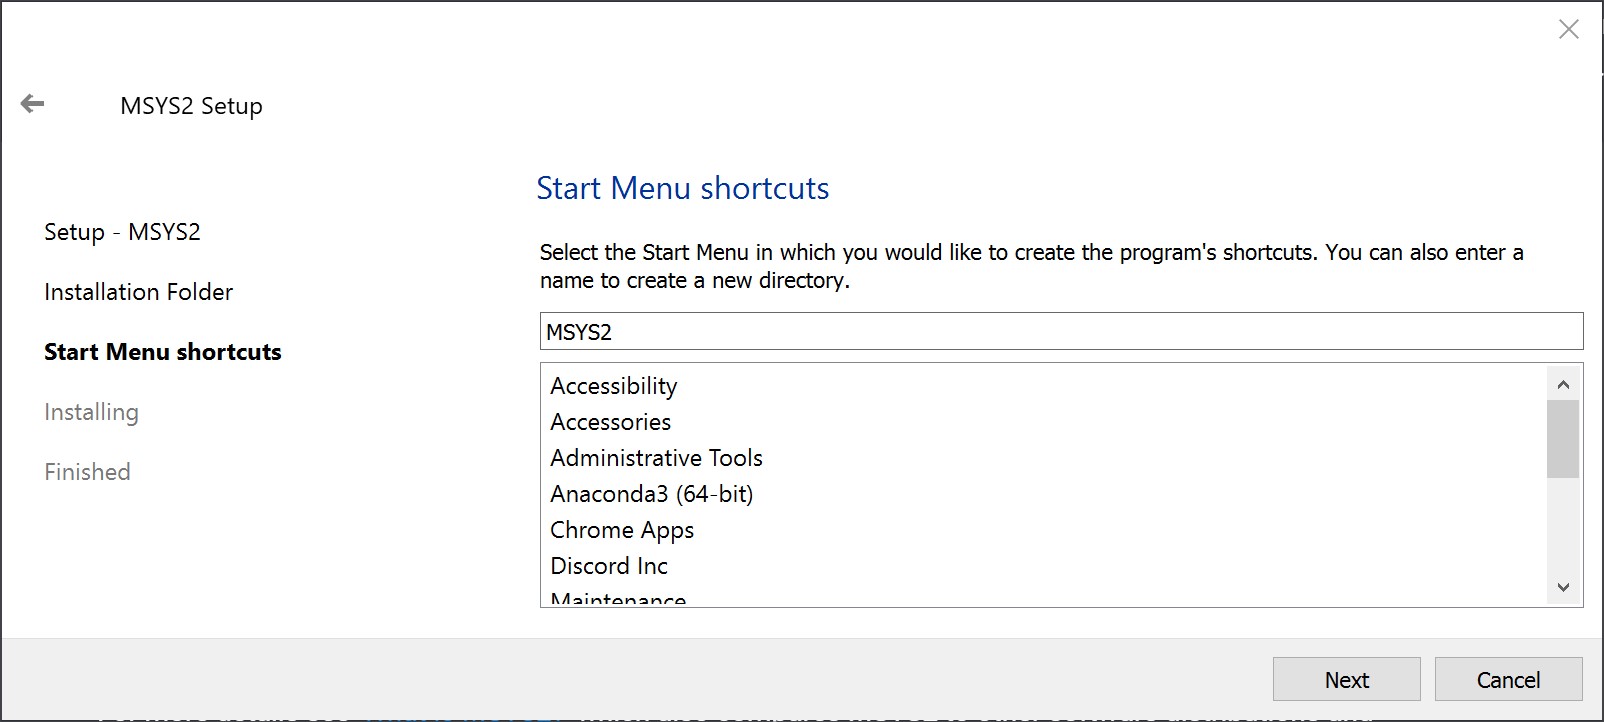
Step 44
Just click next
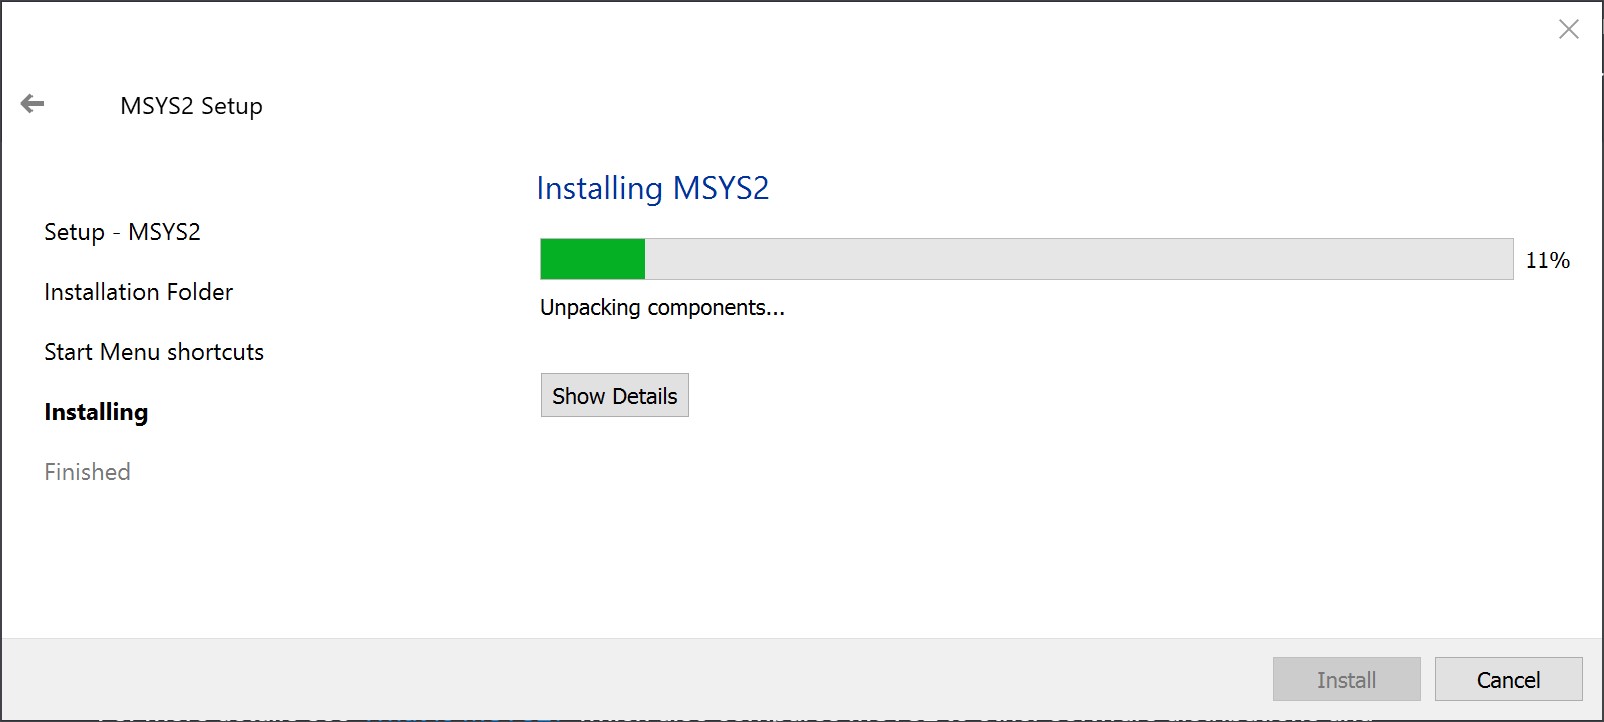
Step 45
Let it install.
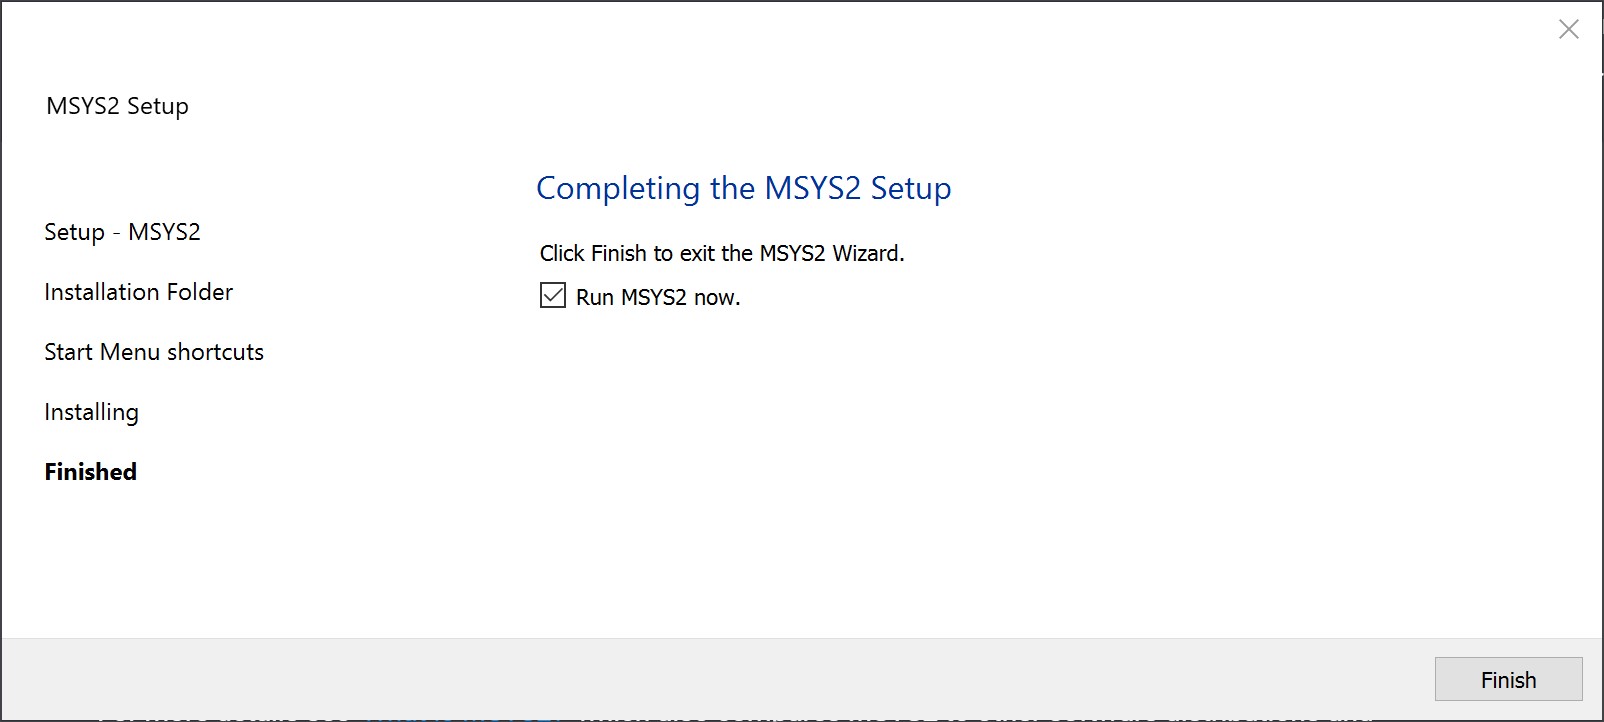
Step 46
Once installed, click finish.
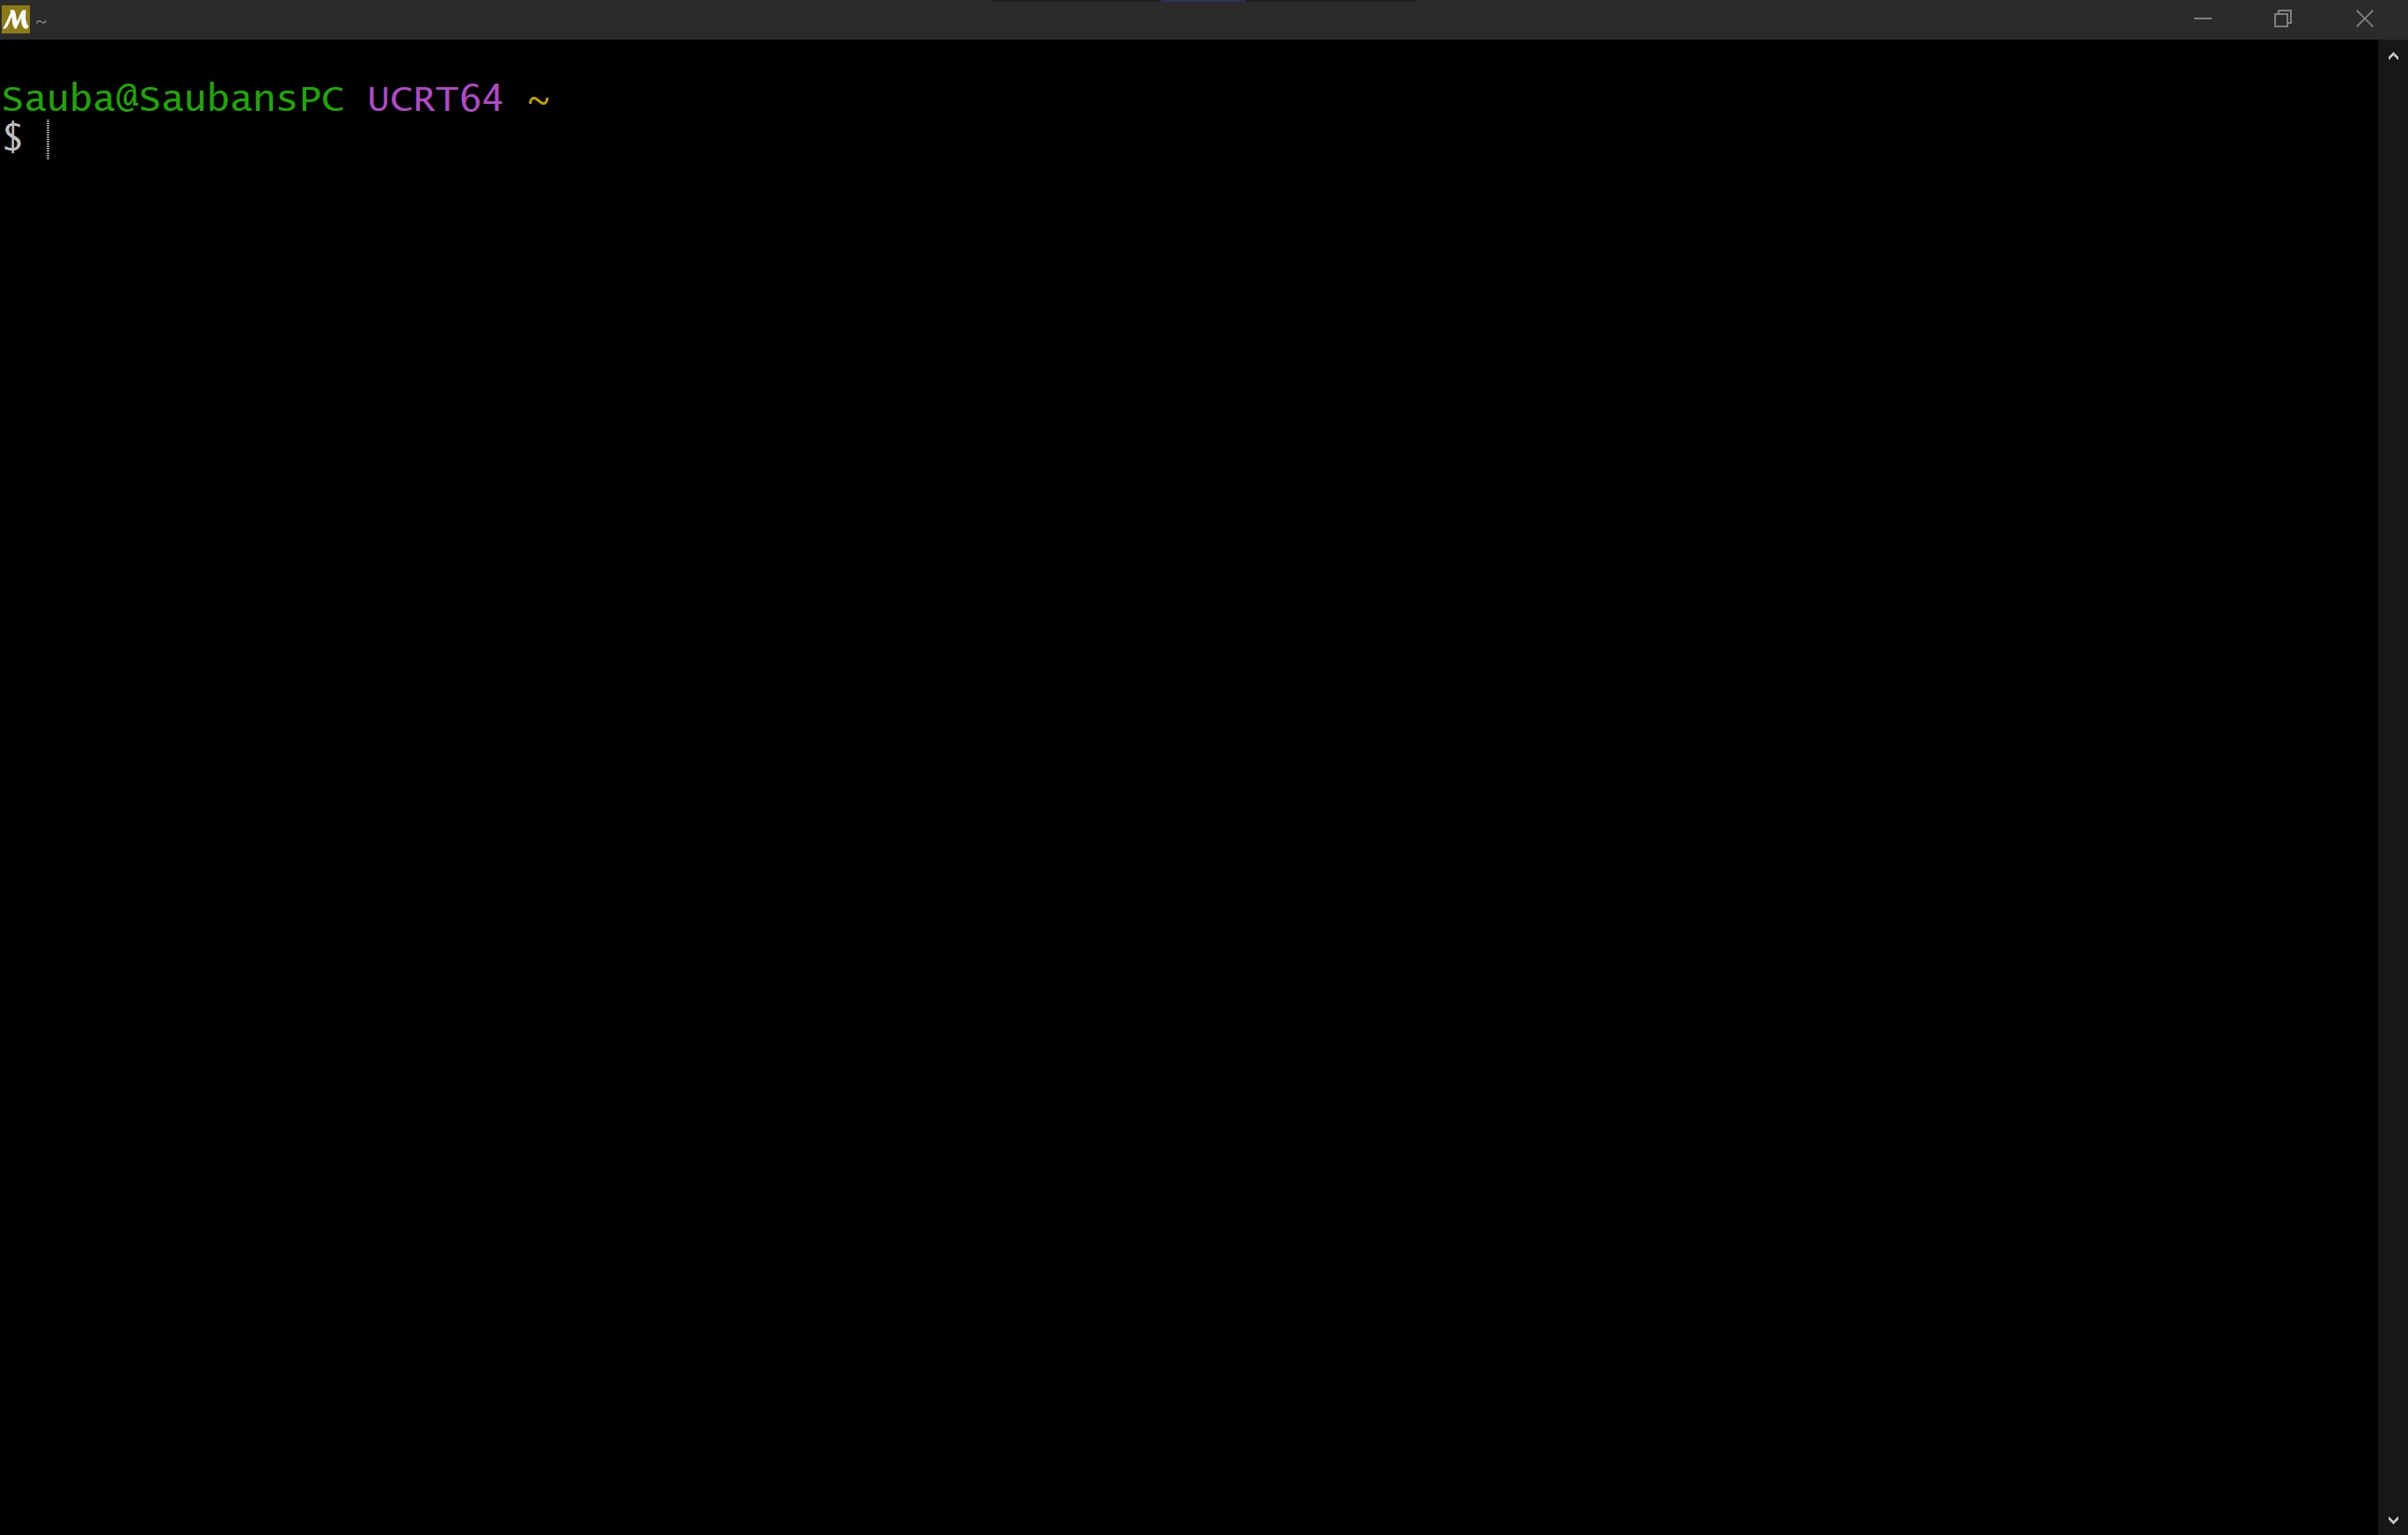
Step 47
When the terminal for MSYS2 opens, it will look like this
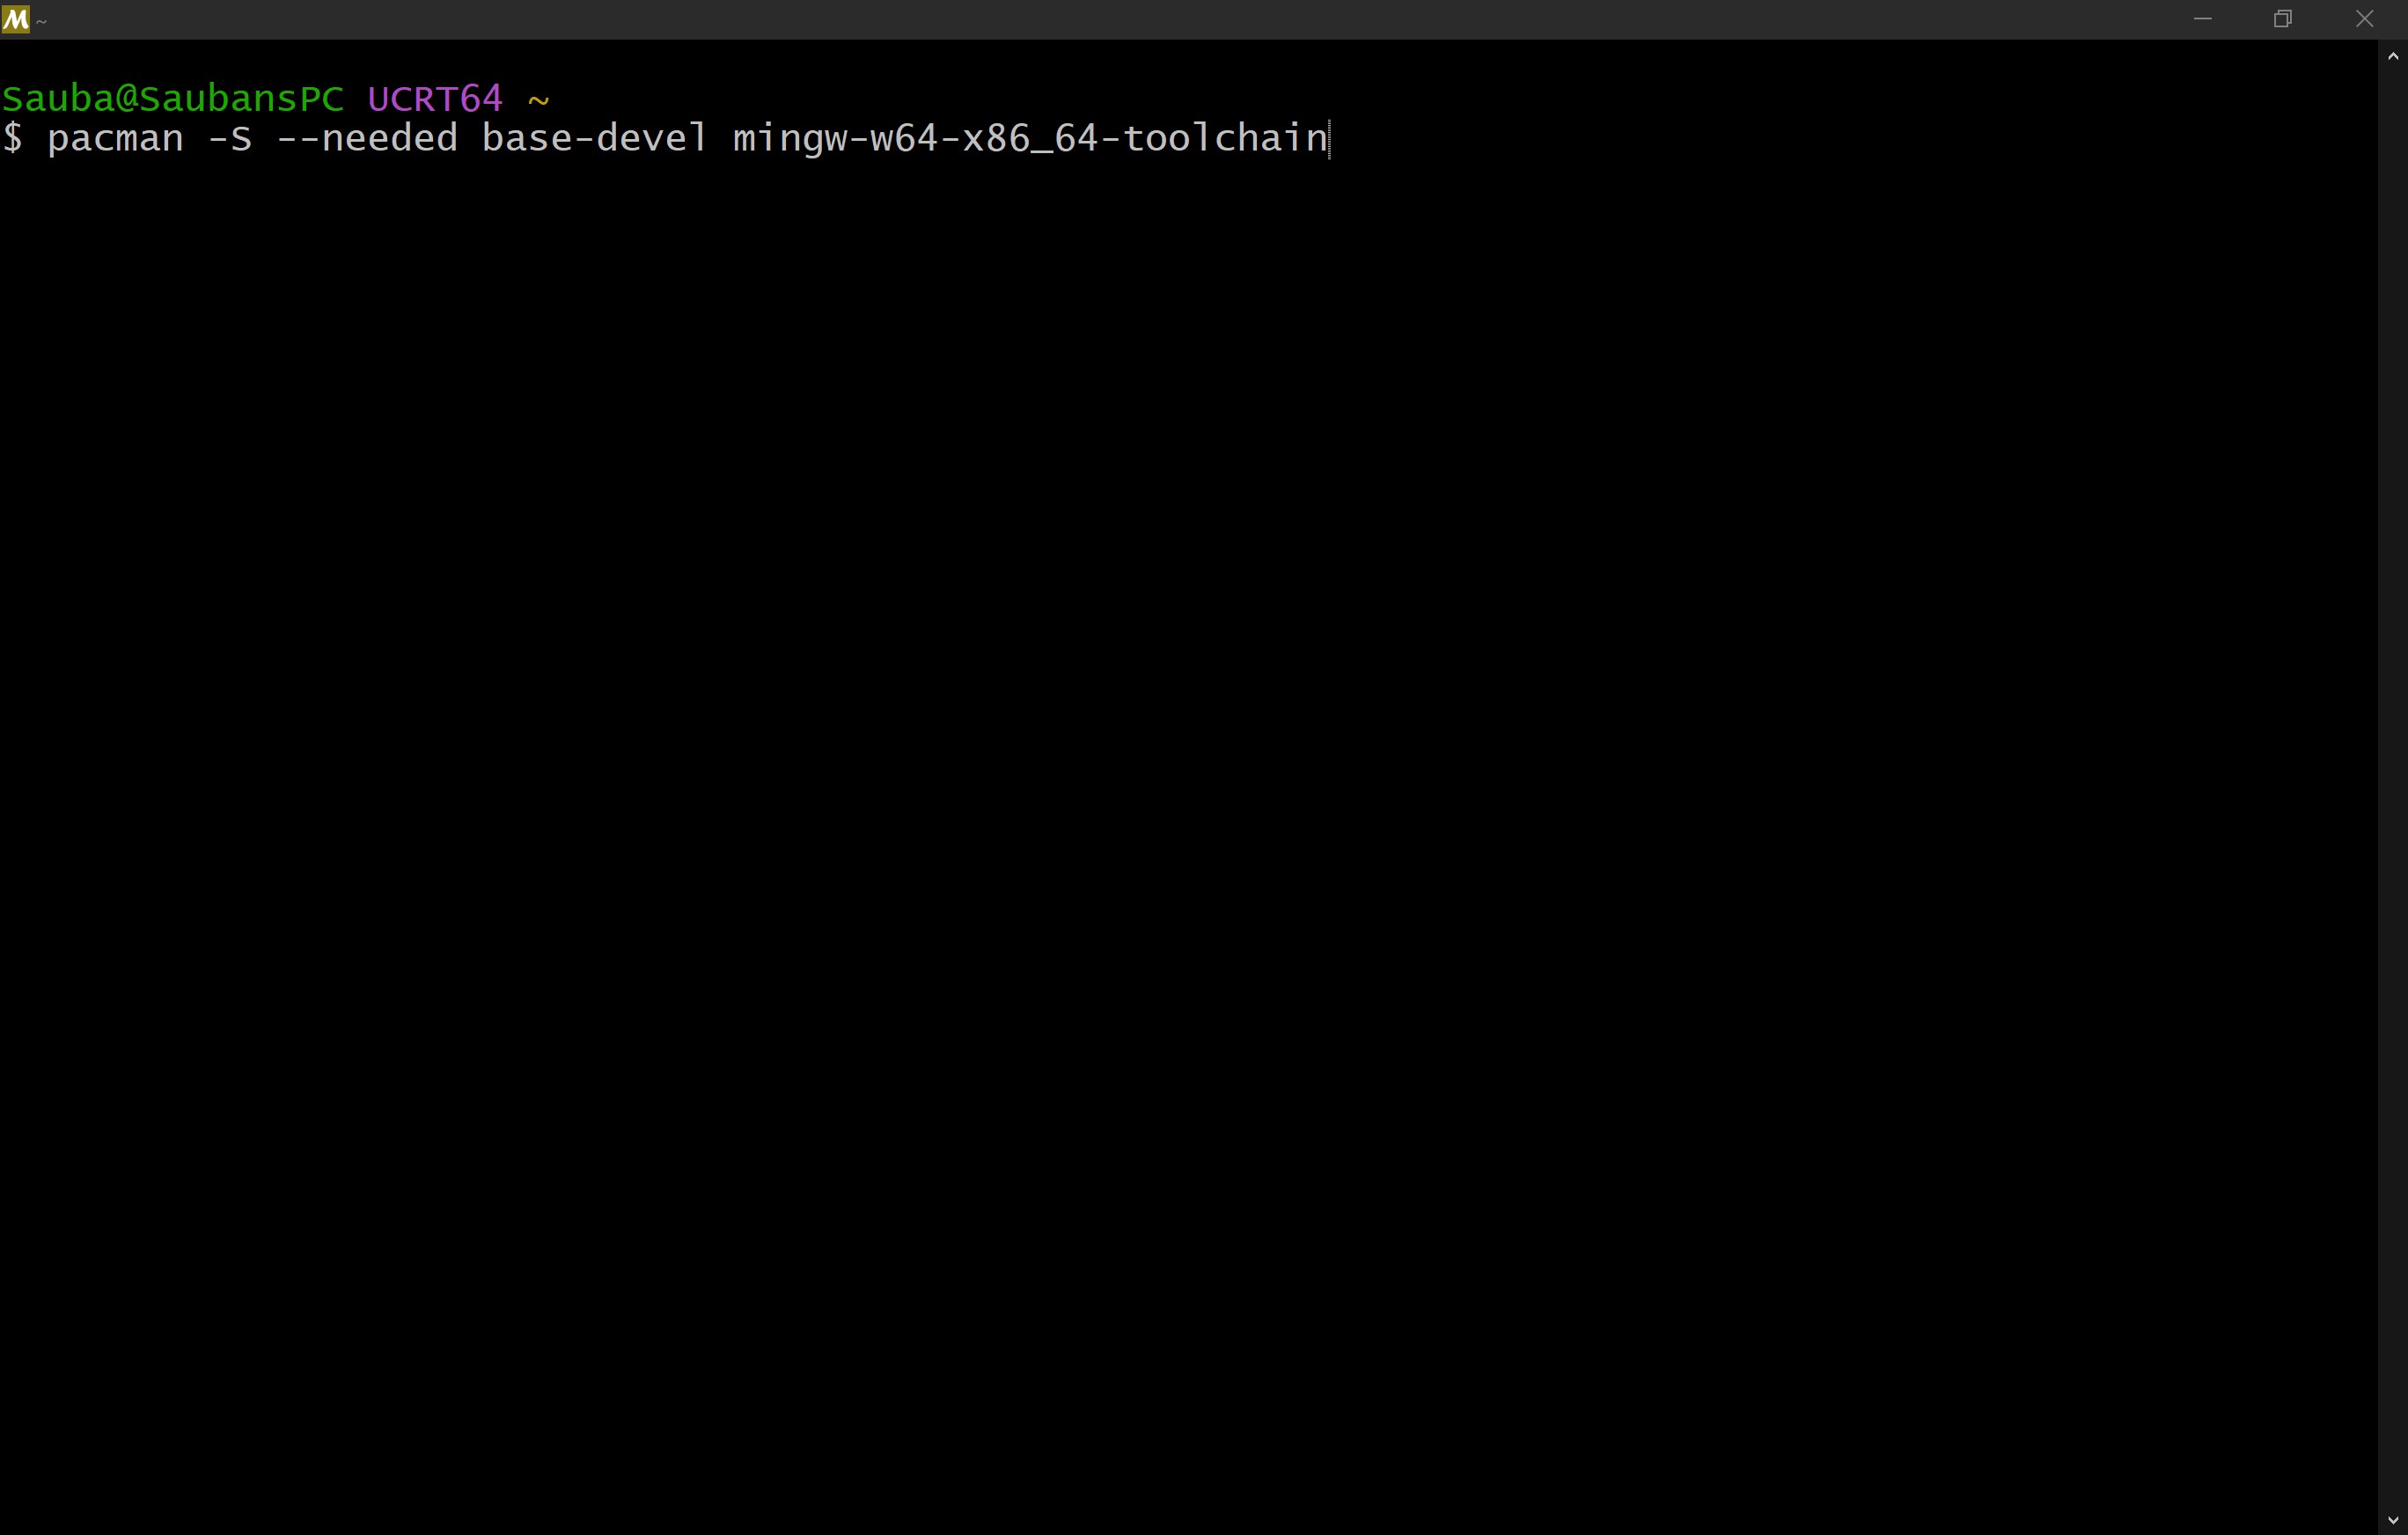
Step 48
Type in the following command in the terminal window:
pacman -S --needed base-devel mingw-w64-x86_64-toolchain
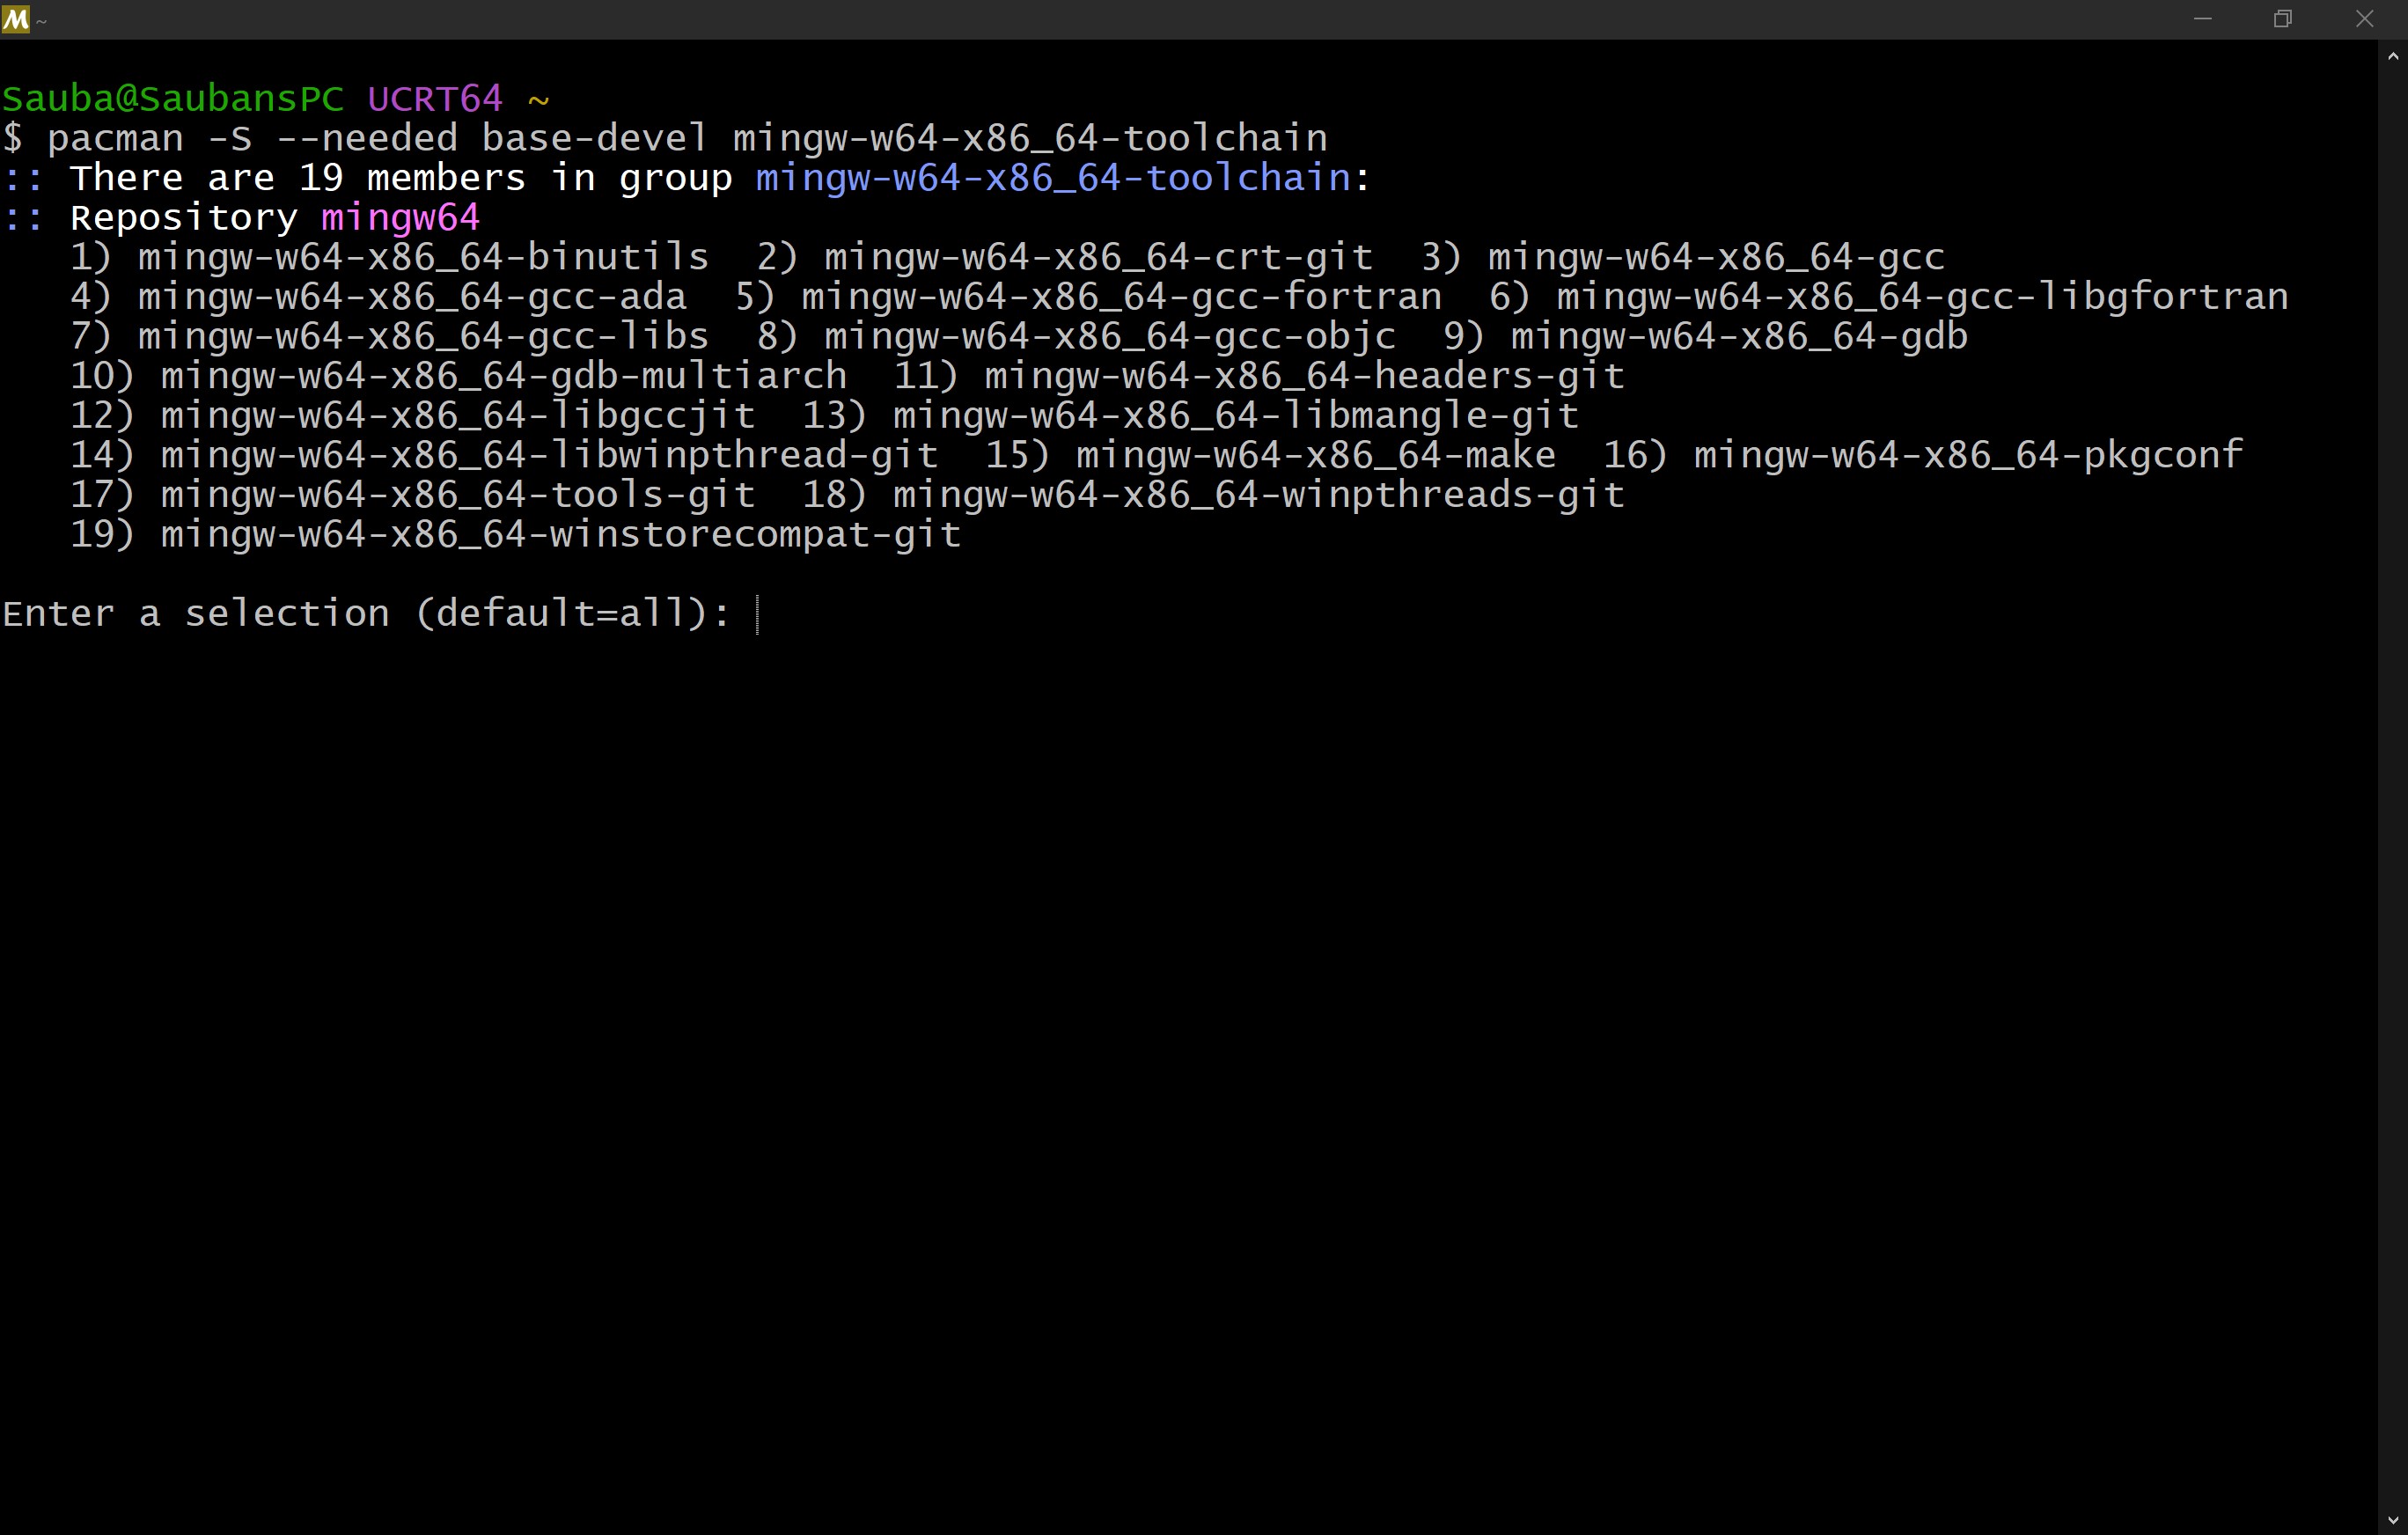
Step 49
It will give you a selection. Just press enter.
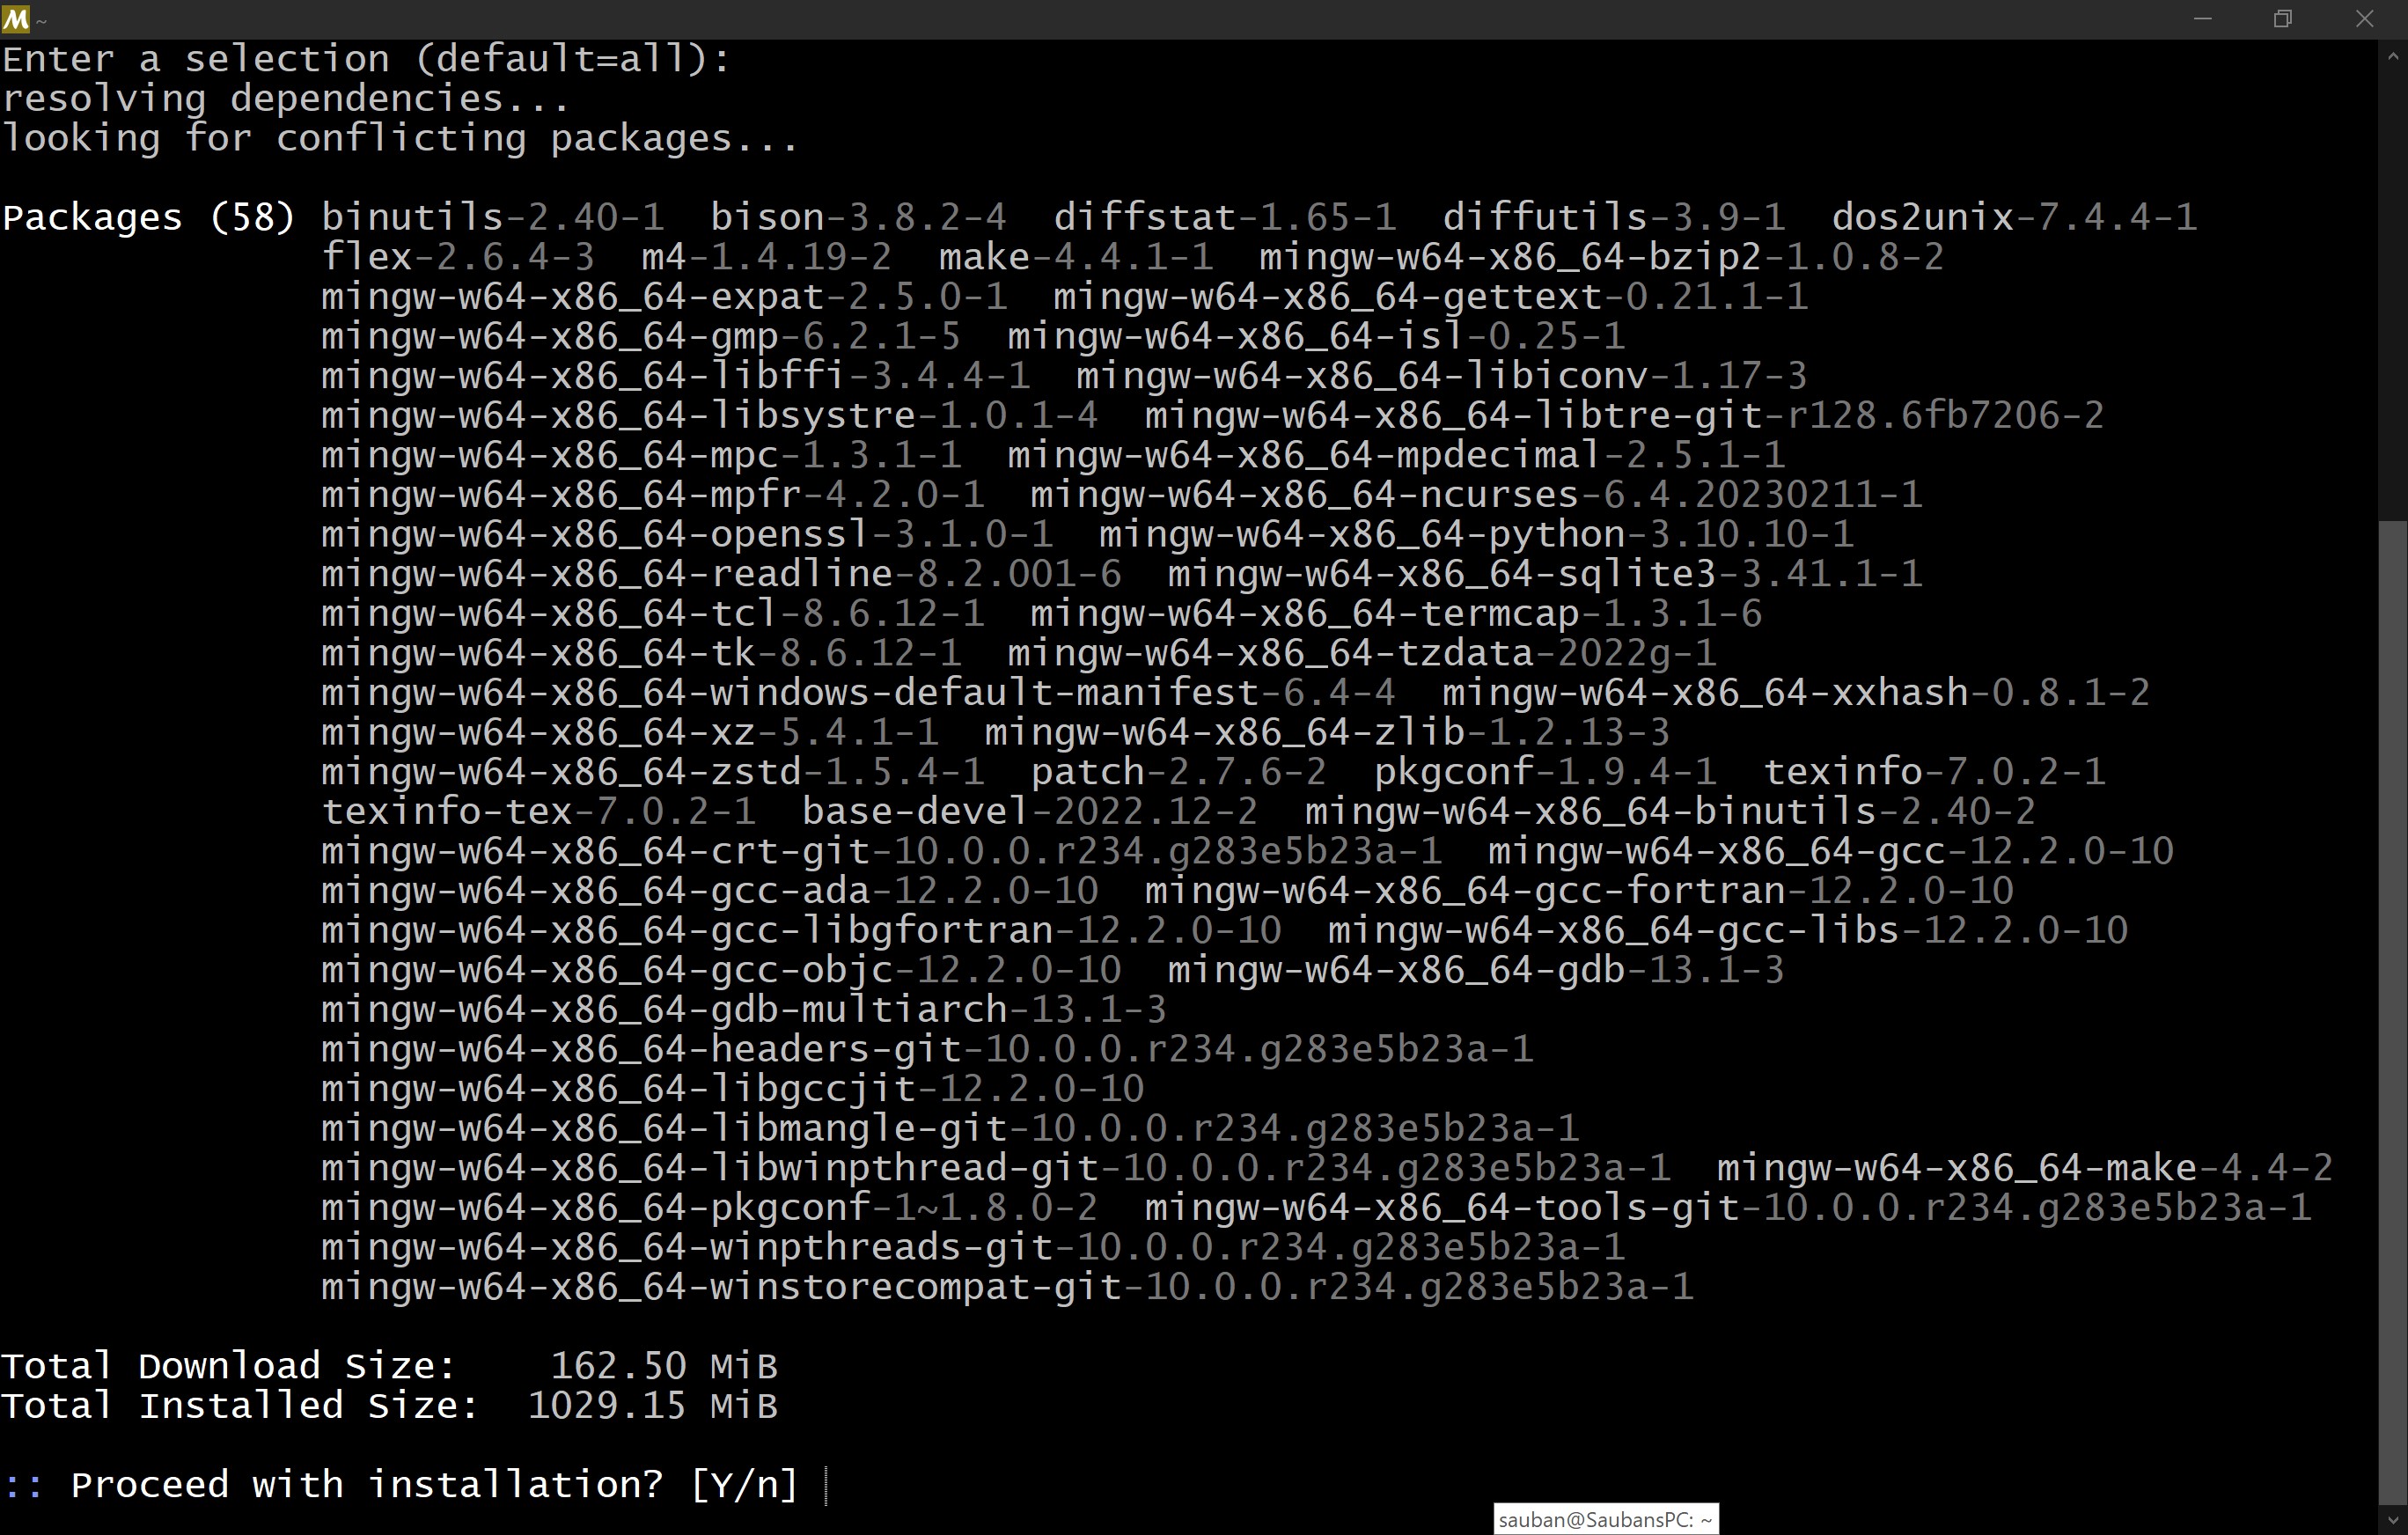
Step 50
Type in y and press enter
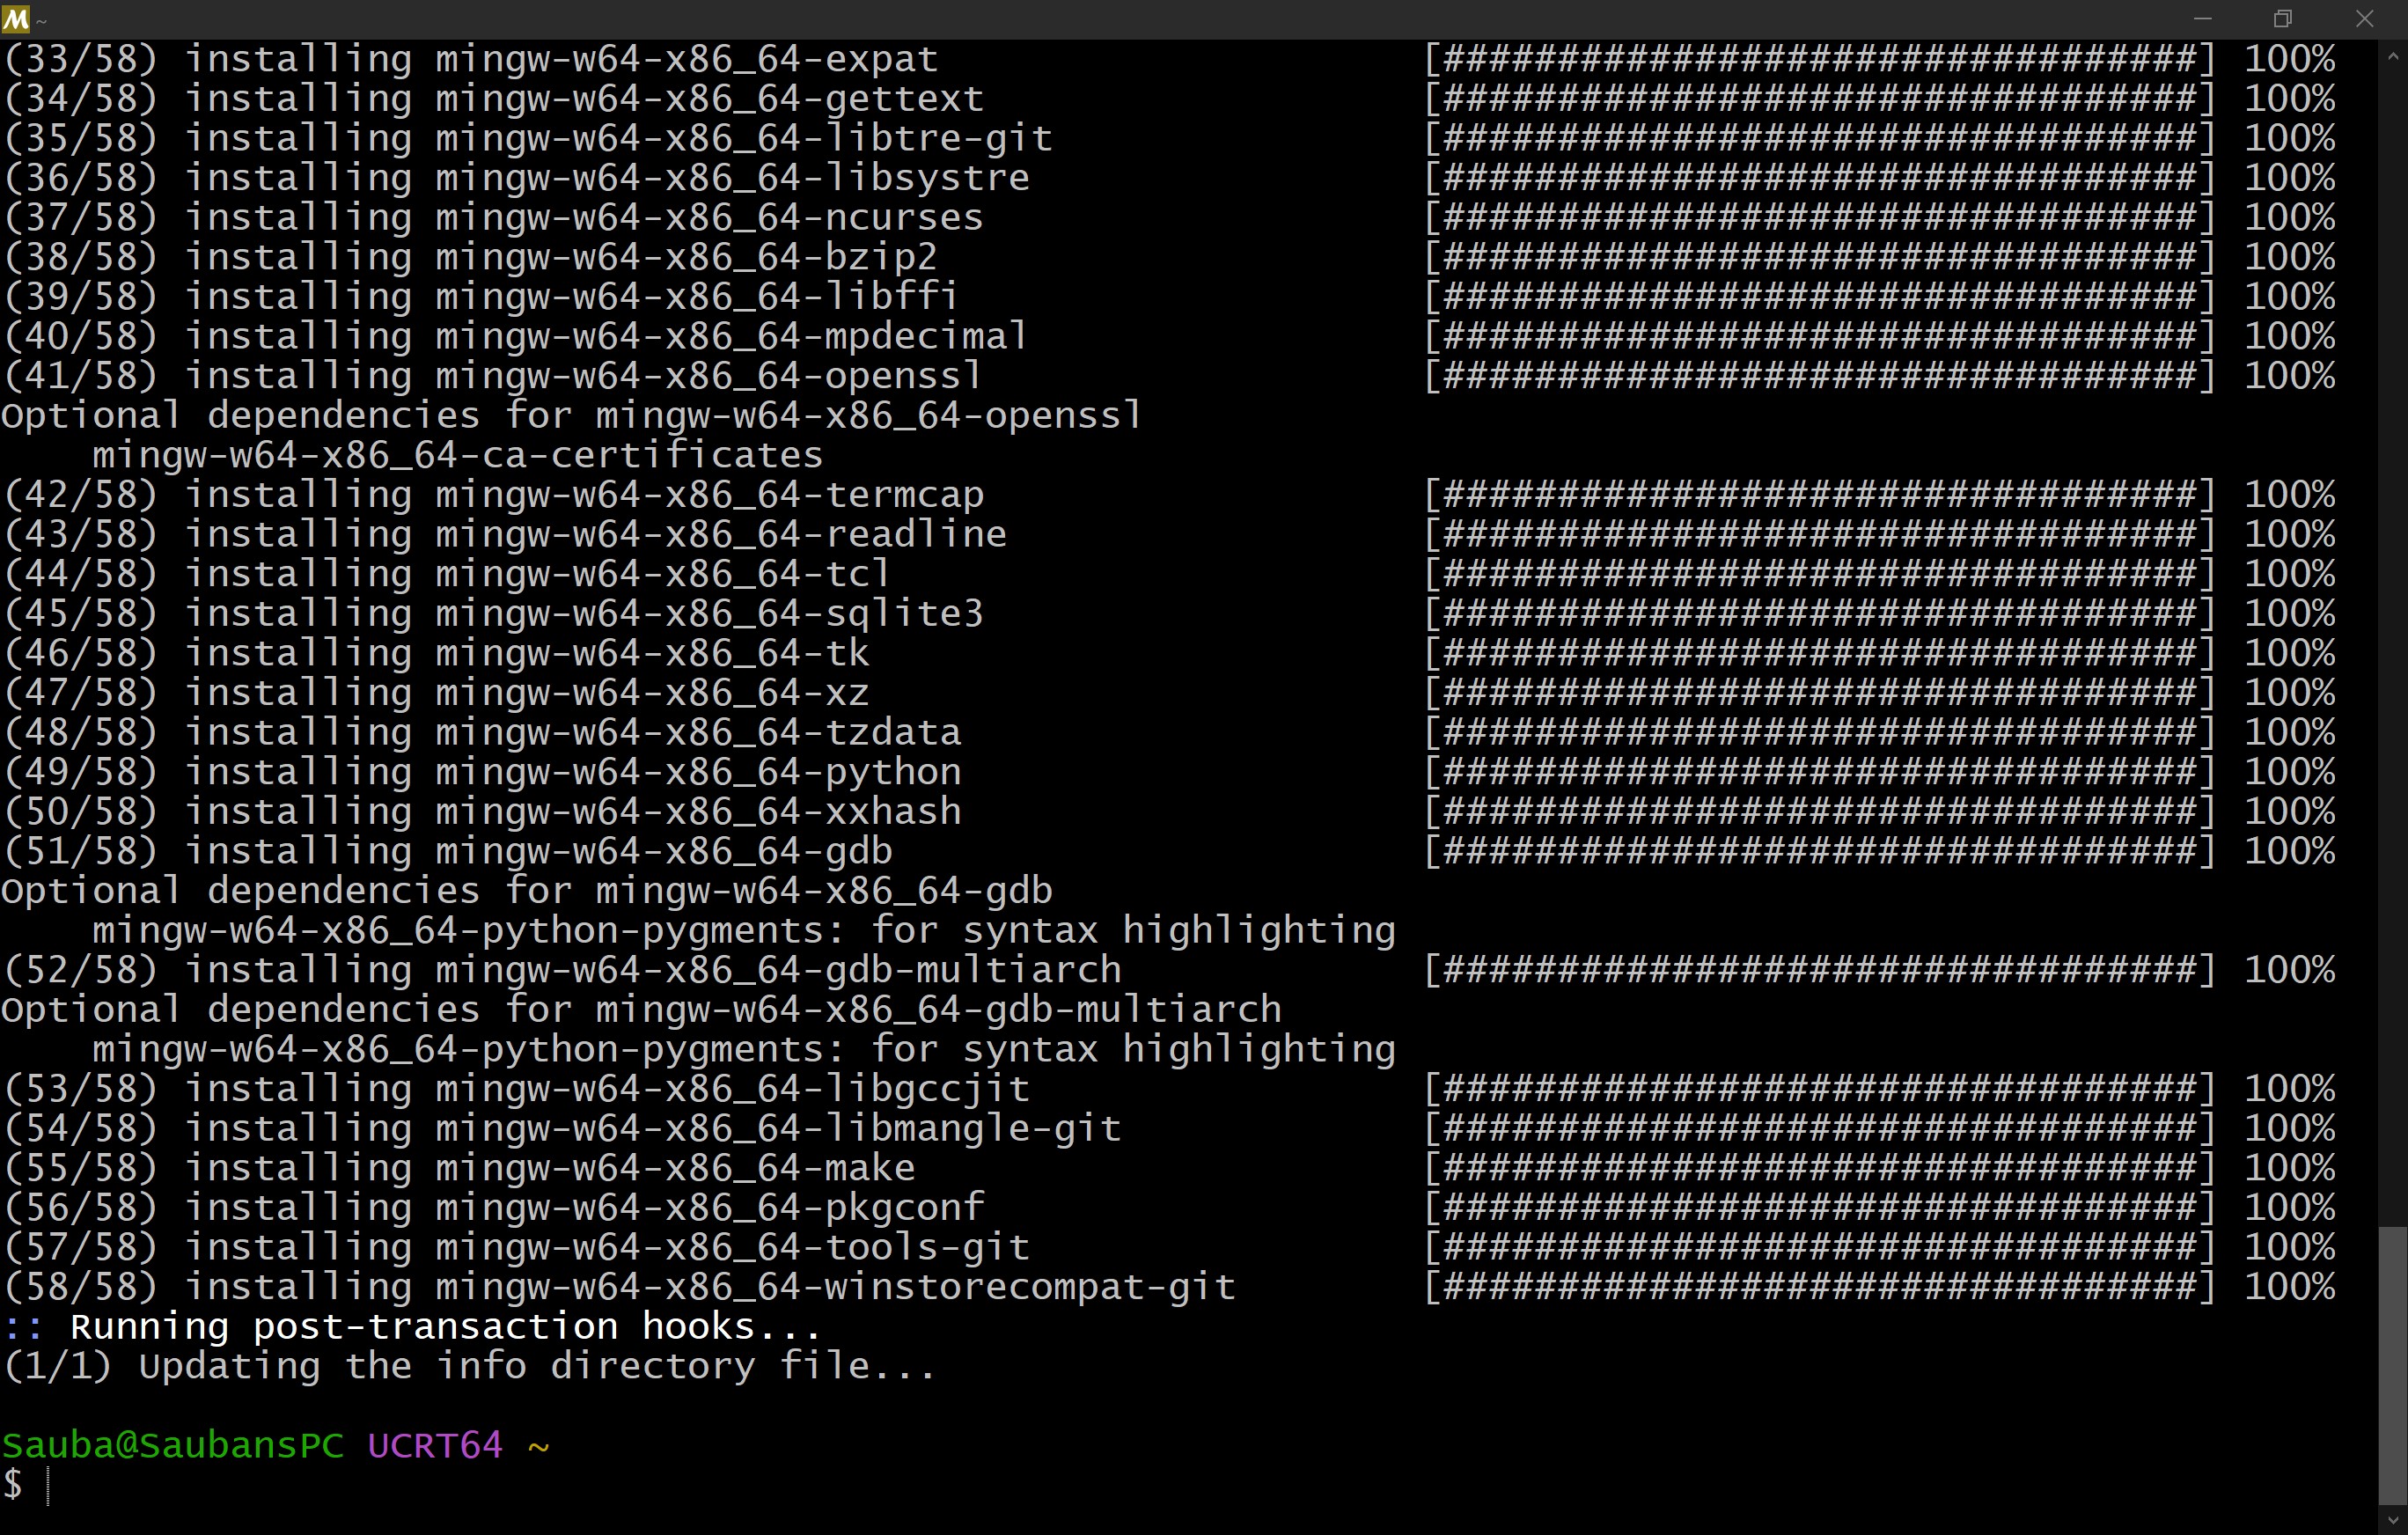
Step 51
Once it is installed, you will know when it asks for more prompts
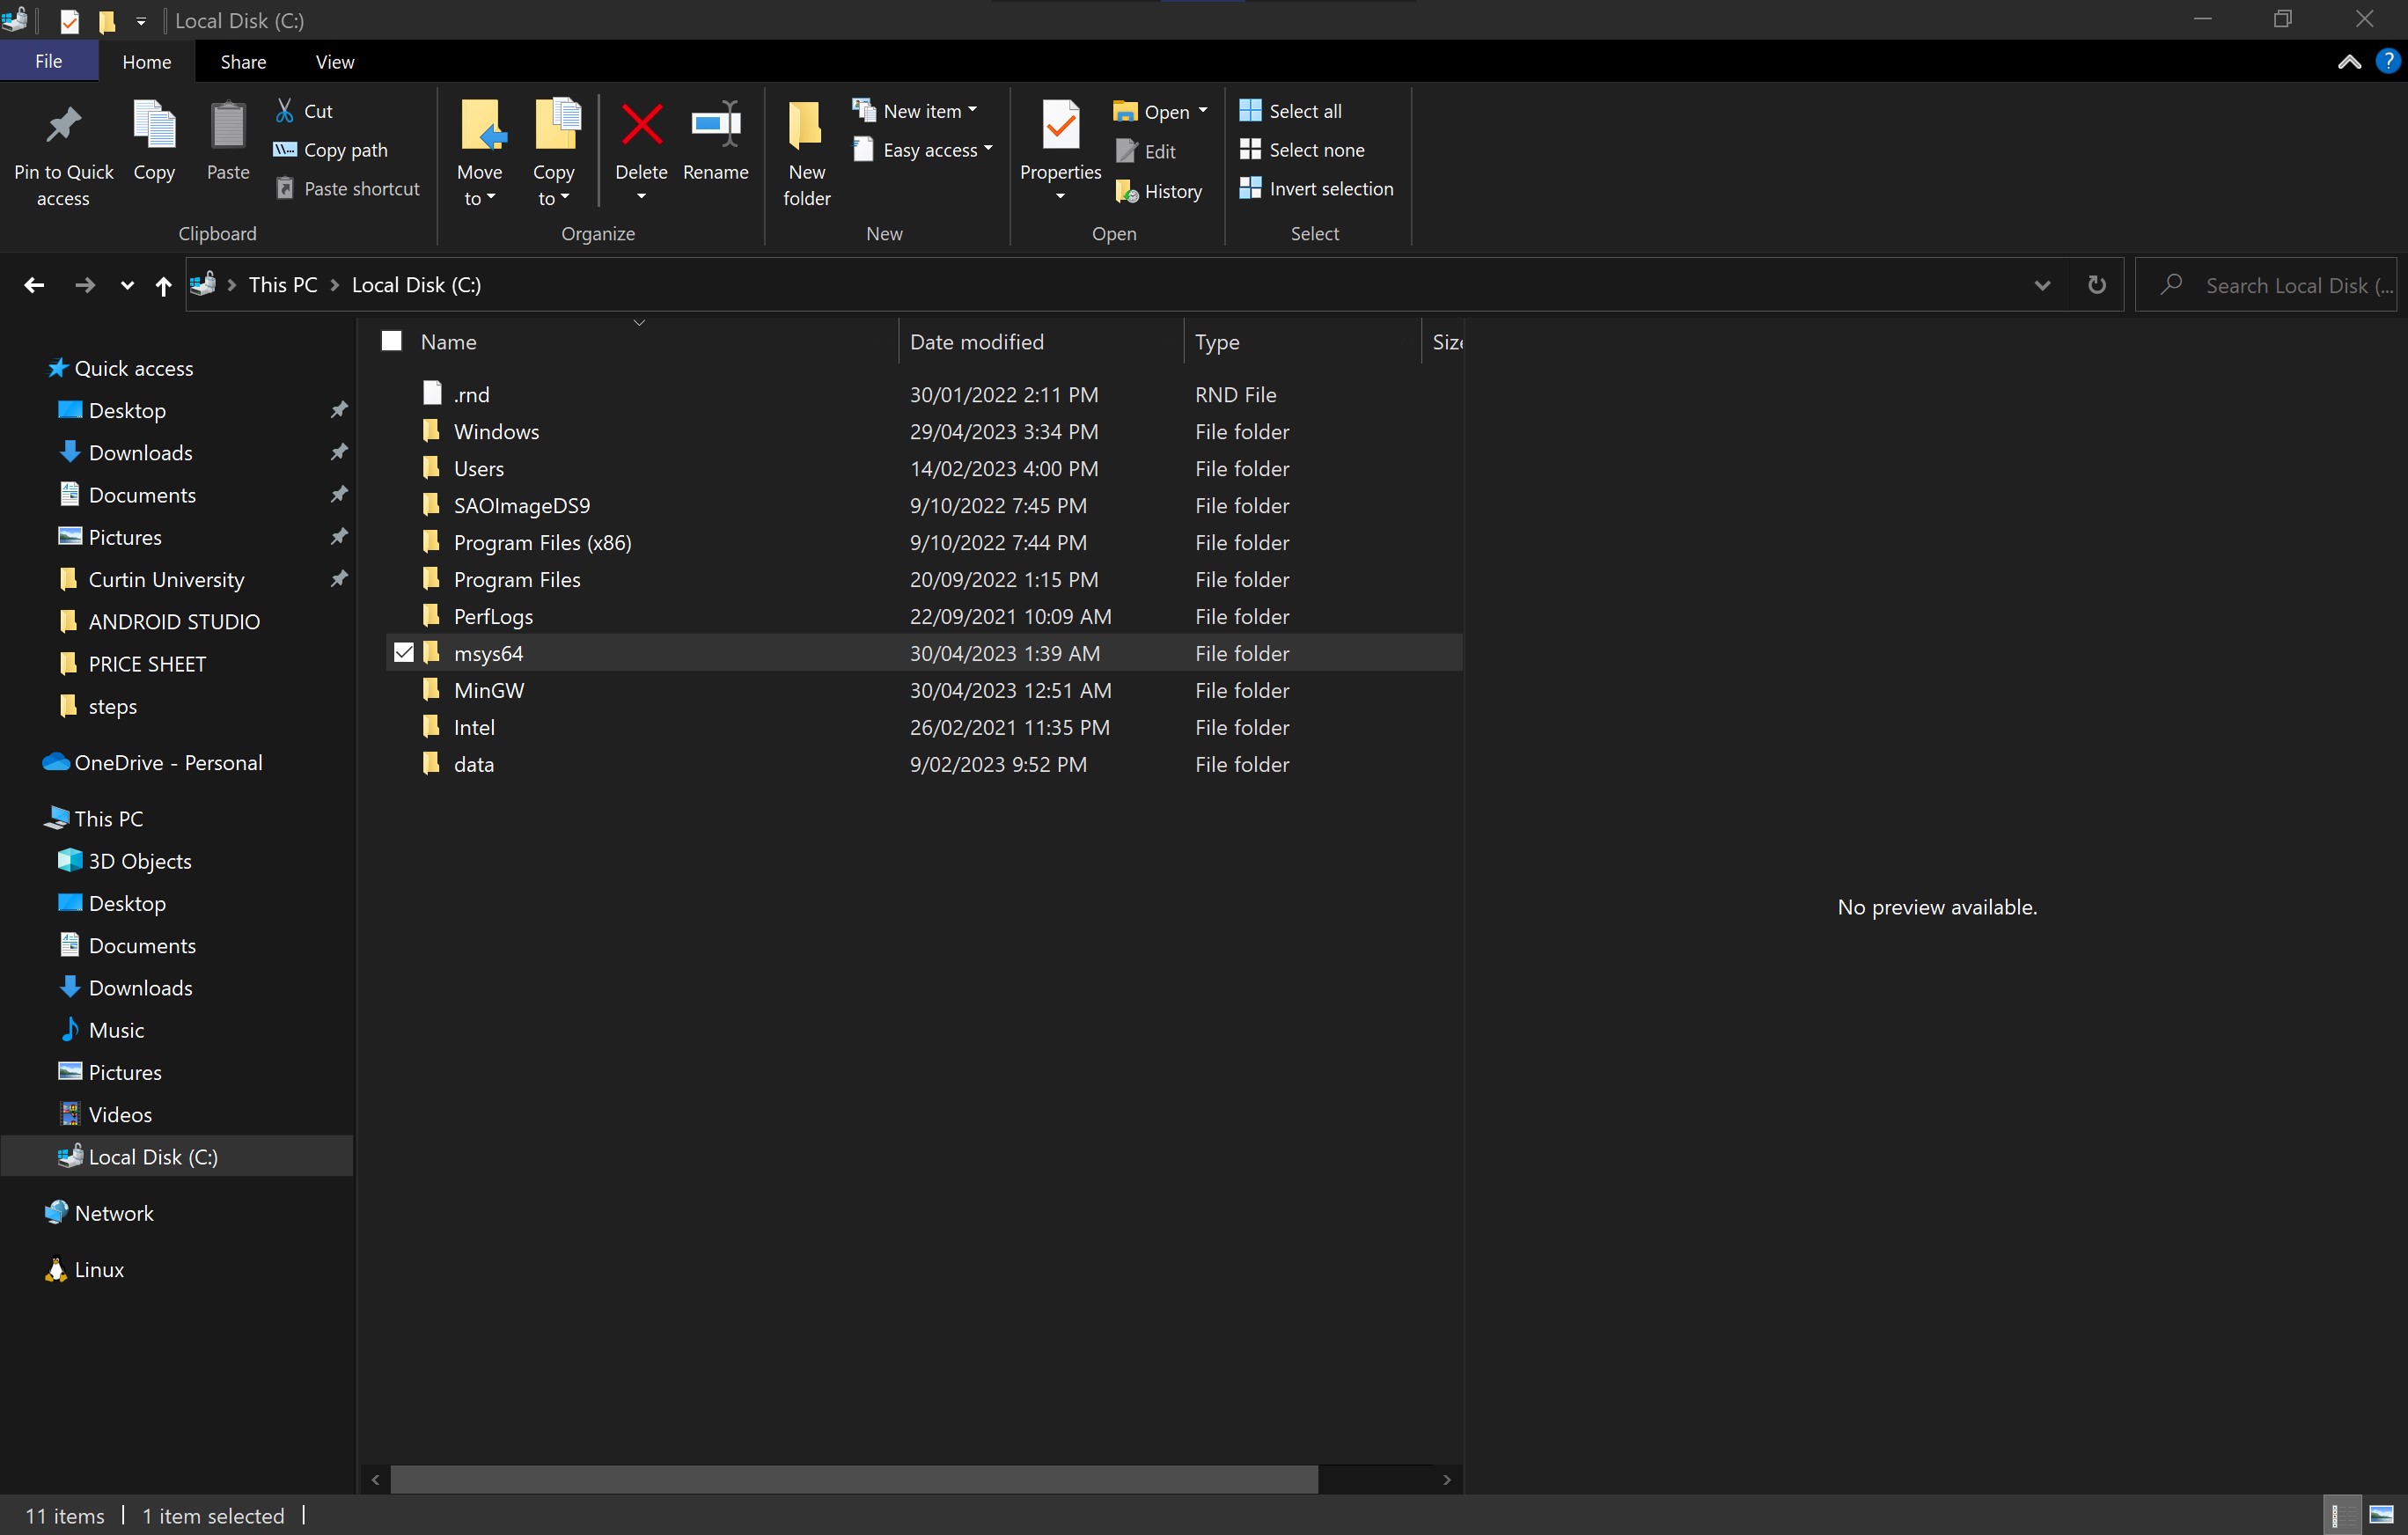
Step 52
Go to the directory where you installed MSYS. For this machine it was in C drive > msys64
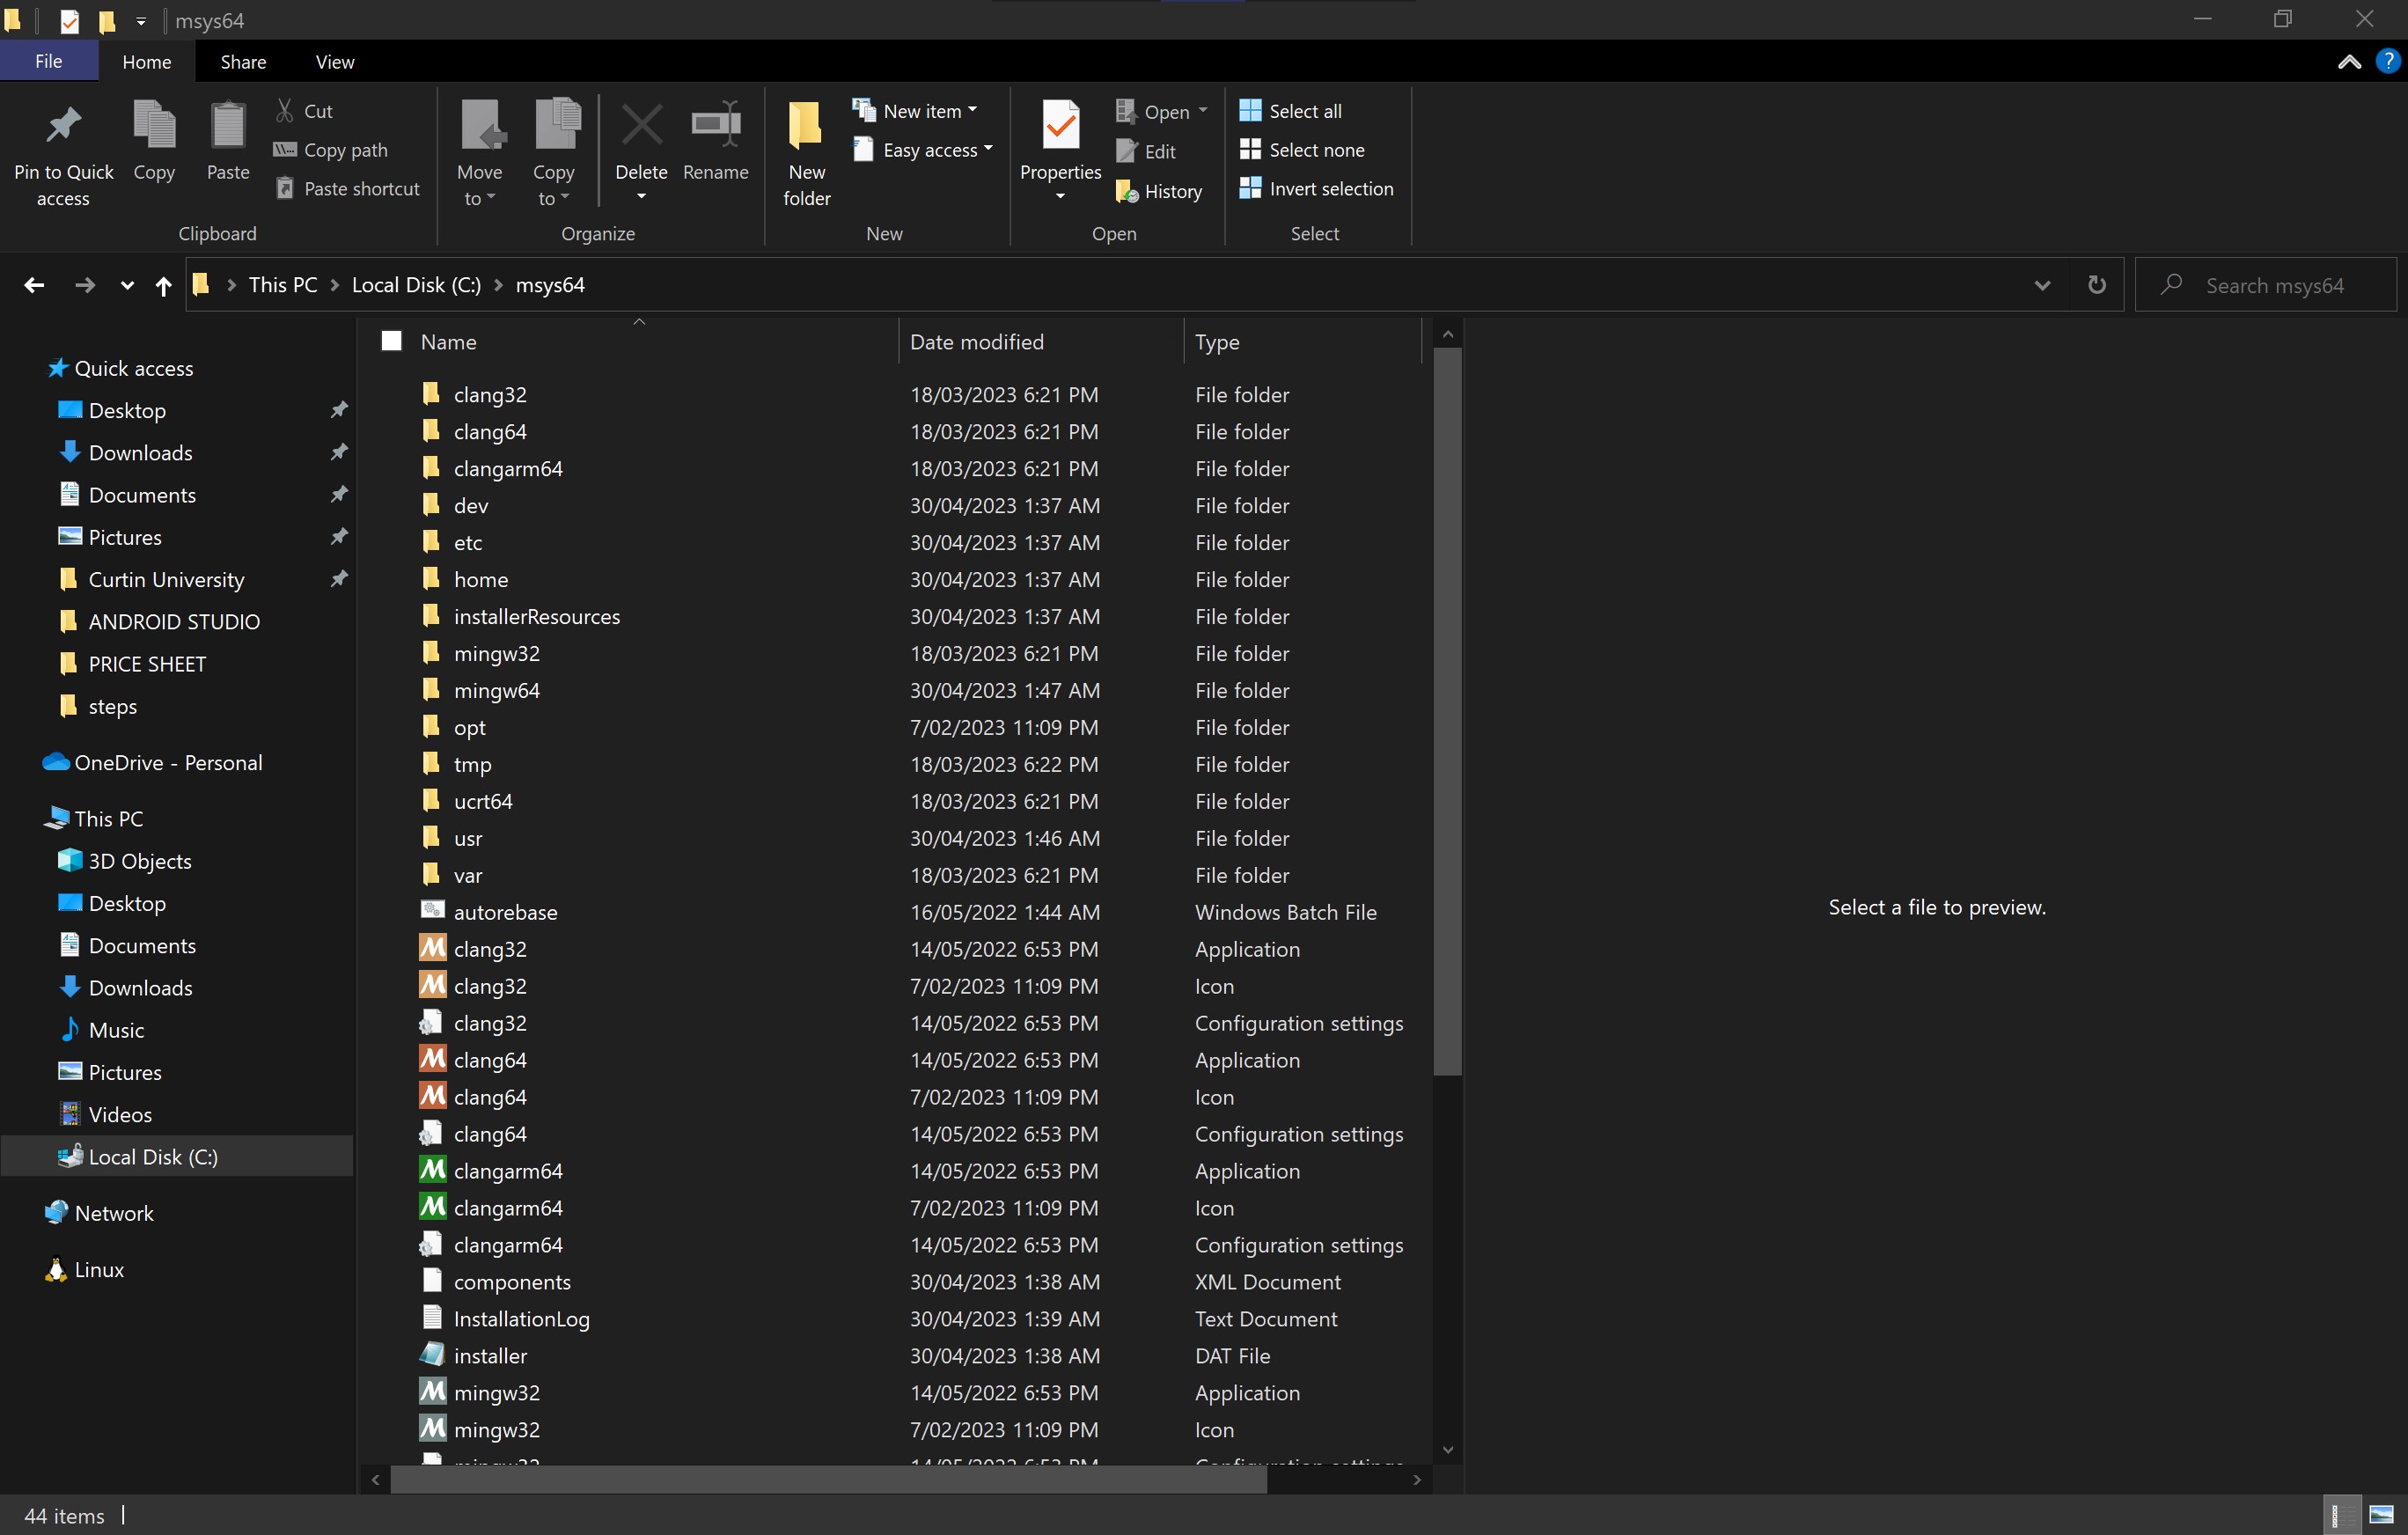
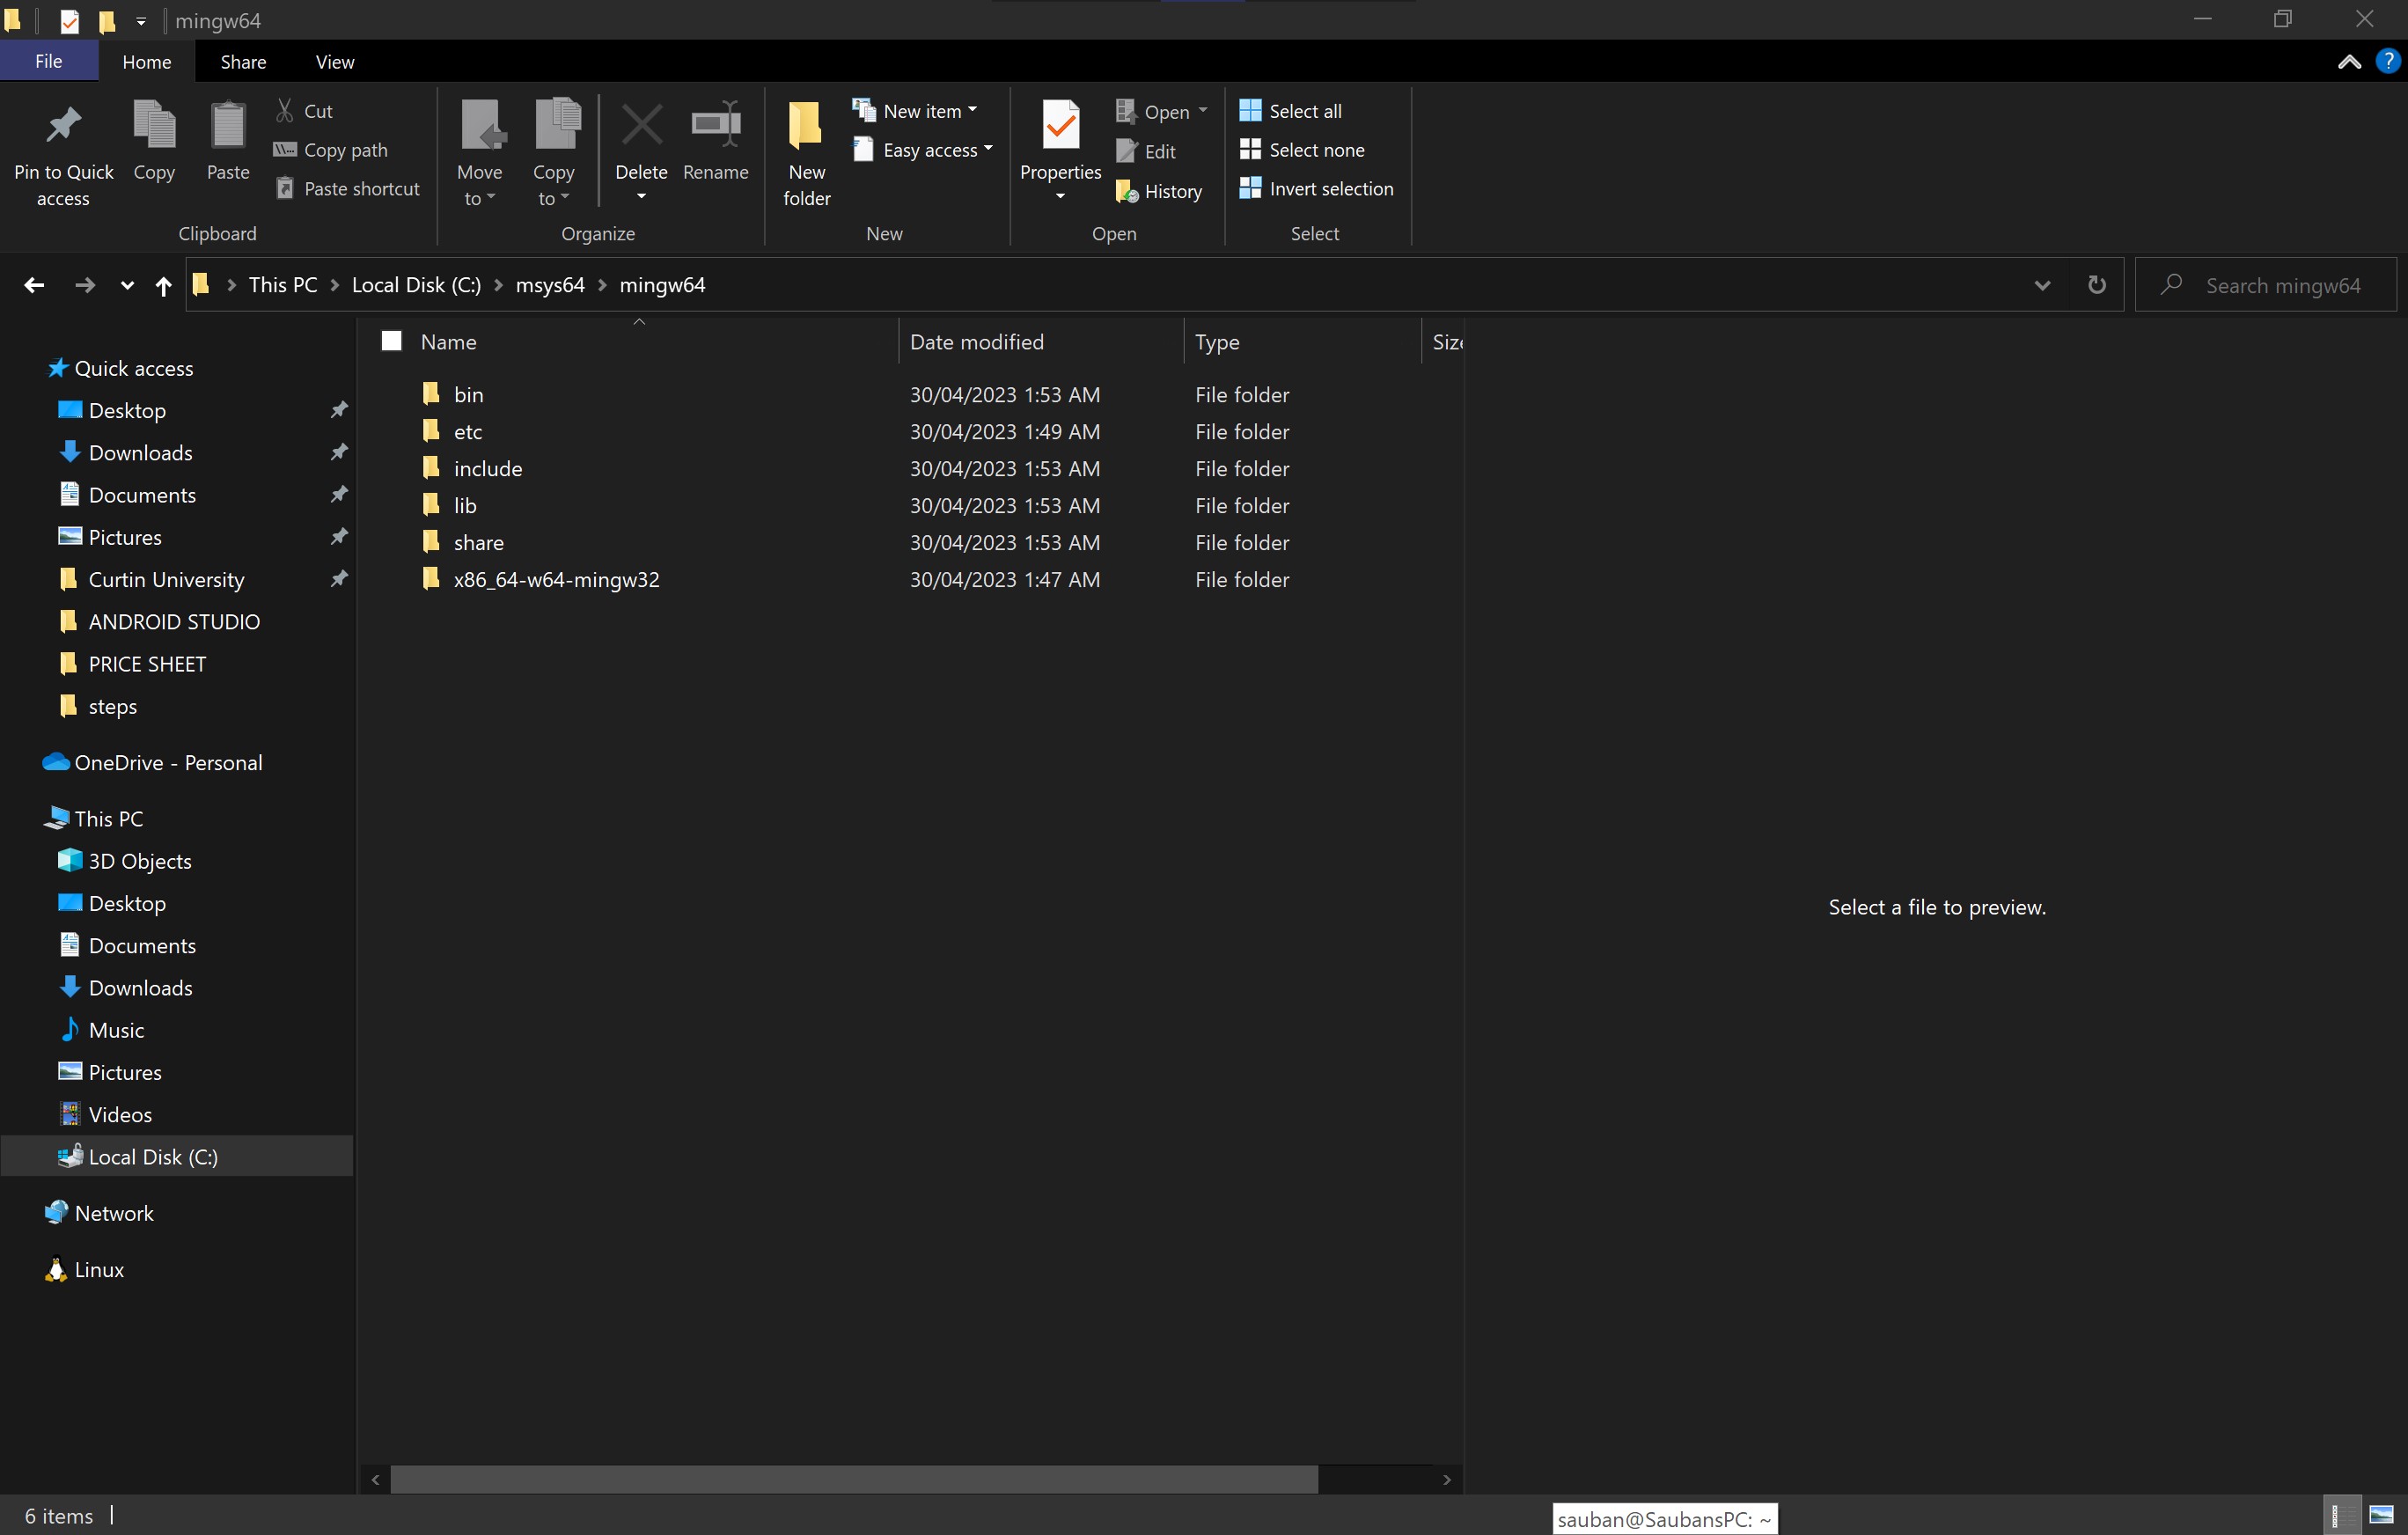
Step 53
msys64 > mingw64
Step 54
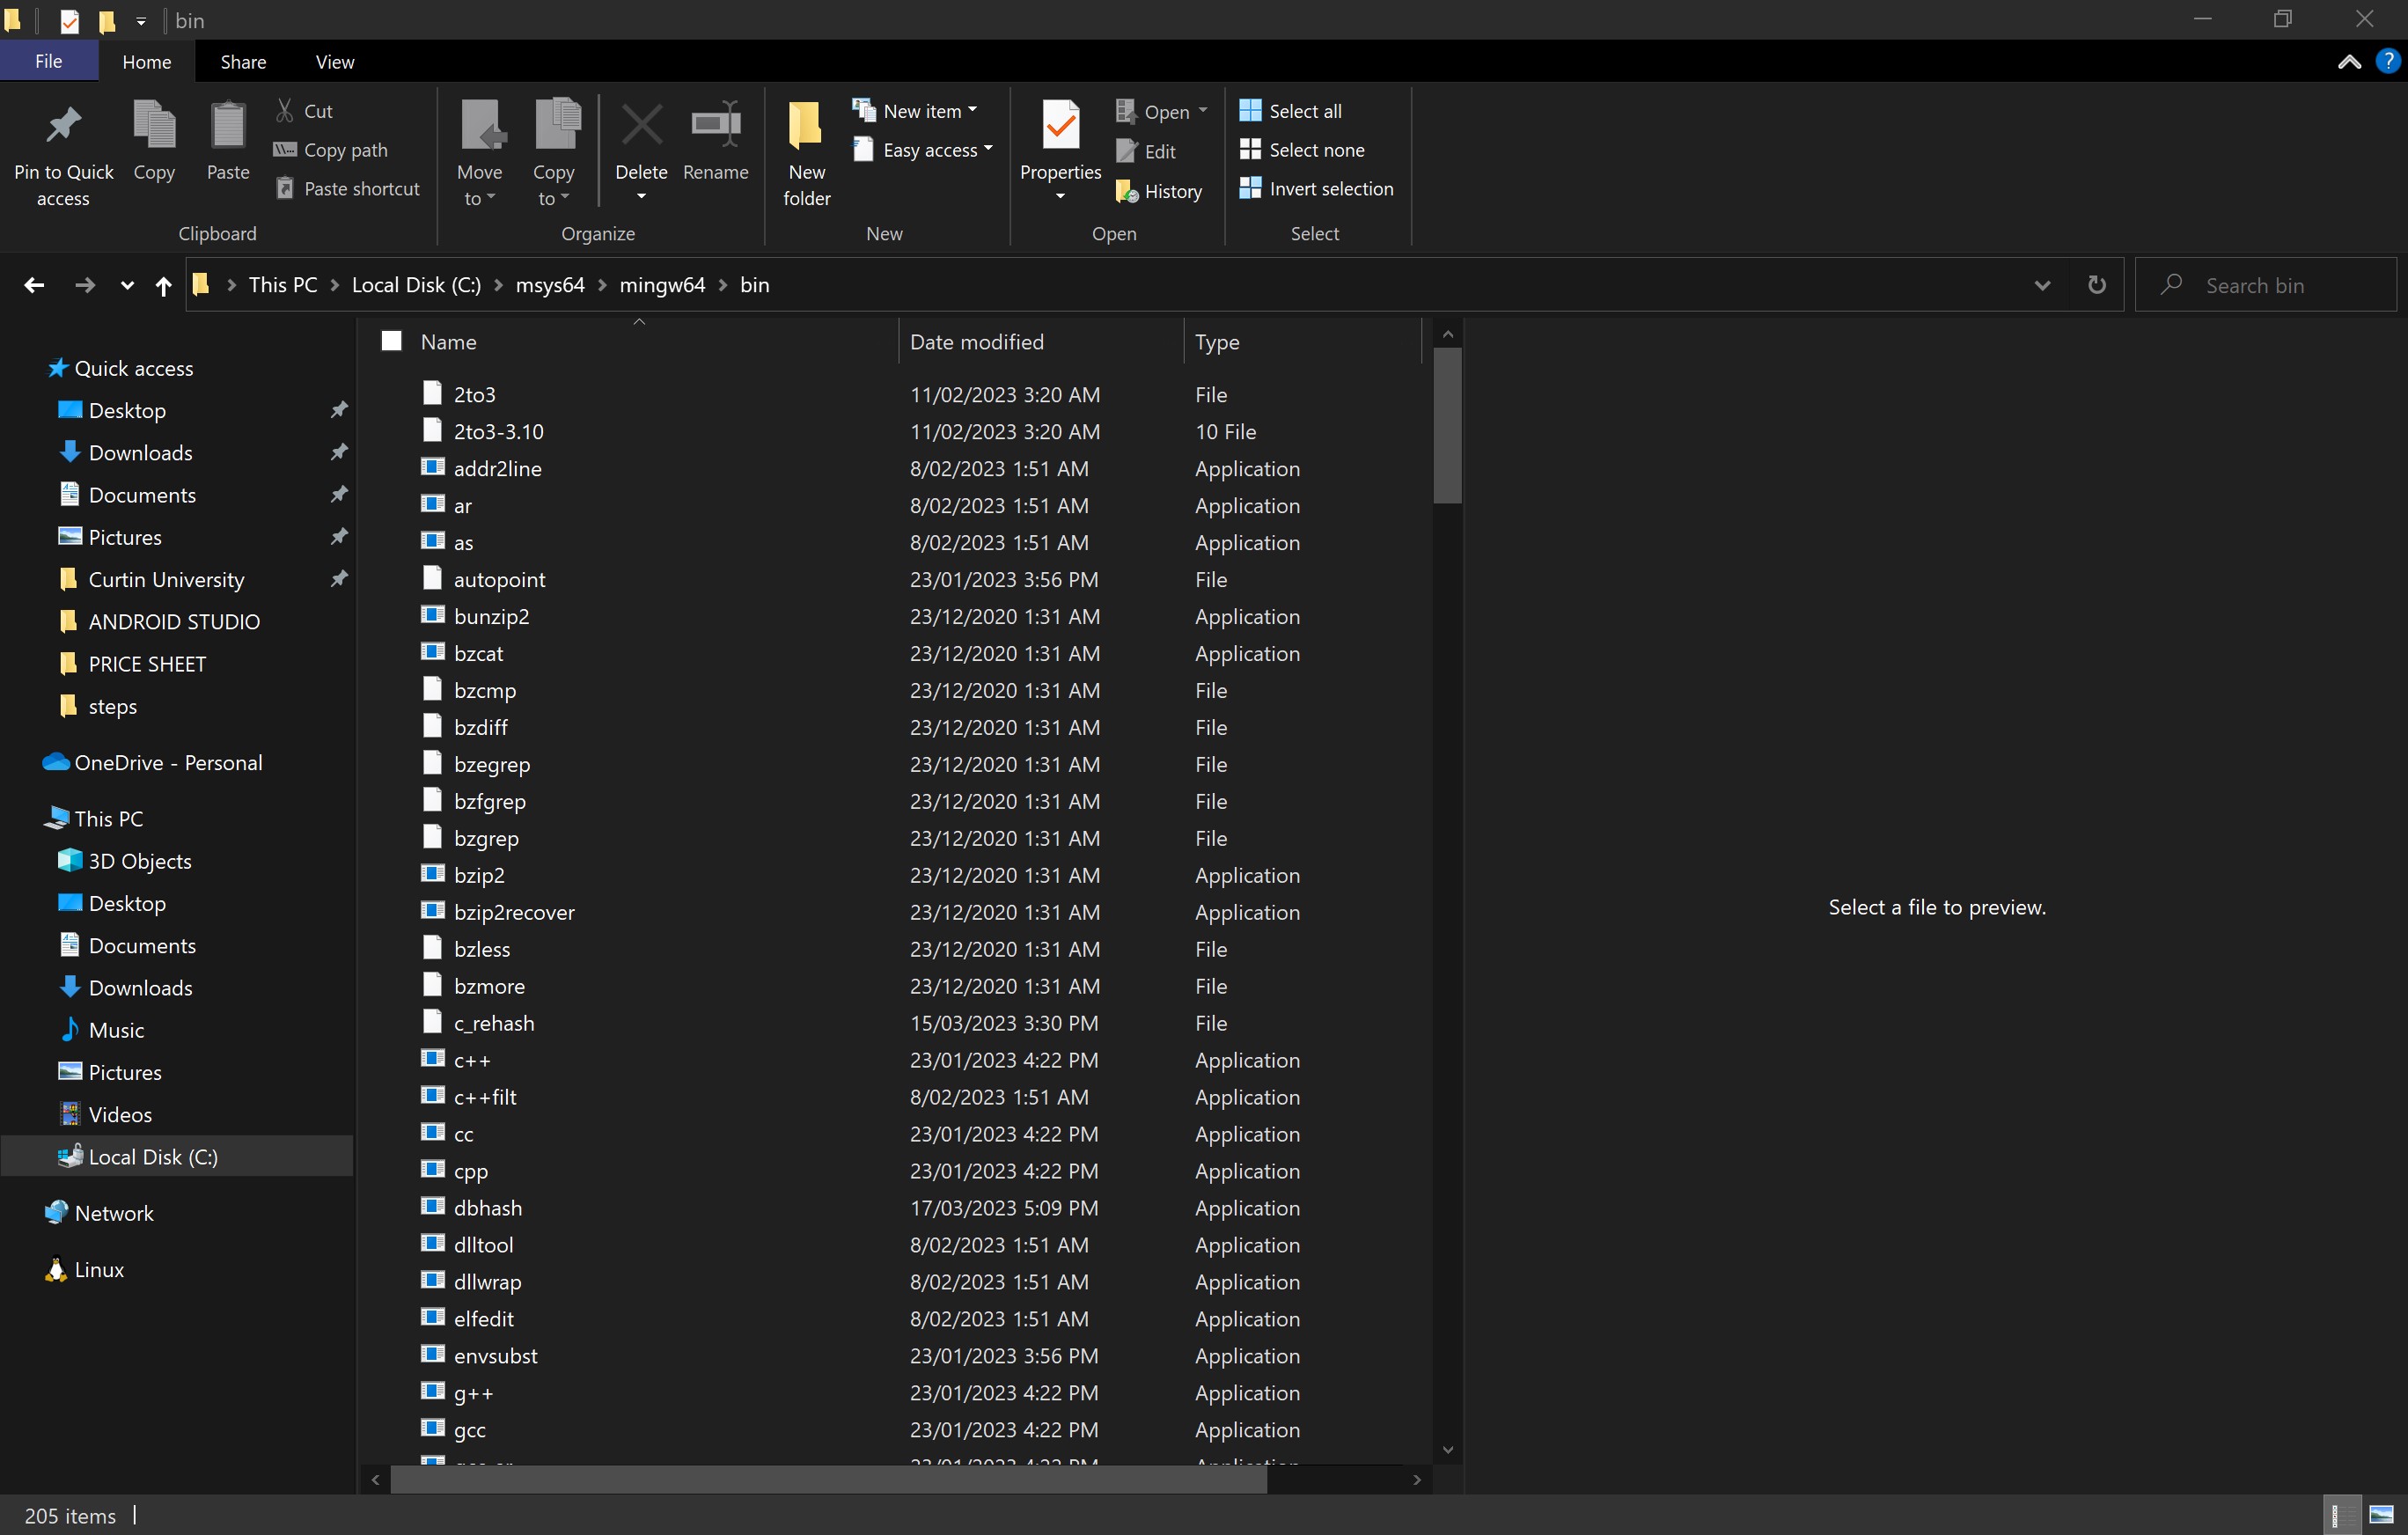
mingw64 > bin
Step 55
Here is where the gcc executable lies.
Step 56
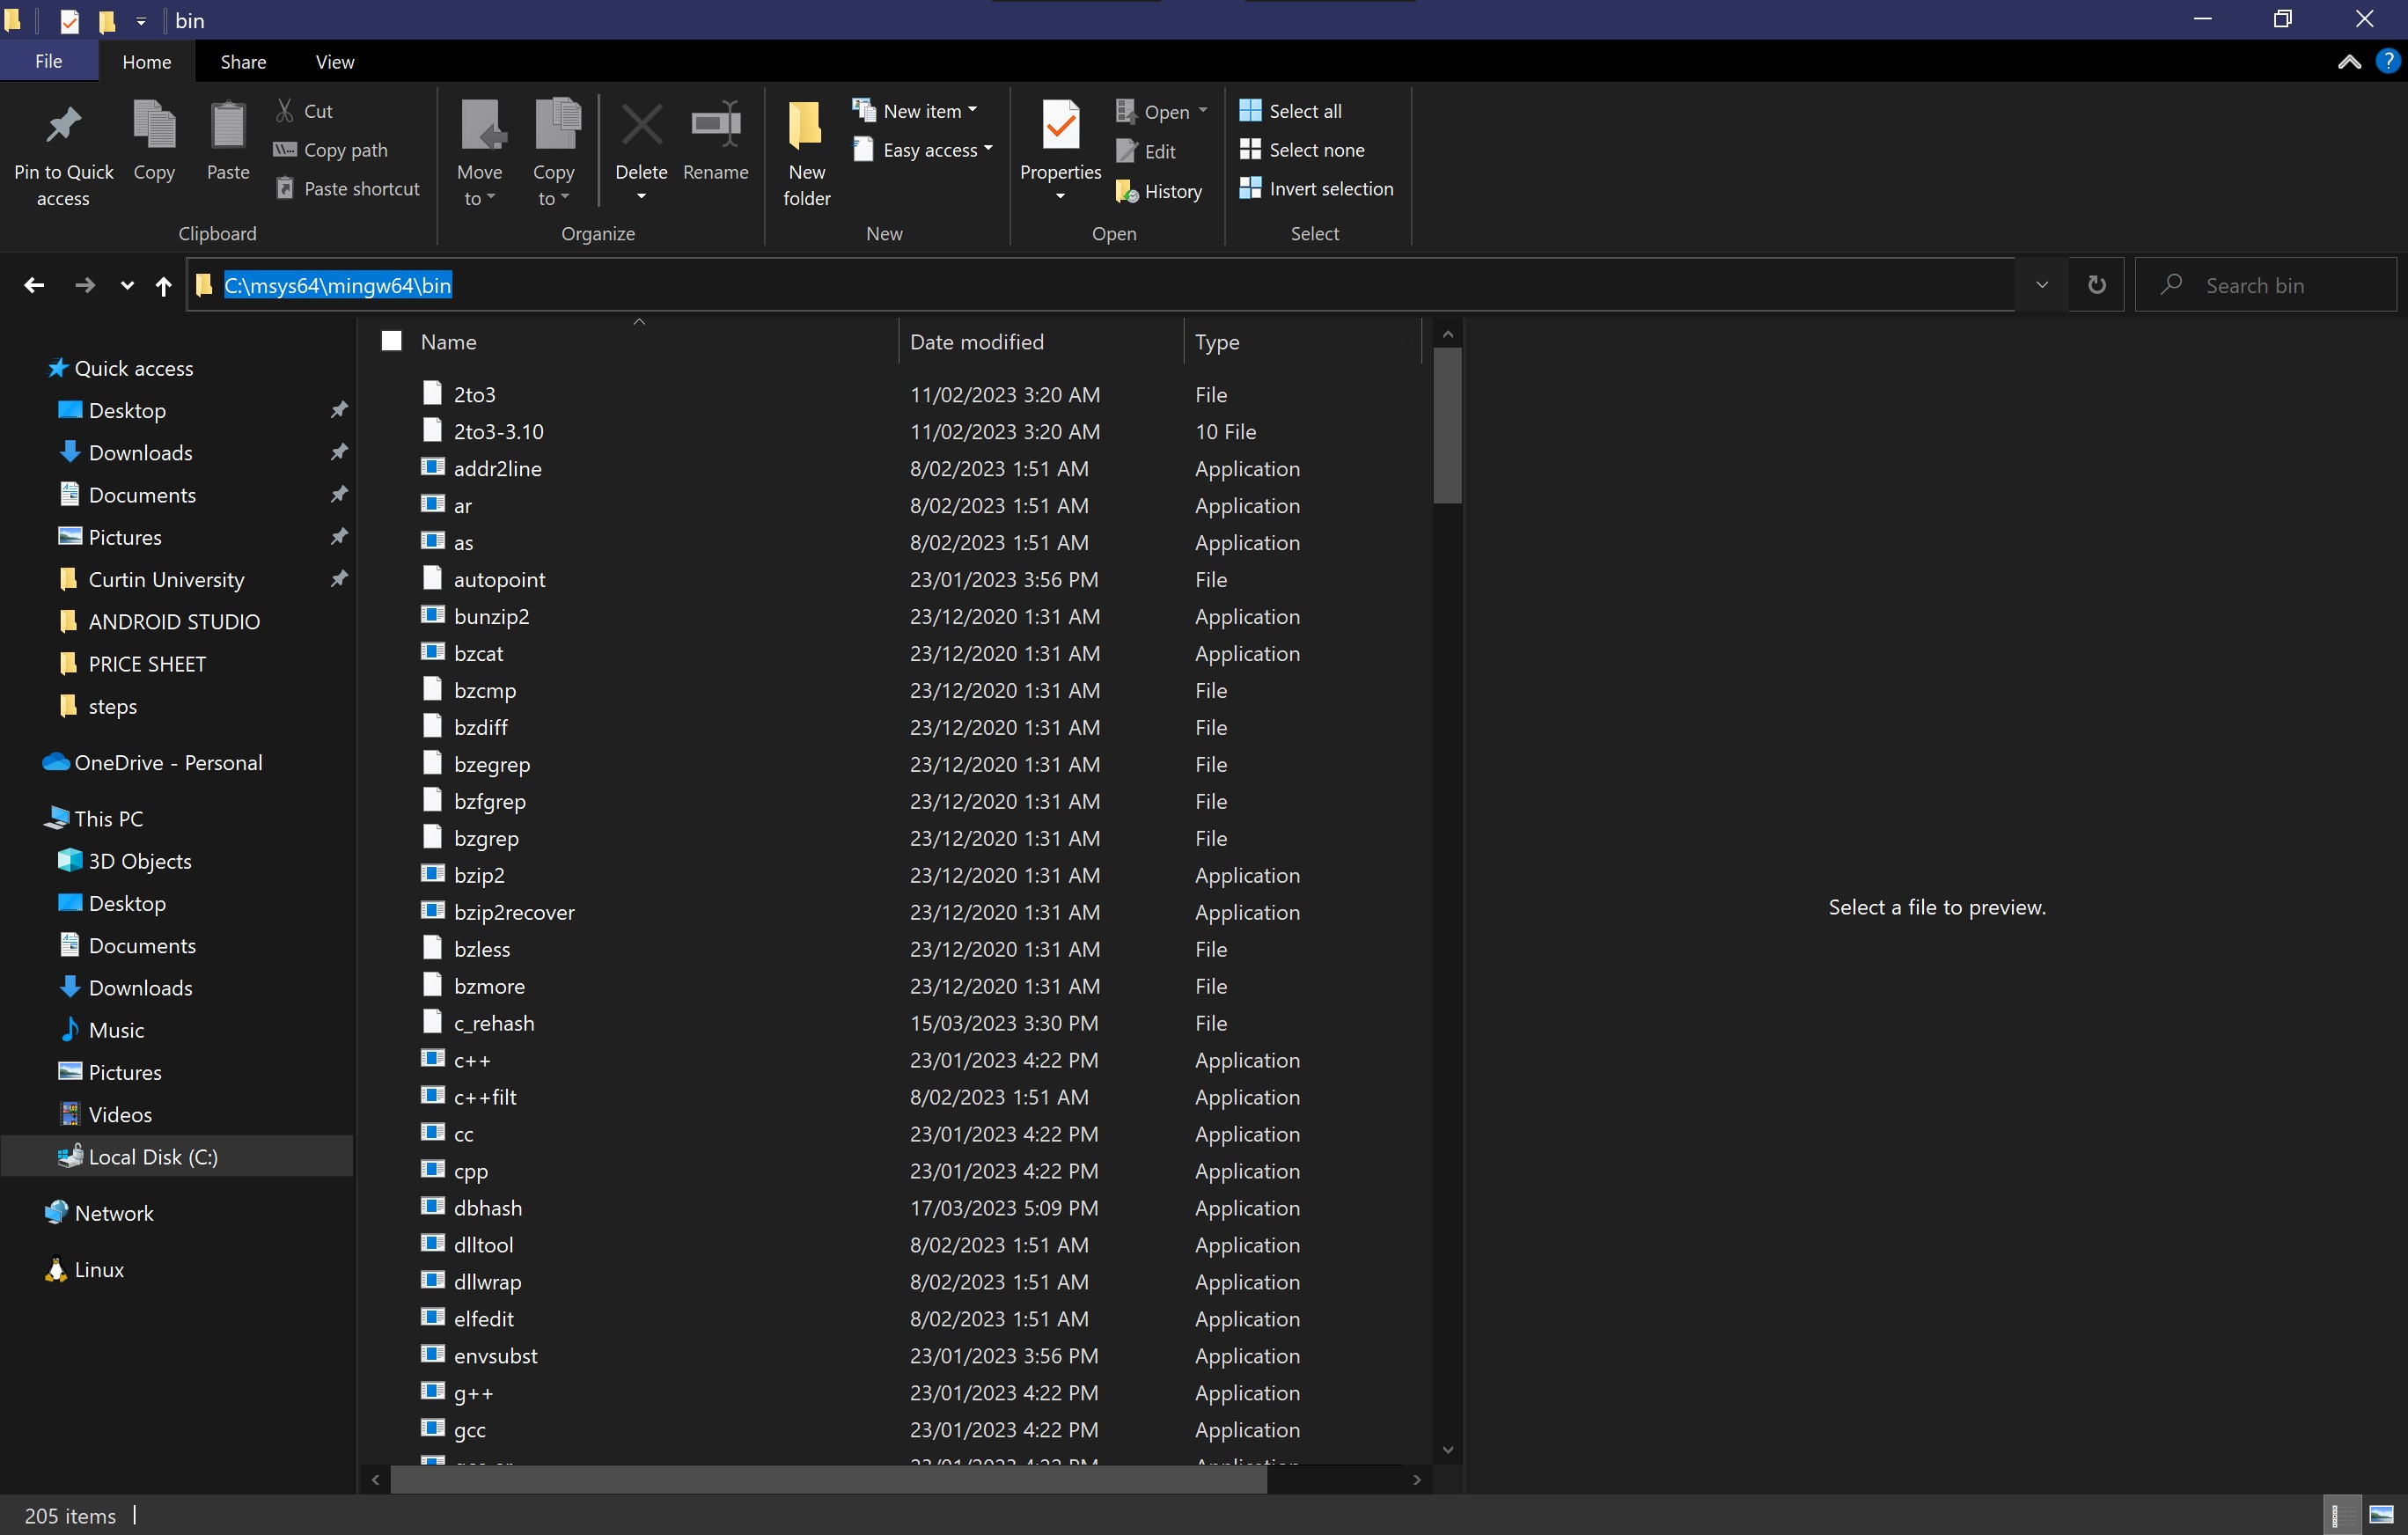
Copy the directory
Step 57
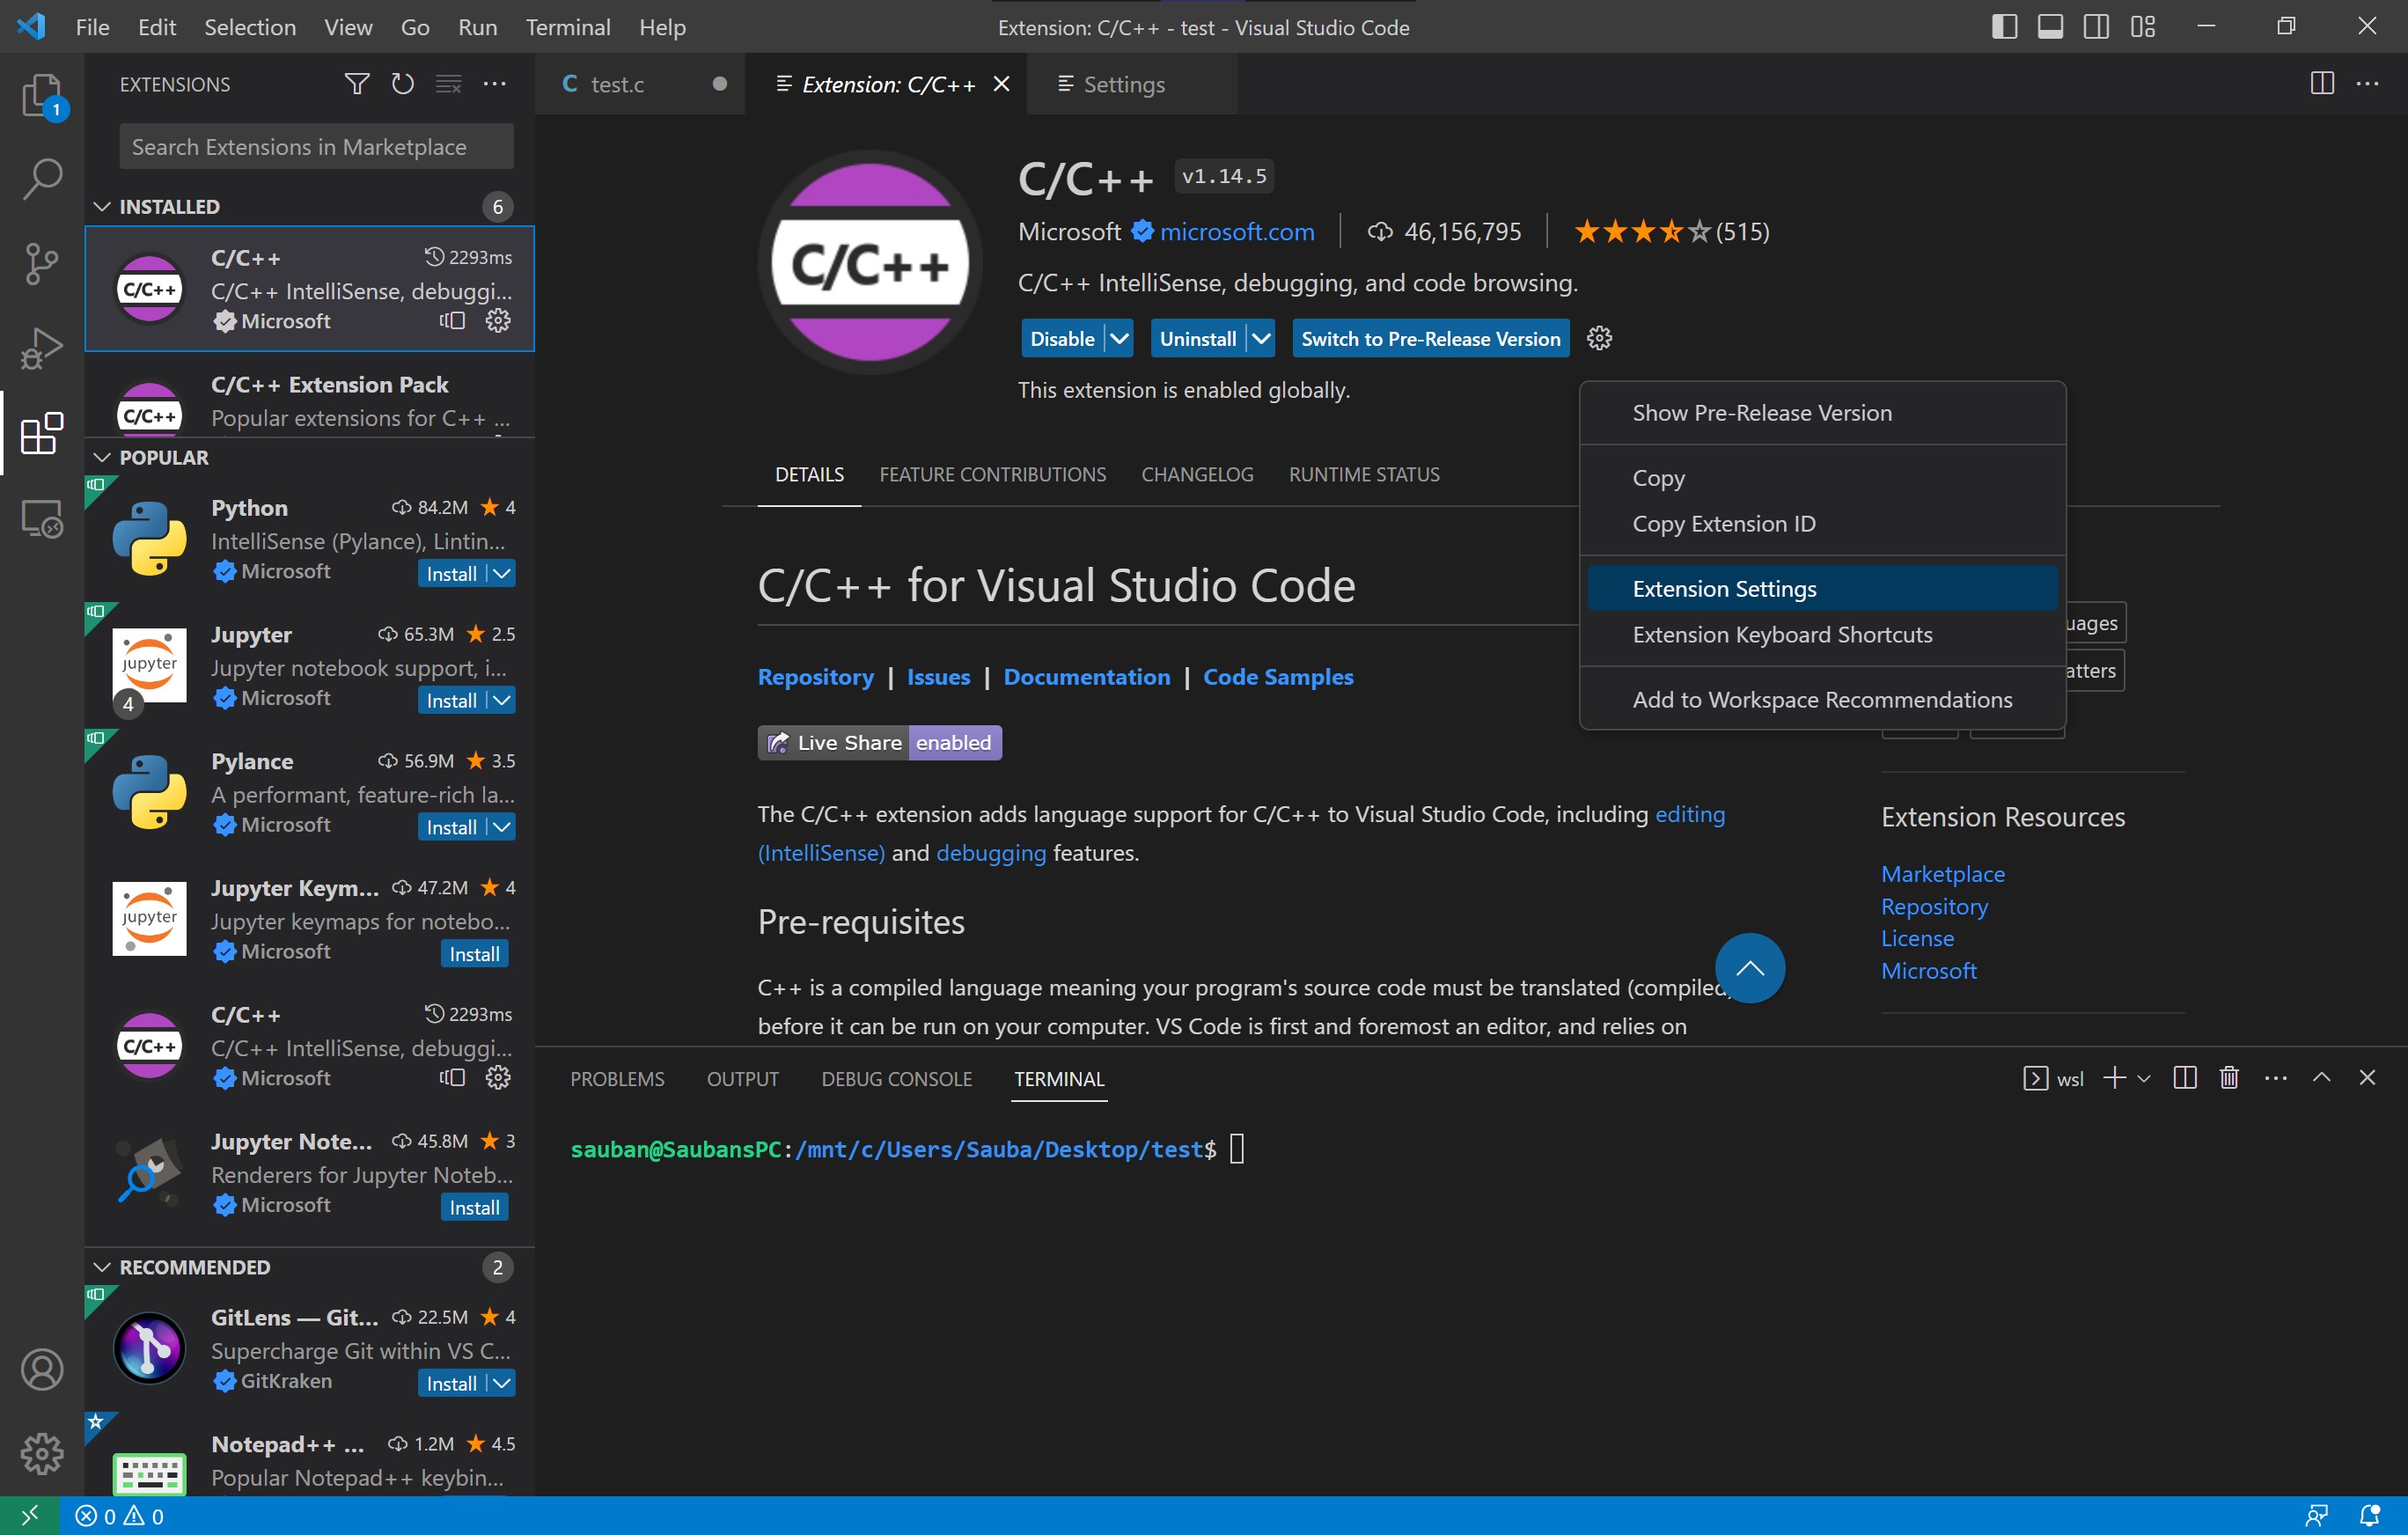
Once you have copied the directory, go back to the extensions page in VSC and click on its setting
Step 58
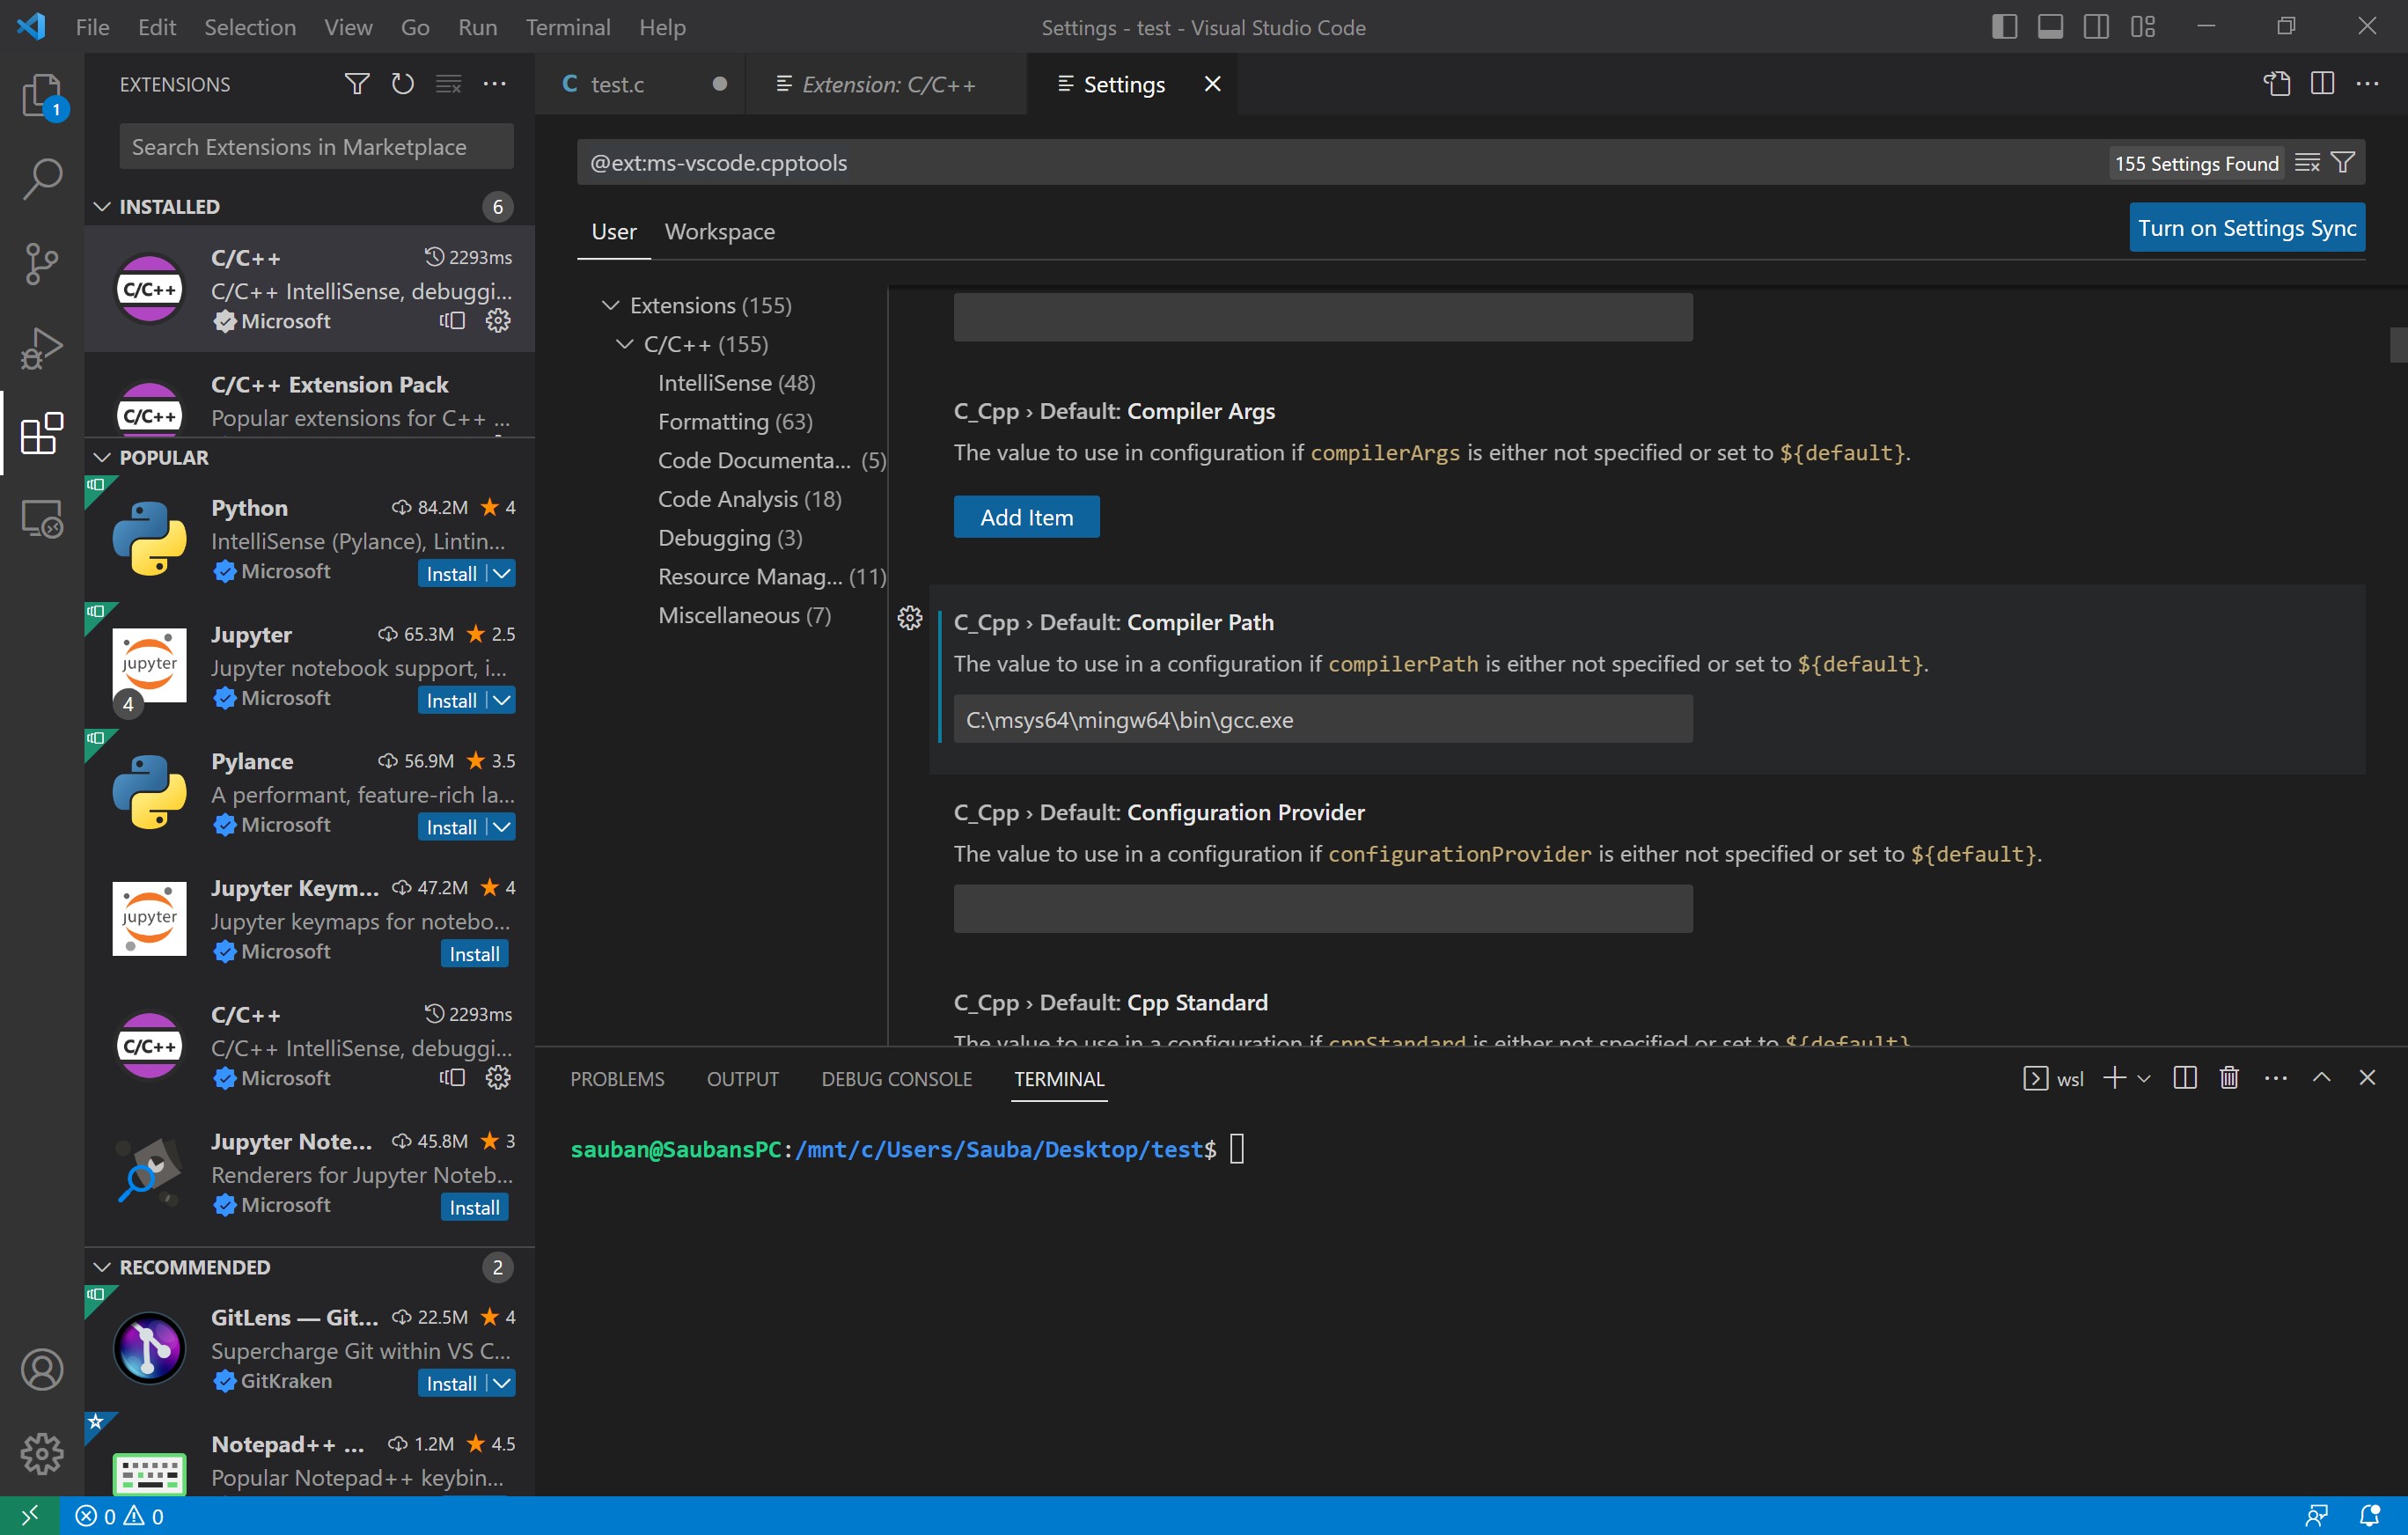
Scroll down until you find C_CPP: Default Compiler and paste in your directory. After the \bin, add gcc.exe as shown in the screenshot. This will now set your default compiler
Step 59
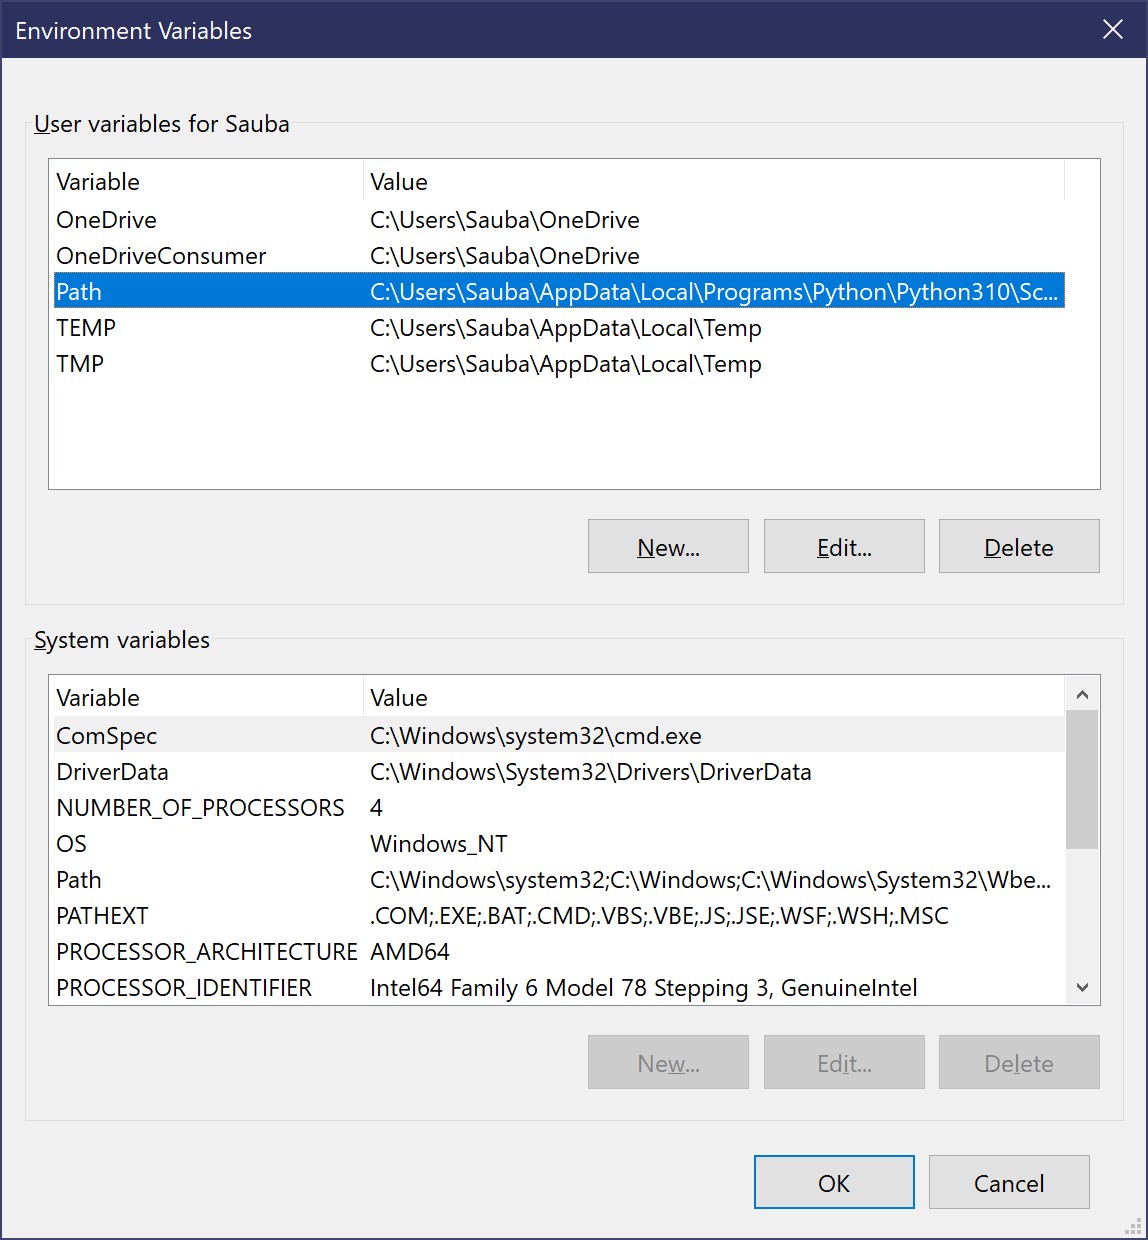
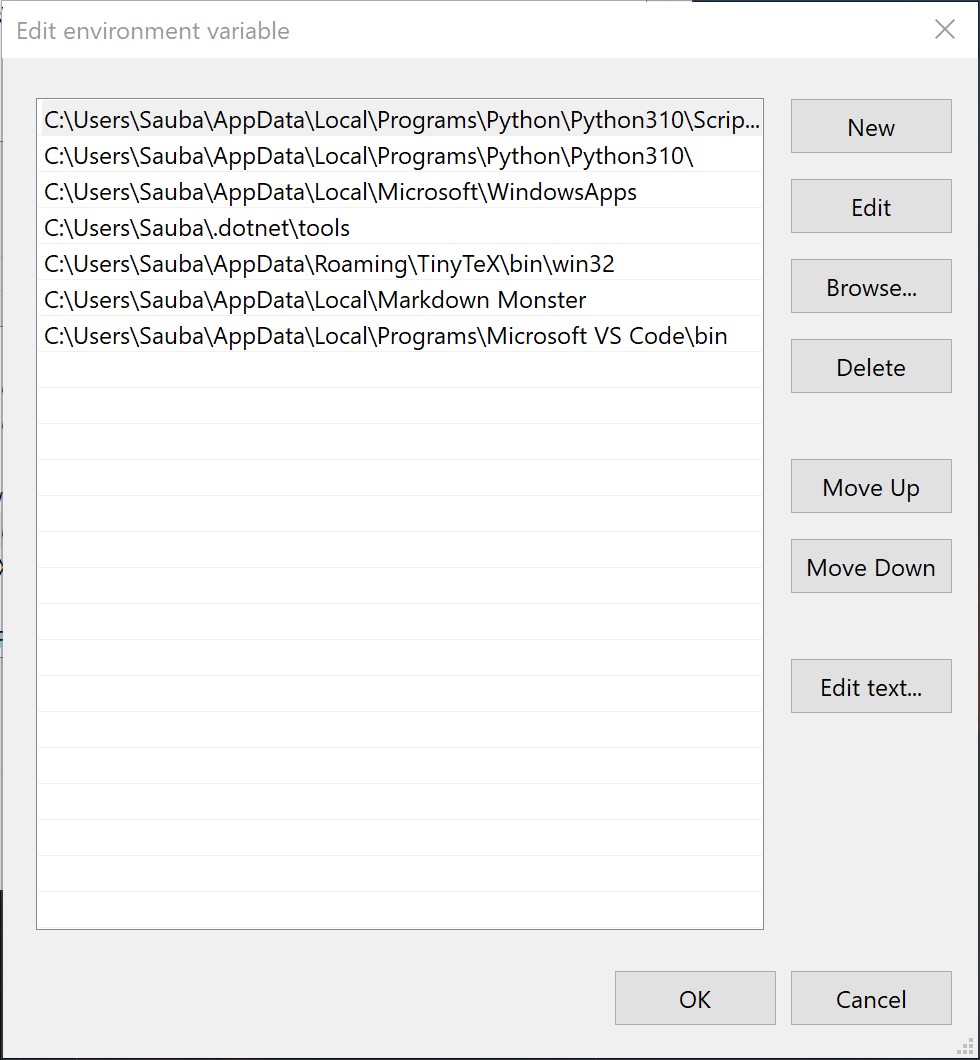
Next step is to add it into your PATH in your machine. Click on the Windows button, and type in edit environment variables. The window should look similar to the screeshot. Click on PATH and then the Edit button
Step 60
Click new.
Step 61
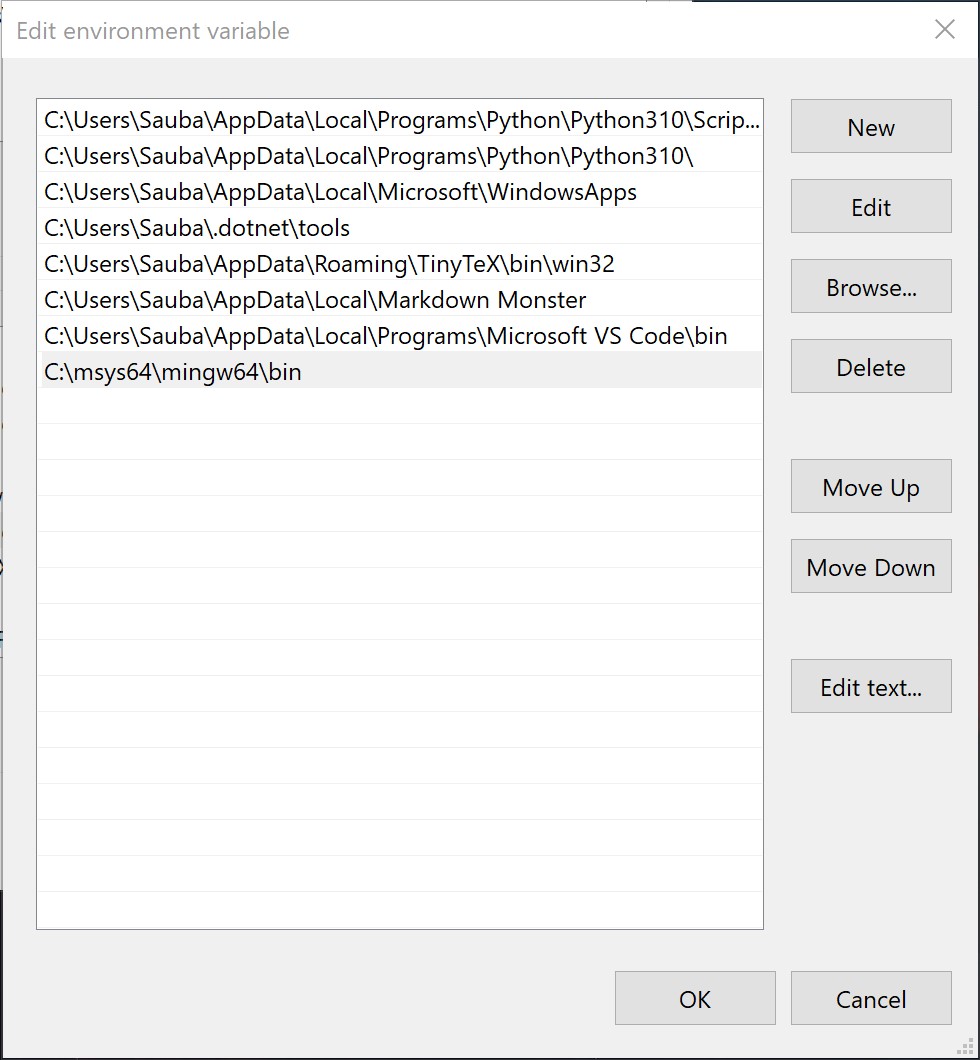
Add your copied directory but without the gcc.exe bit.
Step 62
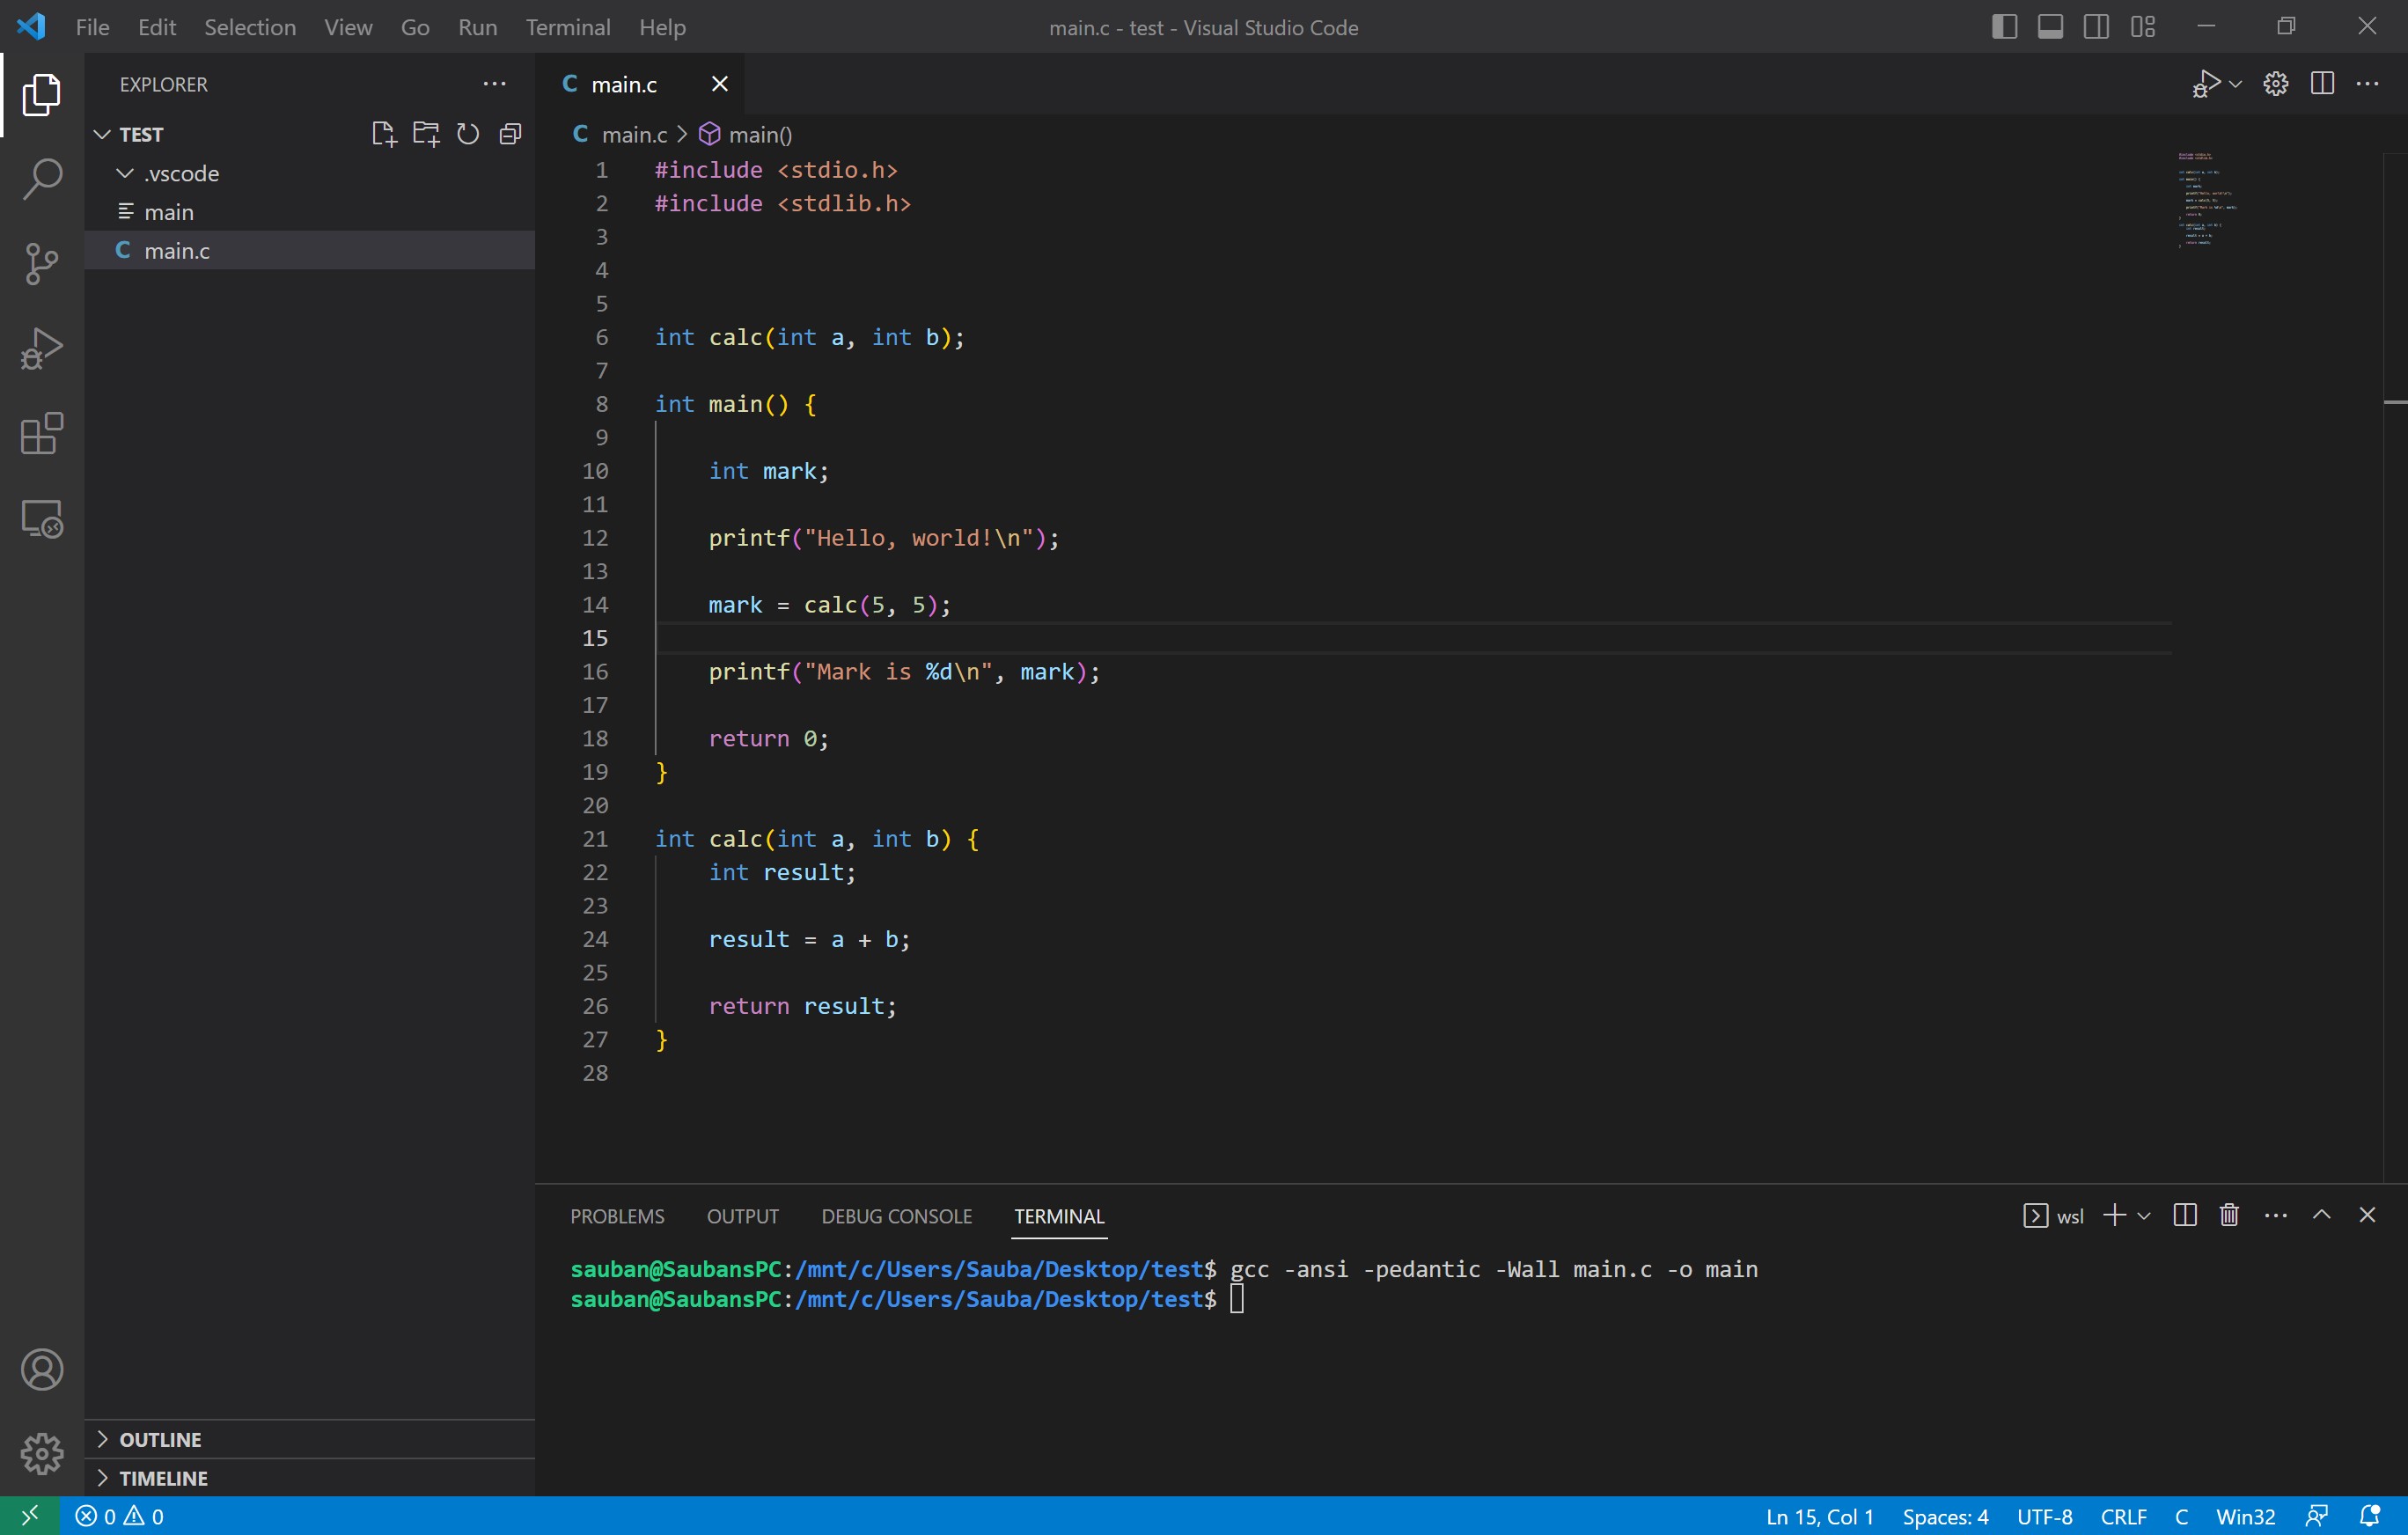
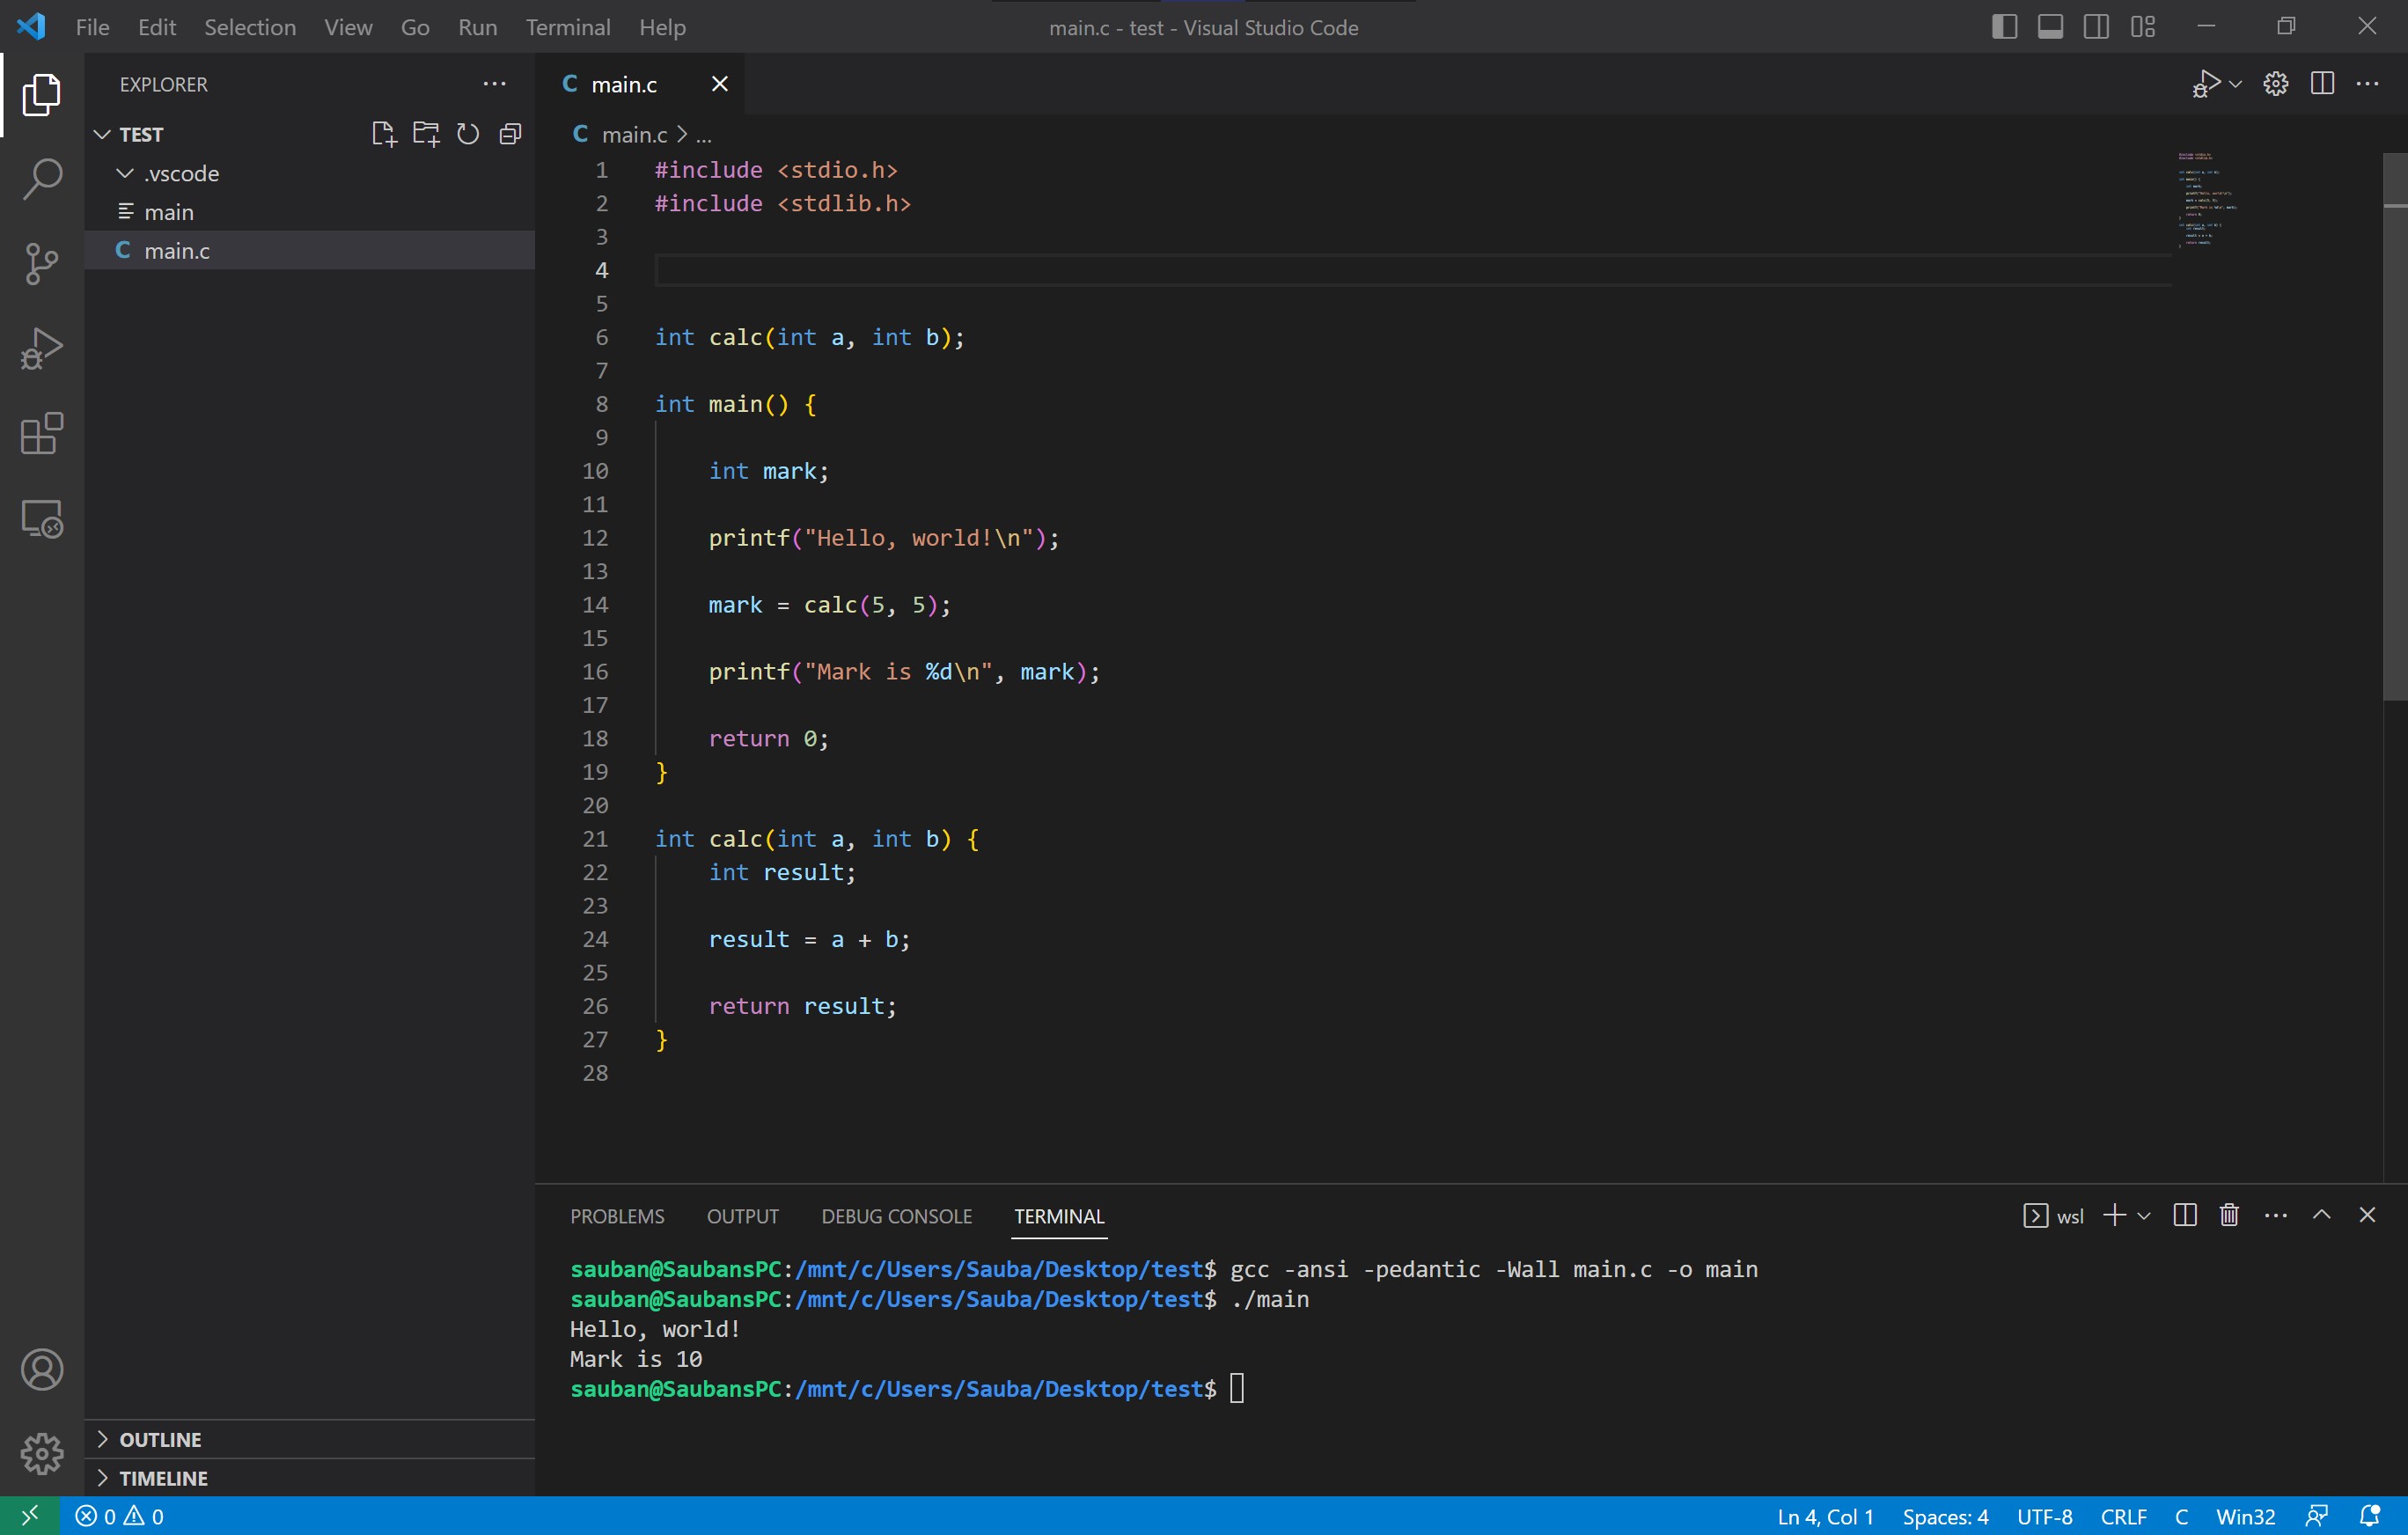
Now back to VScode, and you can see the error has gone. I created another program called main.c that just outputs Hello World and an addition of 2 numbers. To run it, in the terminal type in:
gcc -ansi -pedantic -Wall -Werror main.c -o main
Now note this will be different to you. you can name your file whatever with a .c extension and just replace main.c with that file name. This compilation will be covered more in the Unit COMP1000 - Unix and C Programming
Step 63
Once Compiled, run the program by typing:
./main
And it should output whats shown on the screenshot.
This concludes the guide on how to install WSL and Visual Studio. Now note that this was primarily for C programmers, however this can be used for any coding language. I personally use WSL in Visual Studio to run Java and Python programs as well as C Programs. I prefer this method because it lets me work offline wherever as im not dependant on an internet connection like virtual machines such as VMWare Horizon.